Logic Pro X keyboard command of the day. #LogicProX @StudioIntern1
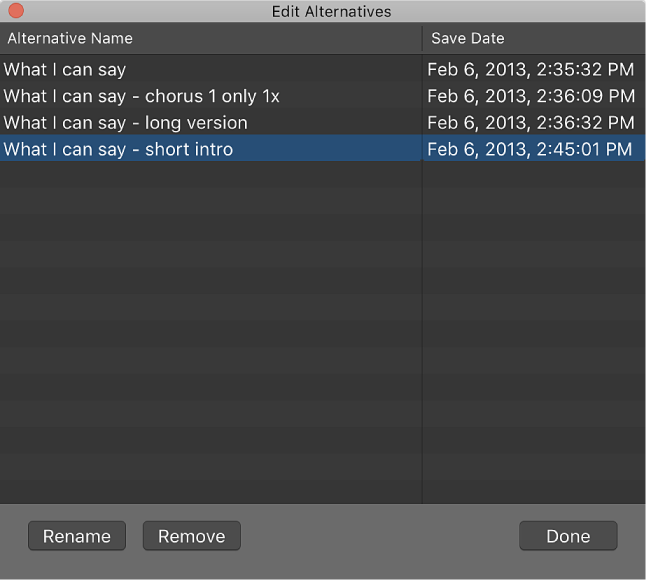
Edit Project Alternatives
Rename or delete alternatives. I find alternatives to be very useful dealing with sets of recorded music. Each song in a set gets it’s own alternative.
Use project alternatives and backups — Logic Pro X
When Show Advanced Tools is selected in the Advanced preferences pane, you can create alternative versions of a project, each with a unique name and different settings. Project alternatives let you save “snapshots” of a project in different states, including different cuts or mixes. They’re saved as part of the project and share the same assets. Alternatives for the current project appear in the File > Project Alternatives submenu.
Backups let you go back to earlier saved versions of a project. Each time you save a project using the File > Save menu item (or pressing Command-S), a version of the current project alternative is saved (up to ten backups per alternative). In the Project > Revert to submenu, backups for the current alternative are listed in descending order from newest to oldest.
⇧ SHIFT – ⌃ CONTROL – ⌥ OPTION – ⌘ COMMAND