Show/Hide Beat Mapping Track ⇧⌘B — Logic Pro X keyboard command of the day

Logic Pro X keyboard command of the day. #LogicProX @StudioIntern1

  Show/Hide Beat Mapping Track   ⇧⌘B

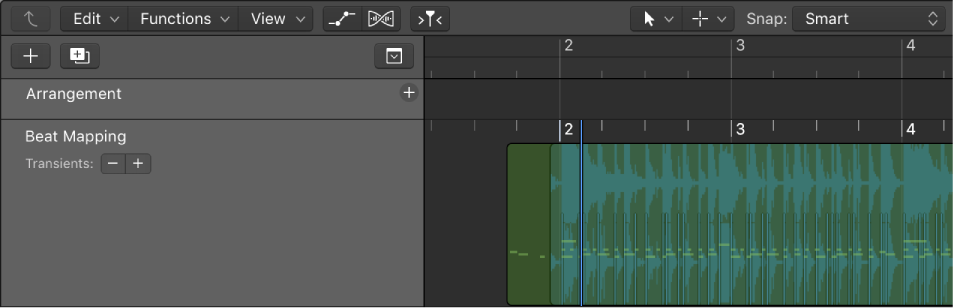
Displays the Beat Mapping Track below the rulers in the Arrange window.

I had previously said that I didn’t know what ‘Show/Hide Beat Mapping Track Only’ actually does, but now it becomes clearer.

The Beat Mapping Track appears in the same area as Marker tracks, Arrangement tracks, et al. When the ‘Show/Hide Beat Mapping Track’ command is used the Beat Mapping track appears below Marker tracks and others. Any track like Marker still remains visible.

If ‘Show/Hide Beat Mapping Track Only’ is used the Beat Mapping Track will appear (when shown) and other tracks like Marker will be hidden. Subsequent ‘Hide’ commands do not bring back Marker track displays, so effectively the ‘Show/Hide Beat Mapping Track Only’ hides the others, but doesn’t keep track of the others.

It feels like ‘Beat Mapping’ is a special space in the track view that can appear on its own, or as a track along with Markers.

Beat mapping overview — Logic Pro X

When Advanced Editing Options is selected in the Advanced preferences pane, you can access the Beat Mapping track. Beat mapping lets you map notes that don’t follow a strict tempo with beats in the ruler. When you play the project, the project tempo adjusts so that the beat-mapped notes are aligned with beats in the ruler.

⇧ SHIFT – ⌃ CONTROL – ⌥ OPTION – ⌘ COMMAND

Toggle Channel Display Default of Multi-Instrument — Logic Pro X keyboard command of the day

Logic Pro X keyboard command of the day. #LogicProX @StudioIntern1

  Toggle Channel Display Default of Multi-Instrument

This command (apparently) affects the Environment display of Multi-Instruments. The only (semi) useful documentation about the MIDI Environment is in the user guide for earlier version of Logic Pro. The best descriptions I can find are in the Logic Pro 9 manuals.

Logic Pro 9 User Manual: Getting to Know the Environment

The Environment refers to the virtual environment of Logic Pro inside your computer. It was developed to allow complete control over your MIDI setup.

⇧ SHIFT – ⌃ CONTROL – ⌥ OPTION – ⌘ COMMAND

Toggle Duration Bar Display — Logic Pro X keyboard command of the day

Logic Pro X keyboard command of the day. #LogicProX @StudioIntern1

  Toggle Duration Bar Display

Turn Duration Bar Display on and off. A different visual representation of how long a note will sound. This might be useful when scoring for film and video.

Display duration bars — Logic Pro X

You can show a graphical representation of a note’s duration by displaying duration bars in the Score Editor.

⇧ SHIFT – ⌃ CONTROL – ⌥ OPTION – ⌘ COMMAND

Show/Hide All Tracks with Same Channel Strip/Instrument — Logic Pro X keyboard command of the day

Logic Pro X keyboard command of the day. #LogicProX @StudioIntern1

  Show/Hide All Tracks with Same Channel Strip/Instrument

Multiple tracks can use the same channel strip or instrument. This command toggles the visibility of the tracks. This can cause lots of channel strips to be visible in the mixer when only one is actually necessary.

⇧ SHIFT – ⌃ CONTROL – ⌥ OPTION – ⌘ COMMAND