link0 link1 link2 link3 link4 link5 link6 link7 link8 link9 link10 link11 link12 link13 link14 link15 link16 link17 link18 link19 link20 link21 link22 link23 link24 link25 link26 link27 link28 link29 link30 link31 link32 link33 link34 link35 link36 link37 link38 link39 link40 link41 link42 link43 link44 link45 link46 link47 link48 link49 link50 link51 link52 link53 link54 link55 link56 link57 link58 link59 link60 link61 link62 link63 link64 link65 link66 link67 link68 link69 link70 link71 link72 link73 link74 link75 link76 link77 link78 link79 link80 link81 link82 link83 link84 link85 link86 link87 link88 link89 link90 link91 link92 link93 link94 link95 link96 link97 link98 link99 link100 link101 link102 link103 link104 link105 link106

Play Next Scene — Logic Pro X keyboard command of the day

  Play Next Scene

Play the next scene (to the right) on the Live Loops grid.

Here we document _scene_ — a column in the grid

Start and stop Live Loops cells in Logic Pro — Apple Support

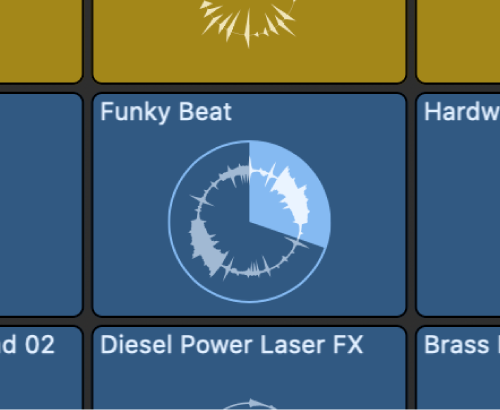
You can start and stop cells individually, or start and stop all the cells in a scene (a column in the grid) simultaneously. Only one cell can play on a track at any time. You can select one or more cells in different scenes and queue them to play together. While a cell is playing, a circular indicator in the middle of the cell shows the current playback position.

Novation Launchpad buttons overview — Apple Support

In Session mode you use the Scene buttons along the bottom of the Launchpad to trigger scenes in Live Loops. You also use the Scene buttons in Mixer mode to perform different functions. The Scene buttons are labeled slightly different, depending on the Launchpad model you are using. Unless noted otherwise, this document refers to the Scene buttons labeled from left to right as follows:

In the land of Ableton scenes are horizontal and made up of clips. In Logic scenes are vertical and contain cells.

Session View — Ableton Reference Manual Version 10 | Ableton

The horizontal rows are called scenes. The Scene Launch buttons are located in the rightmost column, which represents the Master track (see 15.4). To launch every clip in a row simultaneously, click on the associated Scene Launch button. This can be very useful in organizing the live performance of a song with multiple parts.
Open/Close Audio Insert 14 Plug-in Window of focused Track — Logic Pro X keyboard command of the day

  Open/Close Audio Insert 14 Plug-in Window of focused Track

Opens the control window for the fourteenth plugin on a channel. It is possible to have 15 inserts on an audio channel. It isn’t clear to me that I would ever use 15 inserts on a channel, but I guess it is possible.

In my investigation of slots and behavior with the X-Touch I discovered what appears to be a bug in the X-Touch implementation of the MCU. The “slot selection” using the cursor keys changes the display to values P1-P9, and then displays P1 for slots 10-14. There does not appear to be a way to address slot 15 using the cursor keys.

More simply put — trying to use the X-Touch with more than 8 inserts opens a can of worms that I don’t need to pursue.

Un/disclose Take Folder ⌥F — Logic Pro X keyboard command of the day

  Un/disclose Take Folder    ⌥F

**Finally**

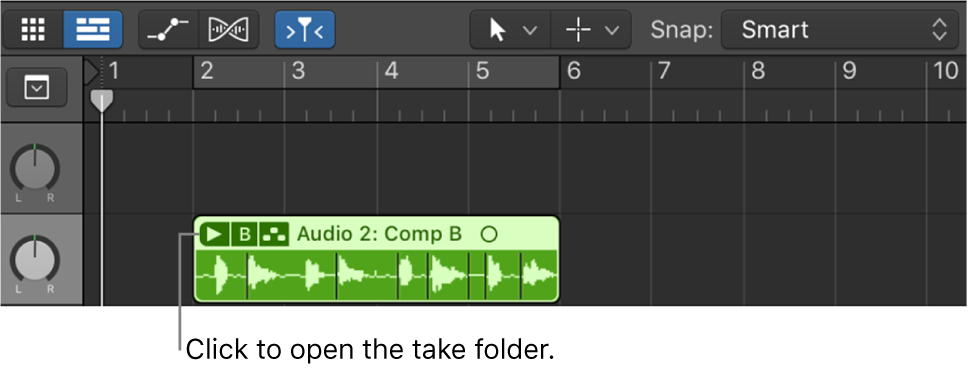
You click on the disclosure triangle to open/close the take folder. This is the first, printed, description of disclosing something that hides behind a disclosure triangle. Most people stare blankly when I use the term “disclosure triangle”. It makes far more sense than saying “Open the folder or stack by clicking on the disclosure triangle.”

I shall begin a campaign of using the terms _disclose_ and _undisclose_

Preview take recordings in Logic Pro — Apple Support

In order to create and edit comps, you first need to preview the take recordings in a take folder. The simplest way to preview take recordings is to open the take folder. You can then select the individual takes for playback. You can also select and preview takes in a closed take folder.

Tempo Track: Extend Left — Logic Pro X keyboard command of the day

  Tempo Track: Extend Left

There is a whole world of work that can be done with a tempo track. The only thing I typically do with tempo is to create a tempo track for audio tracks that I have with no tempo information.

Move and copy tempo points in Logic Pro — Apple Support

Move the selected tempo point, replacing the previous one

In Logic Pro, Control-click a tempo point, then choose Extend Left from the shortcut menu.

The selected tempo point is moved left to the position of the previous one, which it replaces.
Note: This menu item is not available for the first tempo point.