Time Stretch Region Length to Locators ⌥⌘L

Logic Pro X keyboard command of the day. #LogicProX @StudioIntern1

  Time Stretch Region Length to Locators    ⌥⌘L
 

Pre-defined as option-command-L . Appears in the Toolbar as ‘Stretch to Locators’, Edit menu of the Arrange/Tracks window, and in the Edit menu of the Track Editor window.

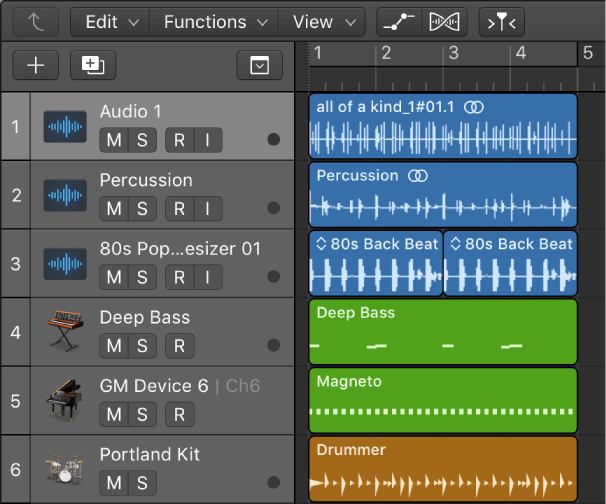
Time stretch regions in the Tracks area
When you resize regions, the position of notes and other events in the regions does not change. Alternatively, you can time stretch regions to shorten or lengthen the relative distance between events in the regions. Expanding regions increases the distance (the amount of time) between events in the regions, while compressing regions decreases the distance.

For example, you can make a region play in half time by stretching it to twice its original length, or play in double time by shortening it to half its original length.

You can also time stretch individual notes, chords, and other items in audio regions using Flex Time. For more information, see Flex Time and Pitch overview.”

Excerpt From: Apple Inc. “Logic Pro X User Guide.” iBooks.

⇧ SHIFT – ⌃ CONTROL – ⌥ OPTION – ⌘ COMMAND

Go to Beginning of First Region — Logic Pro X keyboard command of the day

Logic Pro X keyboard command of the day. #LogicProX @StudioIntern1

  Go to Beginning of First Region
 

Figured it out by hand. No reference made in Logic Pro X User Guide.

Sets the playhead to the beginning of the first region in the project. I think it would be more useful if it set the playhead to the first region of the selected track(s), but that’s just me.

I think what I want is

Go to Selection Start - ⌃↖ - control-home

or

Play From Selection - ⇧˽ - shift-space

Thanks to StackExchange –

Logic Pro X: keyboard shortcut to move the playhead to the begining of selected region — Music: Practice & Theory Stack Exchange:

The accepted answer is spot on — just wanted to add one important thing…

If you’re using a laptop — ctrl-home is produced by pressing ctrl-fn and the left arrow key.

Guess I need to do more editing to really appreciate these commands.

⇧ SHIFT – ⌃ CONTROL – ⌥ OPTION – ⌘ COMMAND

Delete Files ⌘⌫ — command-delete — Logic Pro X keyboard command of the day.

Logic Pro X keyboard command of the day. #LogicProX @StudioIntern1

  Delete Files ⌘⌫ - command-delete
 

Found in the “Audio File” menu in the project files browser. Deletes selected files from the project. I use this when I have printed a mix into the project and make a newer, better one. No need to keep the old print.

⇧ SHIFT – ⌃ CONTROL – ⌥ OPTION – ⌘ COMMAND

Apply Buffer Template to Definition — Logic Pro X keyboard command of the day

Logic Pro X keyboard command of the day. #LogicProX @StudioIntern1

  Apply Buffer Template to Definition
 

This appears in the ‘Options’ menu in the Environment window. The best that I can determine is that the “buffer” is actually the clipboard.

Someday I will find a decent tutorial that can help me learn to use the Environment, Big subject.

Environment overview
The Environment refers to the virtual environment of Logic Pro inside your computer. It provides a virtual view of your MIDI studio, giving you complete control over your MIDI setup, and includes the following objects.

Physical Input and Sequencer Input objects: Represent the physical MIDI inputs of your MIDI interface and the Logic Pro input.

Instrument objects: Virtual representations of each MIDI device (synthesizers and samplers, for example) in your MIDI rig.

Faders, knobs, switches, and other objects: Used to create new data, or to control and modify the MIDI signal flow in real time.”

Excerpt From: Apple Inc. “Logic Pro X User Guide.” iBooks.

⇧ SHIFT – ⌃ CONTROL – ⌥ OPTION – ⌘ COMMAND

Toggle Hide Group 12 — Logic Pro X keyboard command of the day

Logic Pro X keyboard command of the day. #LogicProX @StudioIntern1

  Toggle Hide Group 12

Hmm. 32 groups. The keyboard commands for 1 through 9 are ⌃⇧1 to ⌃⇧9 .

The commands do what I expect. If there is a group numbered ‘n’ the command toggles the view of the tracks/channels. Hidden, but not like “Hide Track”.

Groups appear to be very useful. I should use them more. I fooled around with them a bit to try and change colors more easily, but they do so much more.

Groups are “mixer groups”. The overview helps us get started.

Groups overview
The Mixer groups feature is only available when Show Advanced Tools is selected in the Advanced preferences pane.

Prior to mixing, you may find it useful to define some logical channel strip groups. You could, for example, group all drum channel strips under one drum group. This would allow you to control the group meters (volume, pan, mute, solo, sends, and so on) using a single control, while still maintaining the relative parameter values of each channel strip.

Excerpt From: Apple Inc. “Logic Pro X User Guide.” iBooks.

⇧ SHIFT – ⌃ CONTROL – ⌥ OPTION – ⌘ COMMAND