Set Text Tool — Logic Pro X keyboard command of the day

Logic Pro X keyboard command of the day. #LogicProX @StudioIntern1

  Set Text Tool

Normally used in scoring mode — chord symbols, lyrics, performance notes.

The Text Tool can be used to edit the names of regions as well. Normally I rename regions using ⇧N with a region selected. I guess the Text Tool could be used if I was doing a lot of renaming.

As an exercise I will look to see if I can create Nashville Number charts in Logic.

Assign tools — Logic Pro X

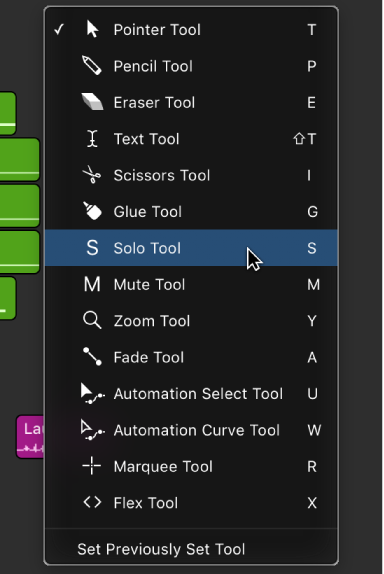
You can assign tools to the Left-click and Command-click Tool menus. The pointer adopts the shape of the active tool, so you can quickly identify which tool is being used.

⇧ SHIFT – ⌃ CONTROL – ⌥ OPTION – ⌘ COMMAND
New Track Alternative ⌃⌥⌘N — Logic Pro X keyboard command of the day

Logic Pro X keyboard command of the day. #LogicProX @StudioIntern1

  New Track Alternative    ⌃⌥⌘N

I don’t normally create tracks that share plugins and processing but with different regions or arrangements. What I normally do is create a new track and copy regions to it so I can have different processing and plugins on the audio. If I want the audio to “voice” differently I would rather see it as a separate channel/track.

This probably comes in to play during production and arrangement as opposed to recording and mixing.

Use track alternatives — Logic Pro X

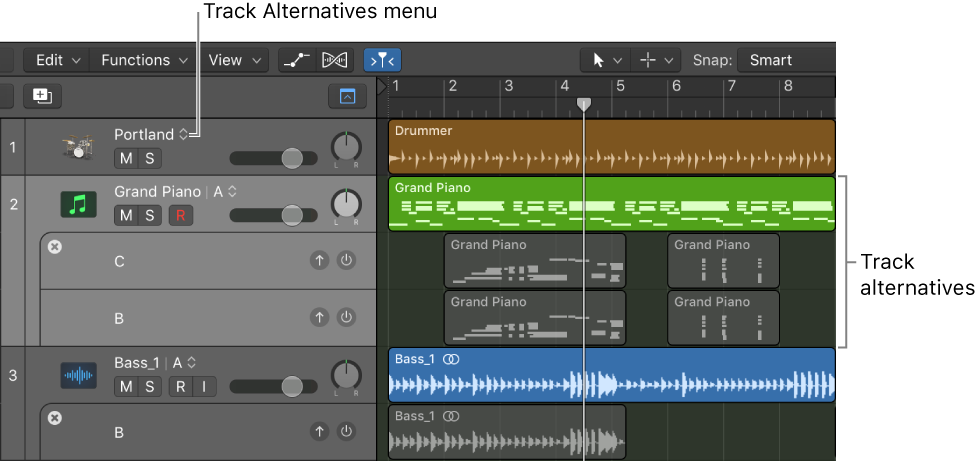
You can create and edit track alternatives and switch between them. Each alternative can contain different regions or arrangements, while sharing the same channel strip and plug-ins. Track alternatives are like “playlists” for individual tracks that can be used to try out different ideas or archive tracks at different stages of development.

⇧ SHIFT – ⌃ CONTROL – ⌥ OPTION – ⌘ COMMAND
Snap Mode: Ticks — Logic Pro X keyboard command of the day

Logic Pro X keyboard command of the day. #LogicProX @StudioIntern1

  Snap Mode: Ticks

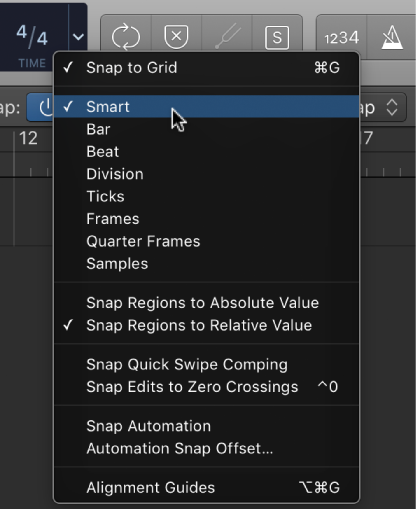
Adjusts the Snap Mode to work in ‘clock Ticks’ — 1/3840th of a second.

I am rarely working at a level in audio files where the extra fine control is necessary. There is a very useful statement about zoom modes and the 1:1 nature of cursor movement to regions.

I finally found some discussion of the “SHIFT-CONTROL” cursor and its movement.

Snap items to the grid — Logic Pro X

The Tracks area includes a grid that helps you align regions, automation points, and other items with the time divisions in the ruler. When you perform any of the following actions, the items move according to the current Snap value:

⇧ SHIFT – ⌃ CONTROL – ⌥ OPTION – ⌘ COMMAND
Default Interpretation — Logic Pro X keyboard command of the day

Logic Pro X keyboard command of the day. #LogicProX @StudioIntern1

  Default Interpretation

Change the interpretation of scored notes.

Interpretation — Logic Pro X

Music notation is meant as a guide to performance, and rhythmic values are often not notated with metronomic precision. The Interpretation setting helps you produce a more readable score from real-time recordings. You should usually turn it off when adding notes via step input or with the pointer.

Note attributes overview — Logic Pro X

You can control the appearance of individual notes in the Score Editor using note attributes. Note attributes include note size and position, accidentals, stems, beaming, and interpretation. Using note attributes, you can enhance the readability of the score and add performance information.

Change the syncopation or interpretation of notes — Logic Pro X

By default, note syncopation and interpretation match the settings chosen in the Region inspector. You can change interpretation settings for individual notes to improve readability.

⇧ SHIFT – ⌃ CONTROL – ⌥ OPTION – ⌘ COMMAND

Toggle Next Region/Event or Move Marquee Start (or Extend Marquee Selection) to Next Transient ⇧→ — Logic Pro X keyboard command of the day

Logic Pro X keyboard command of the day. #LogicProX @StudioIntern1

  Toggle Next Region/Event or Move Marquee Start (or Extend Marquee Selection) to Next Transient ⇧→

I haven’t figured out the “toggle” part of the command, but the extend selection makes sense.

With a note (event) selected in a MIDI region ‘⇧→’ will extend the selection to include the next event. Easy to grab a note and the next few to make adjustments.

Using ‘⇧←’ (previous) extends the selection backwards in time.

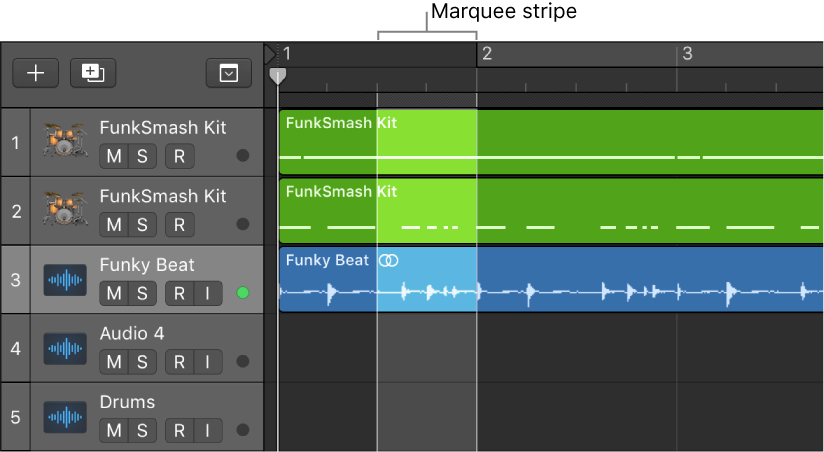
With a marquee selection the commands behave as described, moving the start of the Marquee selection or extending it.

This is very handy fine-grained control of selections. I need to remember to make sure that the Marquee Ruler is visible.

Select parts of regions in the Tracks area — Logic Pro X

Do one of the following:

Using the Marquee tool:

Press and hold Shift, then click in the Tracks area to change the selection in any direction.

Shift-click inside a selection to move the selection end closest to the pointer.

Option-Shift-click inside a selection to move the selection end farther from the pointer.

Using any marquee selection:

Press and hold Shift while using the Left Arrow key or Right Arrow key to move the marquee start point.

You can also use the Toggle Previous (or Next) Region/Event, or set Marquee Start to Previous (or Next) Transient key commands.

Use the Left Arrow key or Right Arrow key to change the selection end points.

You can also use the Select Previous (or Next) Region/Event, or set Marquee End to Previous (or Next) Transient key commands, depending on the type of region selected.

⇧ SHIFT – ⌃ CONTROL – ⌥ OPTION – ⌘ COMMAND