Toggle Hide Group 30 — Logic Pro X keyboard command of the day

Logic Pro X keyboard command of the day. #LogicProX @StudioIntern1

  Toggle Hide Group 30

Hmm. 32 groups. The keyboard commands for 1 through 9 are ⌃⇧1 to ⌃⇧9 .

The commands do what I expect. If there is a group numbered ‘n’ the command toggles the view of the tracks/channels. Hidden, but not like “Hide Track”.

Groups appear to be very useful. I should use them more. I fooled around with them a bit to try and change colors more easily, but they do so much more.

Groups are “mixer groups”. The overview helps us get started.

Groups overview
The Mixer groups feature is only available when Show Advanced Tools is selected in the Advanced preferences pane.

Prior to mixing, you may find it useful to define some logical channel strip groups. You could, for example, group all drum channel strips under one drum group. This would allow you to control the group meters (volume, pan, mute, solo, sends, and so on) using a single control, while still maintaining the relative parameter values of each channel strip.

Excerpt From: Apple Inc. “Logic Pro X User Guide.” iBooks.

⇧ SHIFT – ⌃ CONTROL – ⌥ OPTION – ⌘ COMMAND
Unpack Take Folder to New Tracks ⌃⇧⌘U — Logic Pro X keyboard command of the day

Logic Pro X keyboard command of the day. #LogicProX @StudioIntern1

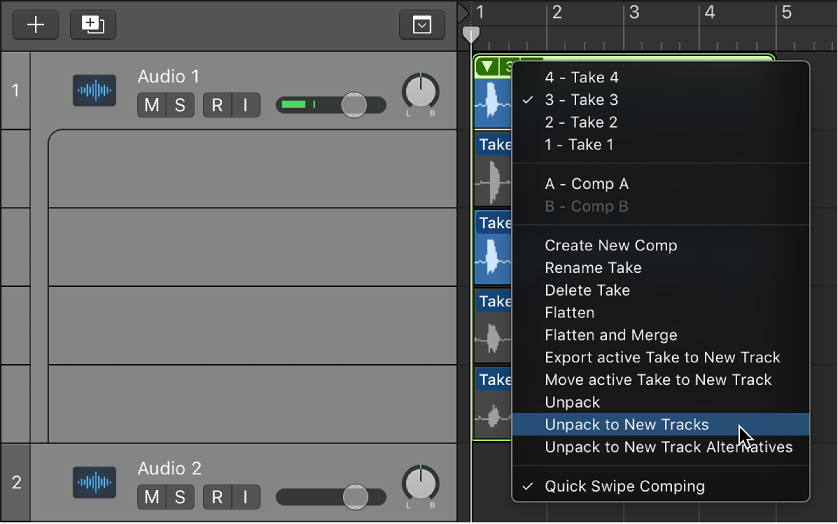
  Unpack Take Folder to New Tracks    ⌃⇧⌘U

“Comping” using “takes” is an alien concept to me. I grew up in a world of live performance. The only “takes” I know about are the many (many, many) times I would practice a piece of music in order to perform it flawlessly when time to play.

It’s a brave new world. Saves a lot of time. Probably gets a better product.

Record multiple audio takes — Logic Pro X

When you’re recording, you can record multiple versions, or takes, of a phrase or section in quick succession. Take recording can be helpful especially when you’re improvising a lead or solo part and want to capture several versions while you’re feeling inspired.

Unpack take folders — Logic Pro X

You can unpack take folders using the original channel strip for all new tracks, or you can unpack take folders using different channel strips for each new track. Both methods replace the selected take folder—or take folders—with new audio tracks for each take and each comp. You can also unpack take folders to new track alternatives, which keeps all the takes on the same track, but as separate track alternatives. The first audio track or track alternative reflects the active comp, followed by the takes and remaining comps in the order they appear in the take folder’s pop-up menu.

⇧ SHIFT – ⌃ CONTROL – ⌥ OPTION – ⌘ COMMAND
Set Nudge Value to Step Input — Logic Pro X keyboard command of the day

Logic Pro X keyboard command of the day. #LogicProX @StudioIntern1

  Set Nudge Value to Step Input

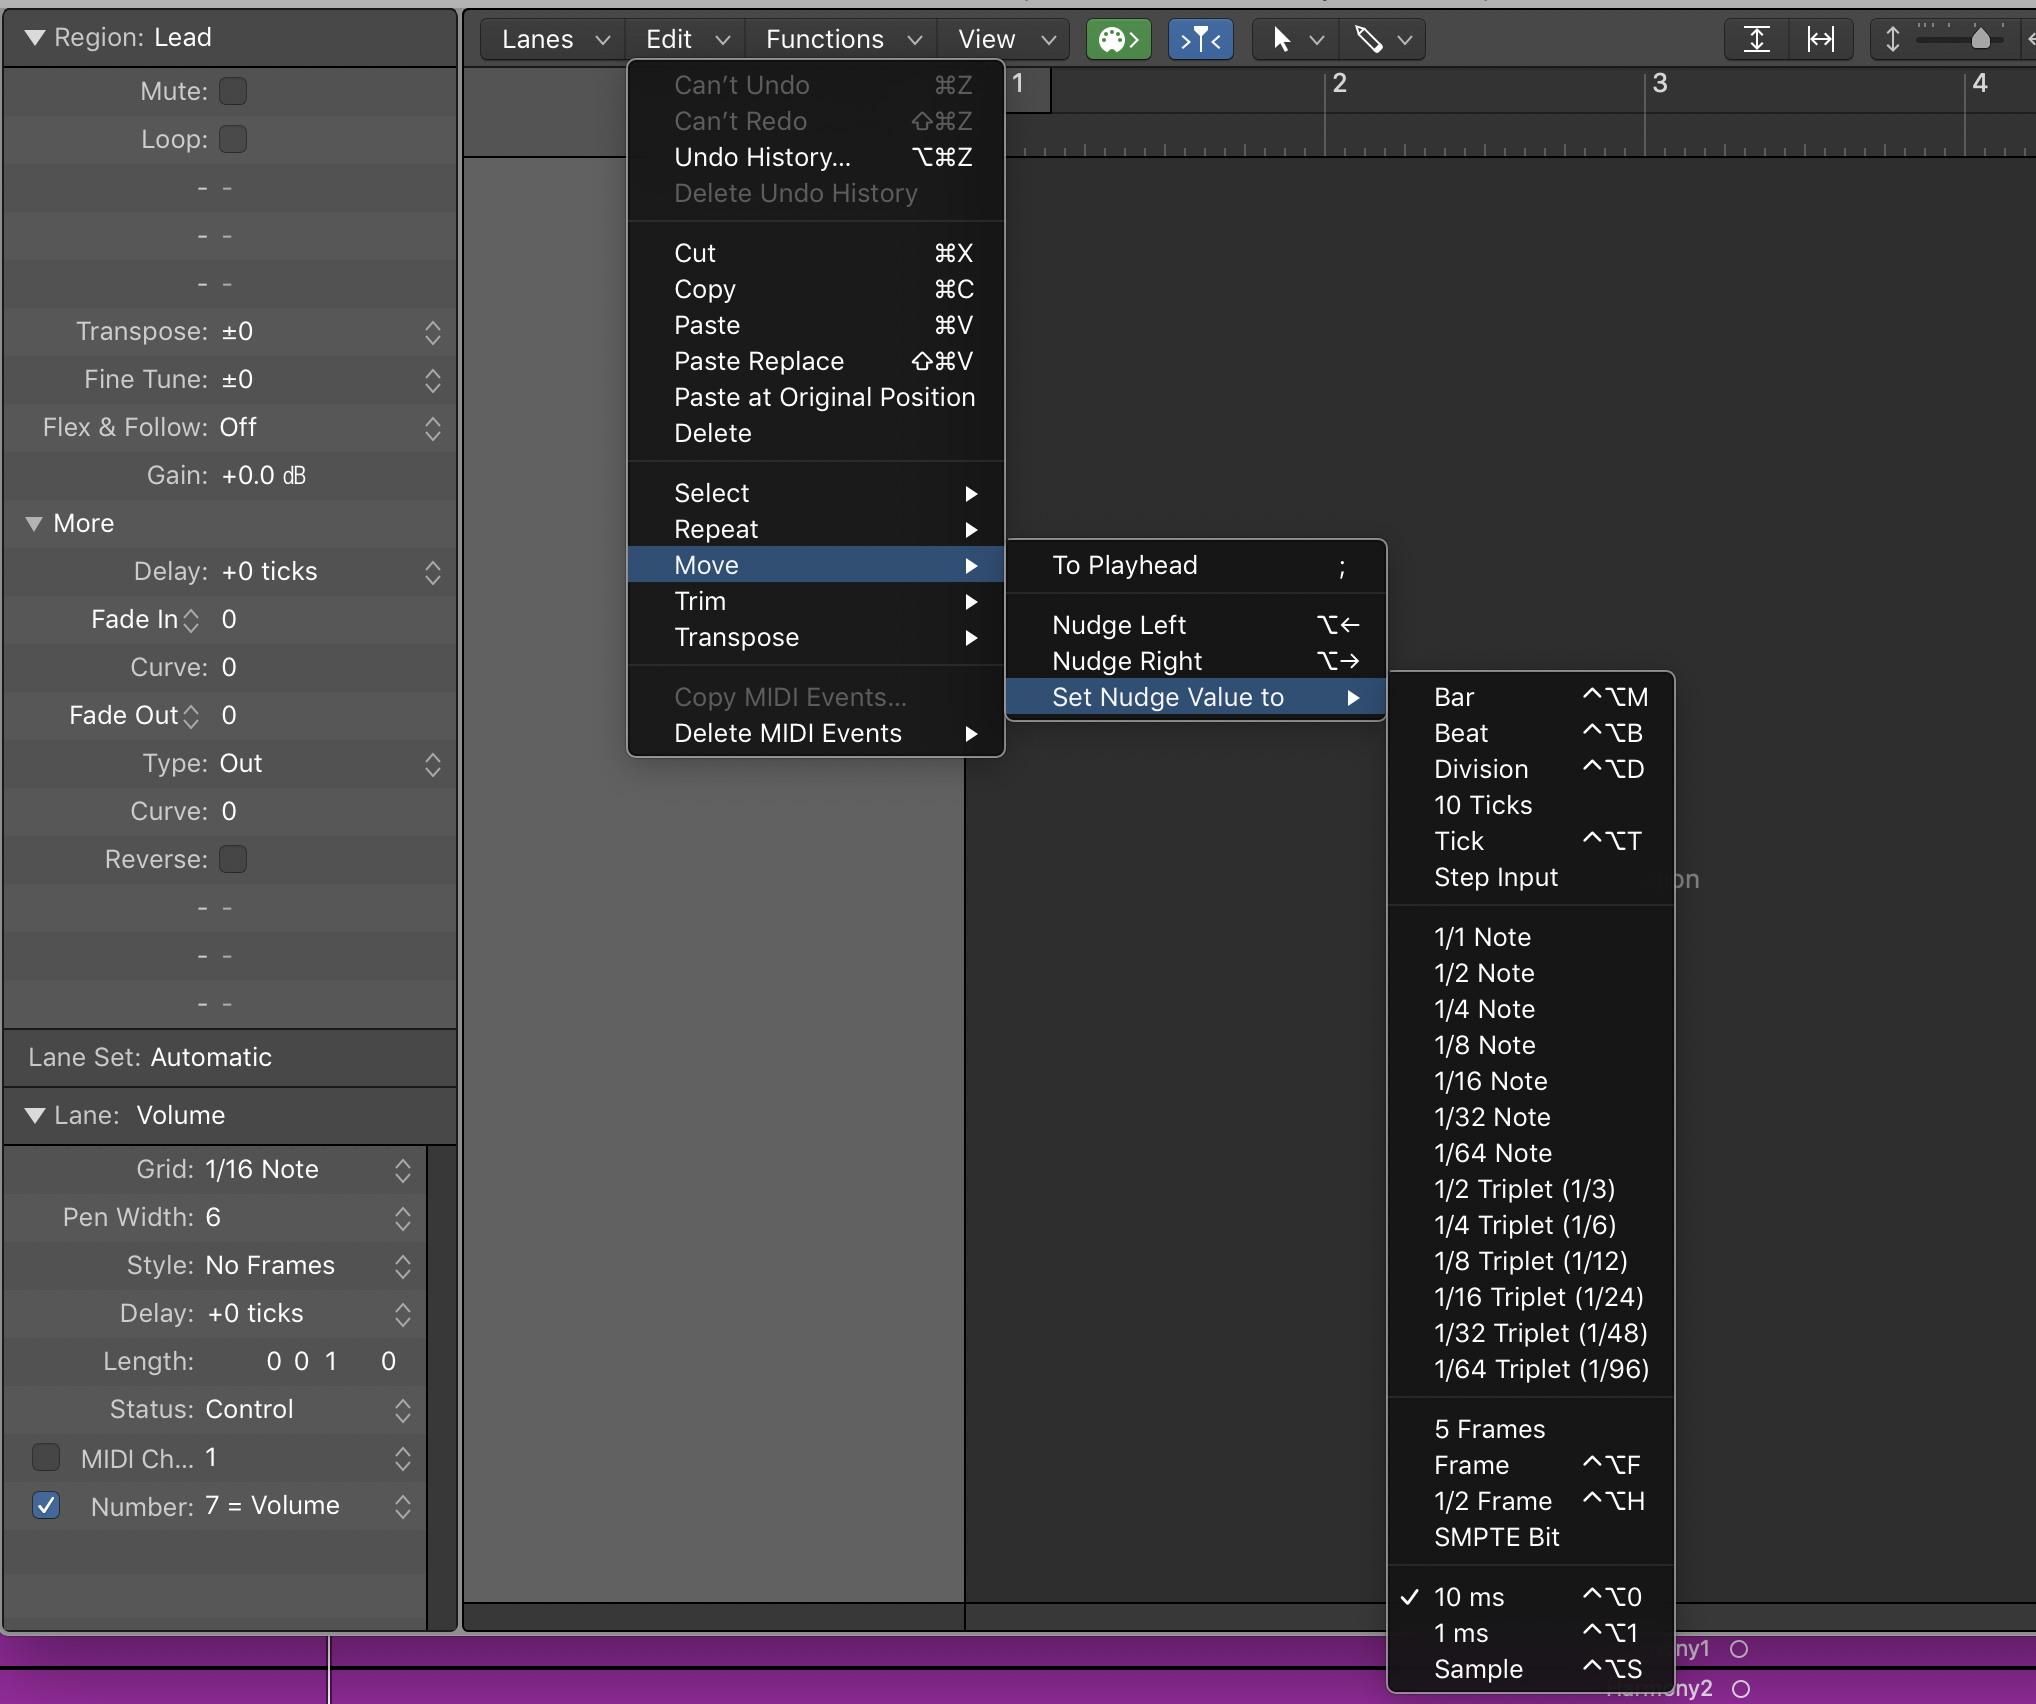
In the Step Editor menus as well as in the dropdown in the Toolbar — Nudge Value. Changes the nudge value to the Step Input value. Makes it easy to move events by steps. If the Step Editor has lanes with different divisions (see reference to the grid) this would be quite useful.

“Step Input” is the value selected for events in the “Step Input Keyboard”. You can change that value in the “Step Input Keyboard” window — click on the value or use keys (1/16th is ‘5’). You can also set the value using the “Set Division Value” commands.

Step Editor overview — Logic Pro X

The Step Editor is a graphical editor that can be used to create or edit MIDI note and controller data. You can use the Step Editor to view and edit different MIDI event types, shown as vertical beams—or steps—along a timeline within a region.

Change the grid and step display — Logic Pro X

The Grid parameter in the Lane inspector is important when creating event steps. When you create new events, they’re automatically added at grid positions set by the Grid parameter. This makes it easy to create a drum pattern with 4 divisions on one lane, 8 divisions on another lane, and 16 divisions on another lane—assigned to kick, snare, and hi-hat sounds, for example.

⇧ SHIFT – ⌃ CONTROL – ⌥ OPTION – ⌘ COMMAND

Command    Key Touch Bar
- Global Commands
Set Next Higher Division
Set Next Lower Division
Set Division Value to 1/4 Note
Set Division Value to 1/8 Note
Set Division Value to 1/16 Note ⌃⌥⇧⌘U
Set Division Value to 1/32 Note
Set Division Value to 1/64 Note
Set Division Value to 1/128 Note
Set Division Value to 1/4 Triplet (1/6)
Set Division Value to 1/8 Triplet (1/12)
Set Division Value to 1/16 Triplet (1/24)
Set Division Value to 1/32 Triplet (1/48)
Set Division Value to 1/64 Triplet (1/96)
Set Division Value to 1/128 Triplet (1/192)
Set Nudge Value to Division ⌃⌥D

Center around Playhead ↓ — Logic Pro X keyboard command of the day

Logic Pro X keyboard command of the day. #LogicProX @StudioIntern1

  Center around Playhead    ↓

In the Smart Tempo Editor only. in most places the down arrow selects the next track.

I generally think of the playhead as the “timeline cursor”.

Set the playhead position — Logic Pro X

The playhead is the vertical line showing the current playback position in the Tracks area and other time-based windows (such as the Audio Track Editor, Piano Roll Editor, and Score Editor).

⇧ SHIFT – ⌃ CONTROL – ⌥ OPTION – ⌘ COMMAND

Set Nudge Value to 10 ms ⌃⌥0 — Logic Pro X keyboard command of the day

Logic Pro X keyboard command of the day. #LogicProX @StudioIntern1

  Set Nudge Value to 10 ms    ⌃⌥0

You can nudge almost anything — notes, regions, events. Keyboard commands allow for much better precision than using a mouse or trackpad. The nudge commands are used for notes (transposition), length (duration), and position (timeline).

Move regions in the Tracks area — Logic Pro X

You can also nudge regions (move them in small increments) left or right using key commands. To nudge regions, you first set the nudge value, then move selected regions by this value. Alternatively, you can nudge regions by a set value.

⇧ SHIFT – ⌃ CONTROL – ⌥ OPTION – ⌘ COMMAND

Command    Key Touch Bar
- Global Commands
Set Nudge Value to Bar ⌃⌥M
Set Nudge Value to Beat ⌃⌥B
Set Nudge Value to Division ⌃⌥D
Set Nudge Value to 10 Ticks
Set Nudge Value to Tick ⌃⌥T
Set Nudge Value to Step Input
Set Nudge Value to 1/1 Note
Set Nudge Value to 1/2 Note
Set Nudge Value to 1/4 Note
Set Nudge Value to 1/8 Note
Set Nudge Value to 1/16 Note
Set Nudge Value to 1/32 Note
Set Nudge Value to 1/64 Note
Set Nudge Value to 1/2 Triplet (1/3)
Set Nudge Value to 1/4 Triplet (1/6)
Set Nudge Value to 1/8 Triplet (1/12)
Set Nudge Value to 1/16 Triplet (1/24)
Set Nudge Value to 1/32 Triplet (1/48)
Set Nudge Value to 1/64 Triplet (1/96)
Set Nudge Value to 5 SMPTE Frame
Set Nudge Value to SMPTE Frame ⌃⌥F
Set Nudge Value to 0.5 SMPTE Frame ⌃⌥H
Set Nudge Value to SMPTE Bit
Set Nudge Value to 10 ms ⌃⌥0
Set Nudge Value to 1 ms ⌃⌥1
Set Nudge Value to Sample ⌃⌥S