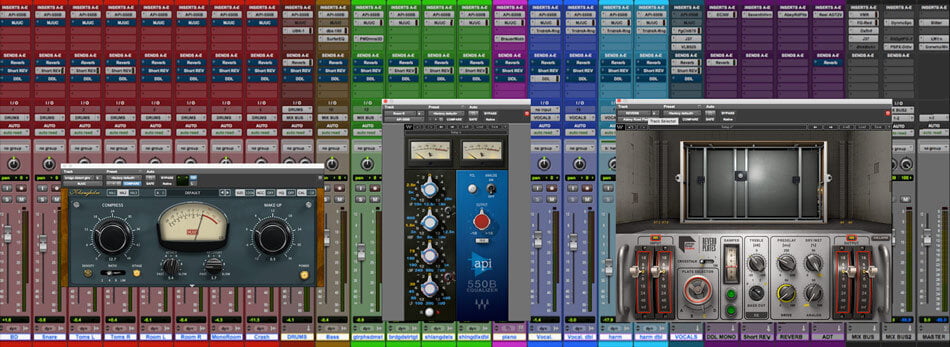
How An Analogue Workflow Might Benefit You In A Digital Environment | Production Expert
In this article, William is going to explore three techniques you can use to help you create an analogue workflow in a digital production environment.
text is a tough way to do audio — ⇧ SHIFT — ⌃ CONTROL — ⌥ OPTION — ⌘ COMMAND
How An Analogue Workflow Might Benefit You In A Digital Environment | Production Expert
In this article, William is going to explore three techniques you can use to help you create an analogue workflow in a digital production environment.
Logic Pro X keyboard command of the day. #LogicProX @StudioIntern1
Go to Left Locator
Move the playhead to the left locator position. I recently wrote about ‘Go to Right Locator’ and enthusiastically assigned the left and right motions to the keys F7 and F9 (rewind and fast forward symbols) on my keyboard.
I now have a very nice workflow for zooming in on a section of a track. Use the Marquee tool to select an area (Auto Set Locators enabled), press F7 to move the playhead to the left locator, and press Z to zoom the selection into view. Very handy…
The order of Zoom and Move Playhead can be reversed. The Z(oom) command will zoom the Marquee selection to fill the Arrange window.
It’s kind of fun when my commands of the day randomly fall into place and give me a new perspective on the work.
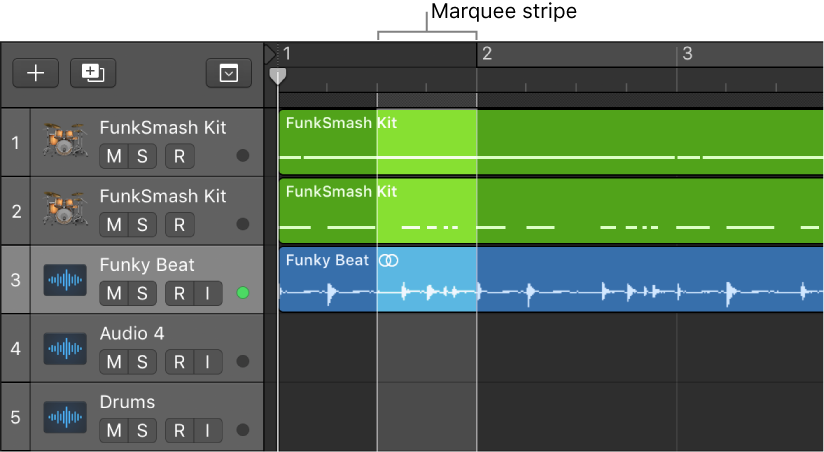
Select parts of regions in the Tracks area — Logic Pro X
You can select and edit parts of one or more regions, using the Marquee tool or the marquee stripe:
⇧ SHIFT – ⌃ CONTROL – ⌥ OPTION – ⌘ COMMAND
Logic Pro X keyboard command of the day. #LogicProX @StudioIntern1
Recall Zoom 3 3
I have modified the ‘Recall Zoom’ and ‘Save Zoom’ key commands.
My experiments in zooming will include determining if zoom settings are global for a project or are stored with screensets. It appears that the zoom setting is global, and retained when you quit and restart Logic.
My knowledge of the zooming workflow is pathetic. Starting to learn Logic on a 27″ monitor gives an entirely different introduction to the user interface. Living with a 1920×1080 screen (or smaller) would give a different meaning to using the zooming features.
You can also zoom in to see regions or events in closer detail, or zoom out to see more of the project. Most Logic Pro windows have zoom sliders.
Sigh — another example of losing the documentation about how to use Logic Pro. In Logic Pro X there are a full 6 pages of documentation about using windows. In Logic Pro 9 there are 17 pages. There is a lot of knowledge about using the interface packed into those 11 pages that you can’t find anywhere for Logic Pro X!
Logic Pro 9 User Manual: Customizing Your Window Setup
Logic Pro allows you to customize your window setup to fit both your working style and the task at hand. While you will perform most of your work in the Arrange window, you can open different combinations of windows (even several of the same type) and adjust each individually. It is also easy to save different window arrangements called screensets, (discussed in Using Screensets), and recall them by pressing a key. All open windows in a project are constantly updated, following the position of the playhead. Alterations made in one window are immediately reflected in all other open windows. For example, if the pitch of a note event is changed in the Score Editor, this change is instantly shown in an open Piano Roll Editor window. This chapter outlines how you can customize and save your overall window setup. The display options of individual windows and editors are covered in their respective chapters.
⇧ SHIFT – ⌃ CONTROL – ⌥ OPTION – ⌘
Command    Key Touch Bar


- Various Windows


Recall Zoom 1 ⌃⌥⌘1


Recall Zoom 2 ⌃⌥⌘2


Recall Zoom 3 ⌃⌥⌘3
Command    Key Touch Bar


- Various Windows


Save as Zoom 1 ⌃⌥⇧⌘1


Save as Zoom 2 ⌃⌥⇧⌘2


Save as Zoom 3 ⌃⌥⇧⌘3
Logic Pro X keyboard command of the day. #LogicProX @StudioIntern1
Toggle Auto Set Locators
That’s a very nifty, hidden set of commands there. I went hunting in the ‘Key Commands’ and could only find ‘Toggle Auto Set Locators’. There appear to be no sub-commands for the options of
by Marquee selection
by Region selection
by Note selection
but there is a hint that the ‘Auto Set Locators’ command can be found in the global menu. Where? Good question.
At the bottom of the Navigate menu I find ‘Auto Set Locators’ and the variations.
Using the Marquee selection to automatically set the cycle area would improve my workflow nicely…I can see the cycle range on the ruler far easier than seeing the Marquee ruler, and if Cycle is on it is very clear where the Marquee selection is.
The ‘Auto Set Locators’ menu items can be discovered by holding down the mouse on the ‘Cycle’ button in the Control Bar.
See the documentation here — Use the cycle area — Logic Pro X
⇧ SHIFT – ⌃ CONTROL – ⌥ OPTION – ⌘ COMMAND
Logic Pro X keyboard command of the day. #LogicProX @StudioIntern1
Stop or Play From Last Position ⌅
The ‘ENTER’ key. When you click in the ruler (time or musical) the position is remembered. This command will start playing from the last position, or stop play.
If you typically use the SPACE key to start and stop play (pause if you will) the position is NOT remembered, so you can pause playback and continue using the space bar, returning to the position by using the ENTER key.
Use transport key commands — Logic Pro X
Some transport functions are available as key commands. Most of these transport key commands have no default assignment, and need to be assigned manually. See Assign keyboard shortcuts.
⇧ SHIFT – ⌃ CONTROL – ⌥ OPTION – ⌘ COMMAND