Guidelines on How to EQ 14 Common Instruments — Produce Like A Pro

‘[Guidelines on How to EQ 14 Common Instruments — Produce Like A Pro](https://producelikeapro.com/blog/how-to-eq-14-common-instruments/)’

Guidelines on How to EQ 14 Common Instruments — Produce Like A Pro

MAX MCALLISTER
JULY 20, 2019

Understanding how to EQ–probably the most used tool available to engineers–is essential. Sometimes it’s as simple as high-passing an instrument, while other cases require more precision. Either way, EQ is fundamental in making mix elements sound more or less defined, larger or smaller, or “better” versus “different.” Having a general reference on how to EQ common instruments is a good way to start!
Scissors Tool I — Logic Pro X keyboard command of the day

Logic Pro X keyboard command of the day. #LogicProX @StudioIntern1

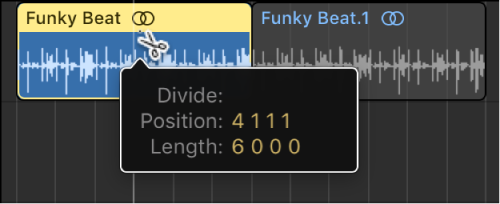
  Scissors Tool    I

I usually split regions by positioning the playhead at the start or end of the segment and using the ‘Split Regions/Events at Playhead ⌘T’. That’s a bit fiddly. I am learning to use the much? easier ‘Split Regions/Events at Locators or Marquee Selection ⌃⌘T’. It’s pretty quick to zoom out and use the Marquee tool to select the areas of interest.

I suspect that if I spent more time making beats and loops that I would become a real fan of the Scissors tool.

The ‘actual’ key command is T I — T to open the Tool menu, I to choose Scissors.

Split regions in the Tracks area — Logic Pro X

Split regions using the Scissors tool

Common tools — Logic Pro X

Scissors tool
Use the Scissors tool to split regions and events, allowing individual sections to be copied, moved, or deleted.

⇧ SHIFT – ⌃ CONTROL – ⌥ OPTION – ⌘ COMMAND

Using Neutron 3 To Speed Up Your Mixes

‘[Using Neutron 3 To Speed Up Your Mixes](https://www.izotope.com/en/blog/mixing/using-neutron-3-to-speed-up-your-mixes.html)’

Using Neutron 3 To Speed Up Your Mixes

by David Bawiec, iZotope Contributor July 17, 2019

Neutron 3 is the perfect tool to help speed up your mixing workflow.
We all need more time. More time to sleep, more time to play. So any tool that can assist you in getting work done faster means you get more of all of the above. In this article, I’ll show you how you can use Neutron’s Mix Assistant and presets to significantly speed up your workflow, all while achieving excellent sonic results in your mix.

Open Instrument — Logic Pro X keyboard command of the day

Logic Pro X keyboard command of the day. #LogicProX @StudioIntern1

  Open Instrument

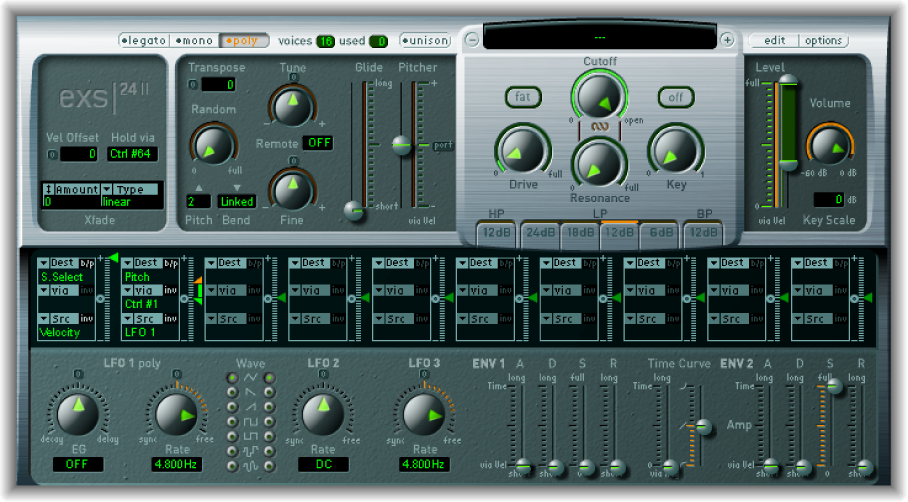
EXS24 command. Very large topic. Some day if I decide to do sampling or make sample-based instruments I will dive in. This should also include Alchemy.

EXS24 mkII overview — Logic Pro X

EXS24 mkII is a software sampler. It plays back audio files, called samples, that you load into it. These samples are combined into tuned, organized collections called sampler instruments. Because sampler instruments are based on audio recordings, they are ideally suited to emulating real instruments such as guitars, pianos, and drums.

Alchemy overview — Logic Pro X

Alchemy is an easy-to-use, yet powerful sample manipulation synthesizer. It offers numerous real-time performance controls and an extensive preset library.

⇧ SHIFT – ⌃ CONTROL – ⌥ OPTION – ⌘ COMMAND

Open Environment Mixer… — Logic Pro X keyboard command of the day

Logic Pro X keyboard command of the day. #LogicProX @StudioIntern1

  Open Environment Mixer…

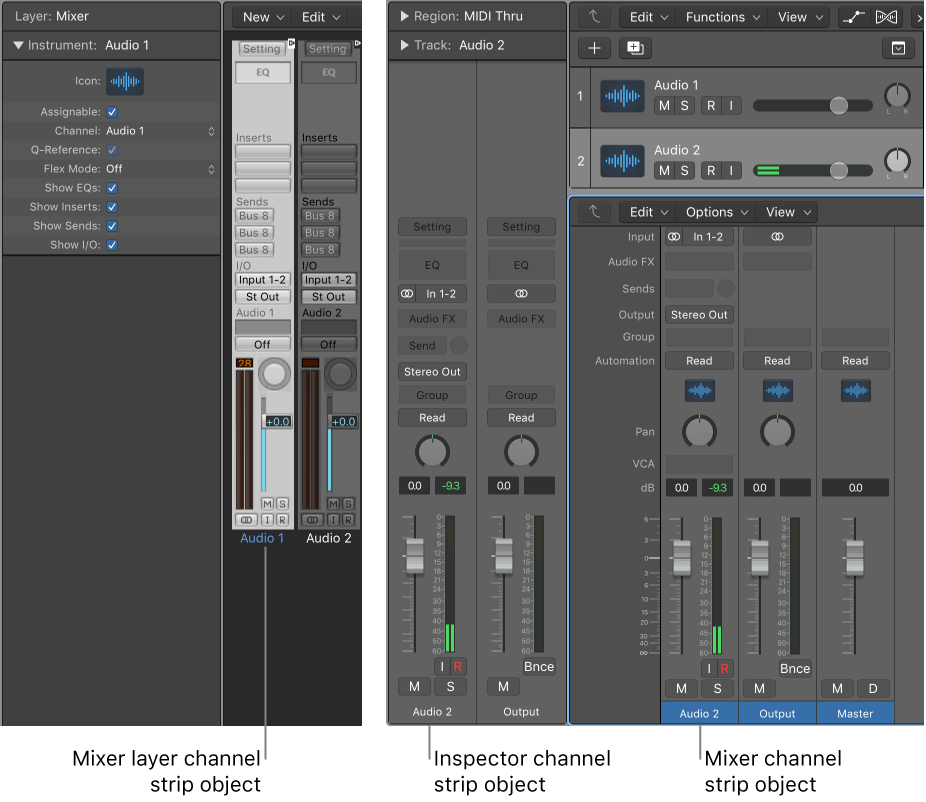
There isn’t much that can only be done in the Environment Mixer since virtually everything is made available in the Arrange window Mixer view and the Mixer window.

The only practical use I have found — so far — is to create channel strips for audio inputs. You can add insert plugins and sends to the input channel, effectively pre-processing input that gets recorded. Print EQ, compression, and gain!

Channel strip objects overview — Logic Pro X

The Environment’s channel strip object is the building block of the Environment’s Mixer layer, the Logic Pro Mixer, and the inspector’s channel strips. For details about channel strip types, see Channel strip types.

⇧ SHIFT – ⌃ CONTROL – ⌥ OPTION – ⌘ COMMAND