Store Channel Strip Configuration as User Default — Logic Pro X keyboard command of the day

Logic Pro X keyboard command of the day. #LogicProX @StudioIntern1

  Store Channel Strip Configuration as User Default

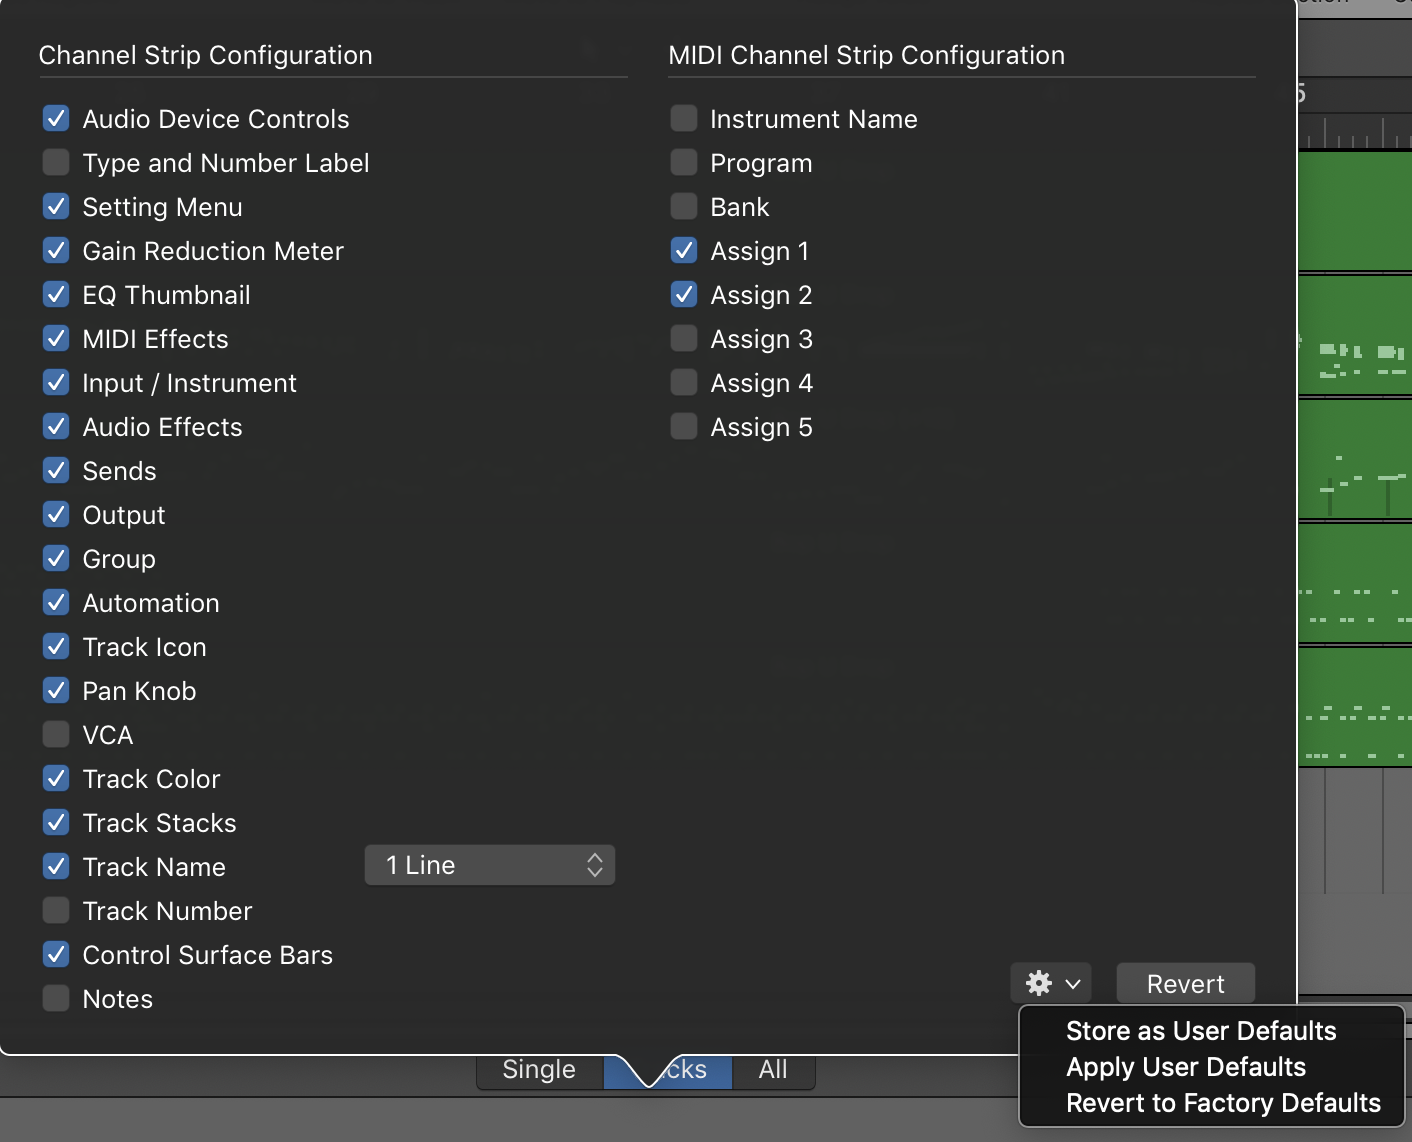
In Logic Pro X version 10.4 the ability to save mixer channel strip configurations was added. There is a tool menu in the configuration dialog that enables the saving of settings as a default.

Some times I want a very detailed channel strip, other times not. I keep forgetting that the channel strip components that are visible are “attached” to a screenset. I can have different components visible in each. This is quite a nice feature.

⇧ SHIFT – ⌃ CONTROL – ⌥ OPTION – ⌘ COMMAND

Solo Movie Audio On/Off — Logic Pro X keyboard command of the day

Logic Pro X keyboard command of the day. #LogicProX @StudioIntern1

  Solo Movie Audio On/Off

One of the difficult ones. There doesn’t seem to be any explanation of what this command does. I have done some experiments and think that I can describe the behavior.

I am not using a separate output for movie audio.

The “Mute Movie Audio” command toggles the Mute button found in the Project Movie settings. This is the place where the movie volume control is located as well.

The “Solo Movie Audio” command toggles the Mute button of the Master channel. When the movie is soloed Logic output is suspended — the muted Master channel.

My current problem is trying to figure out where the Movie audio channels are assigned.

Video and synchronization overview — Logic Pro X

Logic Pro X provides features that let you create or edit the soundtrack of any video or film project. See Add a movie to your project and Work with absolute time code.

⇧ SHIFT – ⌃ CONTROL – ⌥ OPTION – ⌘ COMMAND

Here’s An Easy Way To Emulate A Useful Pro Tools Display Feature In Logic Pro X | Logic Pro

Here’s An Easy Way To Emulate A Useful Pro Tools Display Feature In Logic Pro X | Logic Pro

Here’s An Easy Way To Emulate A Useful Pro Tools Display Feature In Logic Pro X

I often hear Pro Tools users complain about Logic’s inability to display the length of a selected region. This is a feature necessary for editors working with sound design in post-production. It is a useful bit of information, always available in Pro Tools with a glance at the top of the window.

Eli Krantzberg writing for Logic Pro Expert — Tuesday, November 12, 2019

Set All Tracks to Automation Touch ⌃⇧⌘T — Logic Pro X keyboard command of the day

Logic Pro X keyboard command of the day. #LogicProX @StudioIntern1

  Set All Tracks to Automation Touch    ⌃⇧⌘T

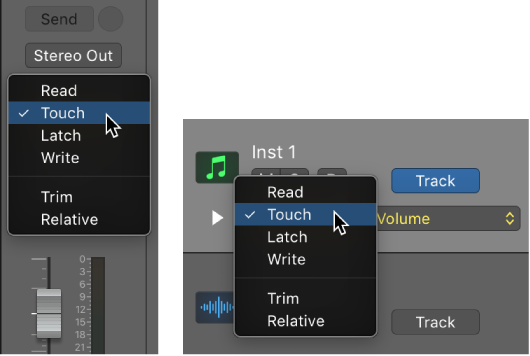
My normal starting state is to have Read automation turned on. Whatever automation there is gets applied. When mixing the state should be changed to Touch — whatever is there is read until you change a parameter (move a fader) which is in effect until you stop movement at which point automation is again Read.

I would probably use this command at the start of a first pass for a mix letting me alter all of the tracks as I need to. As mixing progresses, or focus on certain sections becomes important it might be better to set all the tracks to Read and only enable Touch on the important tracks.

Choose automation modes — Logic Pro X

Automation modes determine how automation tracks are treated. Automation is either being read or being written. You can independently set the automation mode for each track. You can also trim automation values and record relative automation data.

The X-Touch (I use X-Touch and MCU and Logic Control interchangeably) has an entire section of buttons and modes dedicated to automation. It makes sense since the automation is often applied from a physical controller — so much easier than turning knobs with a mouse…

Mackie Control automation buttons — Control Surfaces Help

Hold down the OPTION button, then press one of the Automation buttons to assign the selected automation mode to all channels. When an automation mode has been assigned to all channels, the corresponding automation mode button LED illuminates whenever you hold down the OPTION button.

⇧ SHIFT – ⌃ CONTROL – ⌥ OPTION – ⌘ COMMAND
Open Marker Text — Logic Pro X keyboard command of the day

Logic Pro X keyboard command of the day. #LogicProX @StudioIntern1

  Open Marker Text

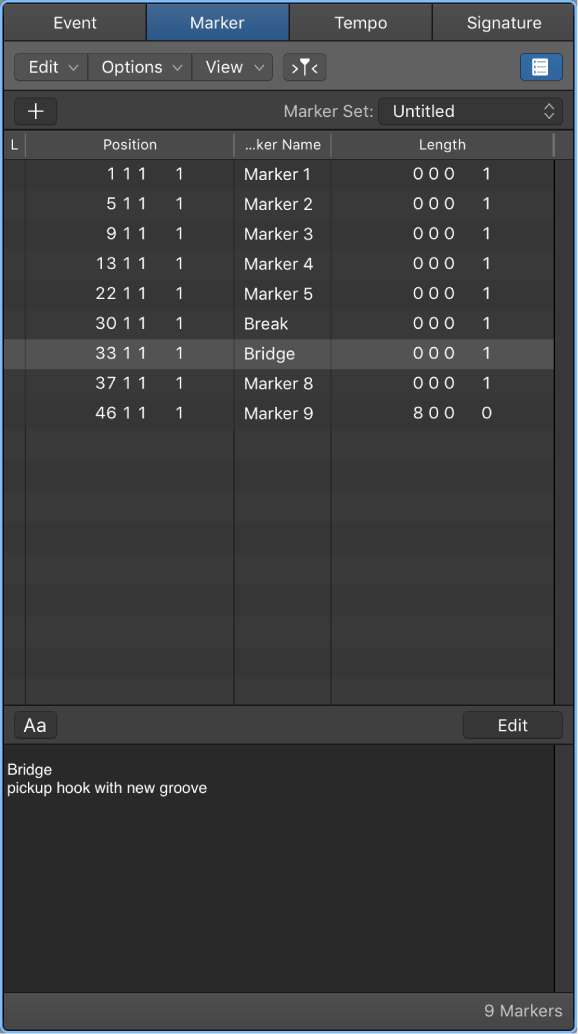
This opens the text window at the bottom of the Marker list. It would be even more fun if it would open the window AND let you start entering text. That is not to be.

For workflow — during an initial listen to a mix it can be very helpful to set markers at points of interest. Distraction of the visual interface is not a good thing.

Create a marker — ⌥’
Now rename the marker — ⇧’
and start typing the note. A carriage return closes off the text. Don’t worry about the display!

For purposes of cross-DAW work you can create a MIDI file that contains *LOTS* of useful information.

Create an external MIDI track (or have one in your template) and insert any *real* MIDI event.

If you now export all MIDI tracks to a MIDI file the MIDI file will contain tempo, key signature, and all of the markers.

Markers overview — Logic Pro X

Markers can help you organize your project, and also act as storage areas for locator positions.

⇧ SHIFT – ⌃ CONTROL – ⌥ OPTION – ⌘ COMMAND