Open Chord Grid Library… — Logic Pro X keyboard command of the day

Logic Pro X keyboard command of the day. #LogicProX @StudioIntern1

  Open Chord Grid Library…

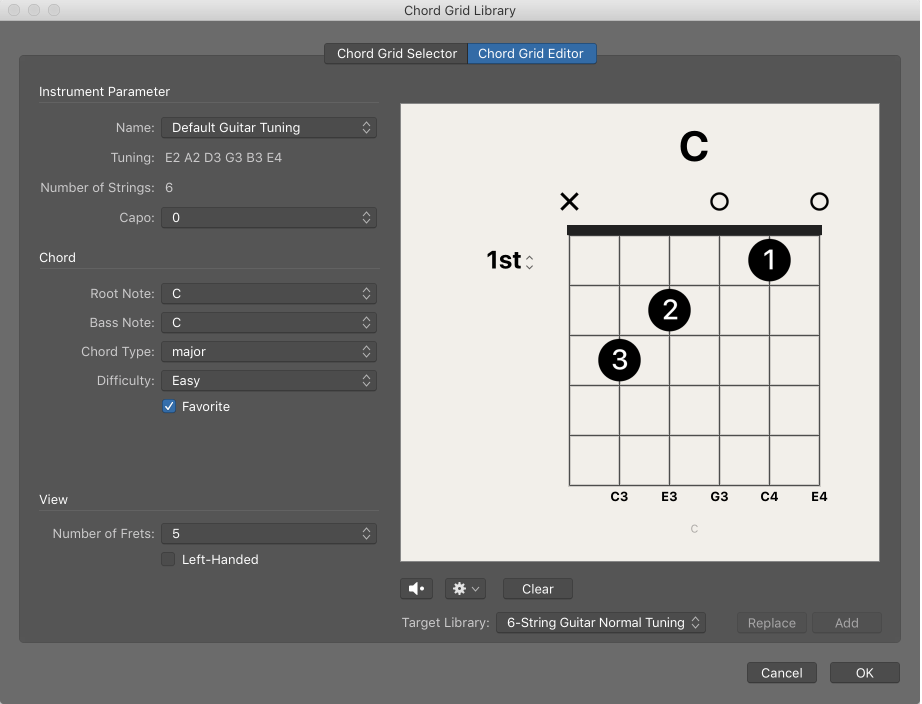
Open the Chord Grid Library window. It’s in the Global Menus, but difficult to find. The menu command is located in the Preferences section of the Logic Pro menu.

Bonus tip — turn on the audition button at the bottom of the selector, then click on a chord. You can choose ‘chord, arpeggio up, arpeggio down’ and ‘fast, medium, slow’ — very nice!

Chord grids overview — Logic Pro X

The Chord Grid Library window contains three panes: the Instrument Editor, Chord Grid Selector, and Chord Grid Editor. The Instrument Editor may not be available, depending on which method you use to open the Chord Grid Library.

⇧ SHIFT – ⌃ CONTROL – ⌥ OPTION – ⌘ COMMAND

Select Previous (Left) Channel Strip ← — Logic Pro X keyboard command of the day

Logic Pro X keyboard command of the day. #LogicProX @StudioIntern1

  Select Previous (Left) Channel Strip    ←

Simple selection of the previous channel strip. Right arrow does what you would expect as well, select the next channel strip.

The “motion keys” are reused in many contexts. Most of them make a lot of sense. A particular use (for me) is to move the Marquee selection by transients. Simple arrows (left/right) move the end of the Marquee selection. Arrows with the shift key held down move the start of the Marquee selection.

It is important to observe which section of the window is selected/active (focussed). There will be a thin blue border around the focus area.

⇧ SHIFT – ⌃ CONTROL – ⌥ OPTION – ⌘ COMMAND

Apply Transform User Preset 20 to selected Events — Logic Pro X keyboard command of the day

Logic Pro X keyboard command of the day. #LogicProX @StudioIntern1

  Apply Transform User Preset 20 to selected Events

Transform User Presets are basically macro operations that can be performed on MIDI events. Repetitive and difficult editing operations can be applied with a simple command.

With 30 possible user presets, referenced by number, it is likely that a list of transforms would be required to make any practical use of the “apply by number” commands.

Currently there are 18 presets defined, with some useful (and not so useful) demonstrations. All good starting points.

MIDI Transform window overview — Logic Pro X

The MIDI Transform window is a powerful tool for edits that would otherwise be impossible (or tedious). For example, imagine an orchestral project that has been sent to you for editing. The individual violin and viola parts were recorded with a different string library. Two hundred MIDI regions contain aftertouch information that introduces an unpleasant pitch modulation, and some sample layer switching artifacts when played with your string samples. After looking at this aftertouch information, you discover that only a small range of values is causing the problem. Your options: edit your sampler instruments, manually remove all aftertouch information (region by region, or globally, thus losing the performance benefits that the aftertouch information provides), or alter the problematic values in the MIDI Transform window.

⇧ SHIFT – ⌃ CONTROL – ⌥ OPTION – ⌘ COMMAND

Go to Marker Number 1 — Logic Pro X keyboard command of the day

Logic Pro X keyboard command of the day. #LogicProX @StudioIntern1

  Go to Marker Number 1

Move the playhead to Marker 1 and update the display placing Marker 1 at the left edge.

I guess marker numbers might make sense if someone has made a list of markers, by number, that refer to positions within the project, maybe scenes in a video or sections of long orchestral work. I use markers to split live recordings on song-start boundaries, but don’t normally refer to them by number.

As I have said before I removed all of the ‘Go to Marker Number n’ key commands to free up my keyboard for other things. If I need to go to by number I can simply enter ⌥/ and type in the number that I want to use.

On the control surface I just use the backward/forward buttons to move to the marker of choice.

The problem really is that markers are always sequential from the beginning of the project. If I have 8 markers and I add one between 6 and 7 the location of marker 8 changes. I think this requires a formal definition of markers for the project that don’t get changed. Maybe a punch list?

⇧ SHIFT – ⌃ CONTROL – ⌥ OPTION – ⌘ COMMAND

Show/Hide Track Name — Logic Pro X keyboard command of the day

Logic Pro X keyboard command of the day. #LogicProX @StudioIntern1

  Show/Hide Track Name

Toggles the track name on and off in mixer windows. I can’t think of a reason that I wouldn’t want to see a track name at the bottom of the mixer.

⇧ SHIFT – ⌃ CONTROL – ⌥ OPTION – ⌘ COMMAND