Create Flex Marker At Next Transient — Logic Pro X keyboard command of the day

Logic Pro X keyboard command of the day. #LogicProX @StudioIntern1

  Create Flex Marker At Next Transient

Places a Flex Marker at the next transient. Shifting timing of sound is a very helpful tool. Pay very close attention to any artifacts that might be introduced when moving time…

Time stretch using flex markers — Logic Pro X

In the Tracks area, you edit the timing of audio material using flex markers. After adding flex markers to an audio region, you use them to time stretch—compress or expand—the audio material. The boundaries within which this is done are determined by the preceding and following flex markers, or the region start and end positions if there are no preceding and following flex markers.

⇧ SHIFT – ⌃ CONTROL – ⌥ OPTION – ⌘ COMMAND

Quick Help Follows Pointer — Logic Pro X keyboard command of the day

Logic Pro X keyboard command of the day. #LogicProX @StudioIntern1

  Quick Help Follows Pointer

This is an important setting. Logic Pro X has an extensive help system that can be displayed in various ways.

The simple method, after enabling Quick Help, shows a ‘tool tip’ window in yellow containing help for whatever is currently beneath the cursor. Quite handy, but it can be visually annoying.

You can cause the help info to be displayed in a small Quick Help window by making sure this option is un-checked. The option is in the Help menu. The location of the Quick Help window is the top of the Inspector column in the main window.

You can drag the Quick Help window out of the main window and position it anywhere on the screen that you would like. This becomes very useful for screensets that do not have the main window open.

If you have an iPad running “Logic Remote” connected to your session you can put the Quick Help window onto the iPad using one of the built-in commands.

I need to use “Logic Remote” more often.

blah

⇧ SHIFT – ⌃ CONTROL – ⌥ OPTION – ⌘ COMMAND

Create 2 Track Automation Points for Visible Parameter — Logic Pro X keyboard command of the day

Logic Pro X keyboard command of the day. #LogicProX @StudioIntern1

  Create 2 Track Automation Points for Visible Parameter

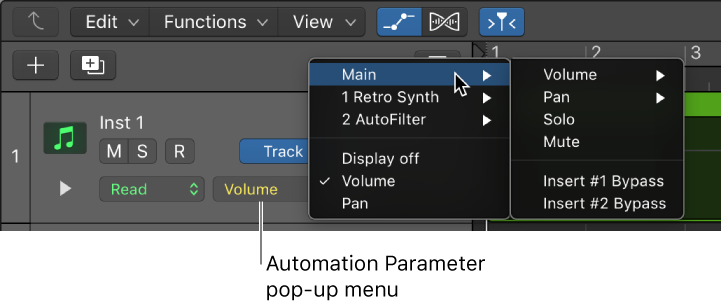
There are commands for creating automation points for things like Volume, Pan, and Sends. This command will create two automation points for the parameter that is currently showing in Automation. This is the simple way to add automation points to control a Smart Control, an EQ parameter, just about anything.

Region-based vs. track-based automation — Logic Pro X

Logic Pro offers two types of automation: track-based automation, and region-based automation. Track-based automation can be applied to the entire track, from the beginning to the end of your project. Region-based automation only applies to the specific region the automation parameters are connected to. With track-based automation, if you re-record, move or copy regions (either to another point on the same track, or to another track) the automation data remains tied to the initial point on the track in which it was created. With region-based automation, if you re-record the region, the automation is lost; if you move or copy the region (either to another point on the same track, or to another track) the automation remains with the region. Region-based automation is particularly useful when you are automating instrument parameters.

⇧ SHIFT – ⌃ CONTROL – ⌥ OPTION – ⌘ COMMAND

Go to Marker Number 17 — Logic Pro X keyboard command of the day

Logic Pro X keyboard command of the day. #LogicProX @StudioIntern1

  Go to Marker Number 17

Another of the numbered marker commands. Not happening for me. I name my markers or use the forward/backward marker commands and buttons on the X-Touch.

Markers overview — Logic Pro X

There are several ways to create and edit markers in Logic Pro. You can view and edit markers in the following work areas:

Navigate using markers — Logic Pro X

You can navigate through your project using markers. This is useful when you want to quickly jump to, and edit, regions or events at a specific position in your project, for example.

⇧ SHIFT – ⌃ CONTROL – ⌥ OPTION – ⌘ COMMAND