Set Punch Out Locator Point by Rounded Playhead ⌃⌥⌘O — Logic Pro X keyboard command of the day

  Set Punch Out Locator Point by Rounded Playhead ⌃⌥⌘O

The ease of using the computer as the tape machine. The difficult task of replacing a section of a recording becomes almost trivial with punch recording.

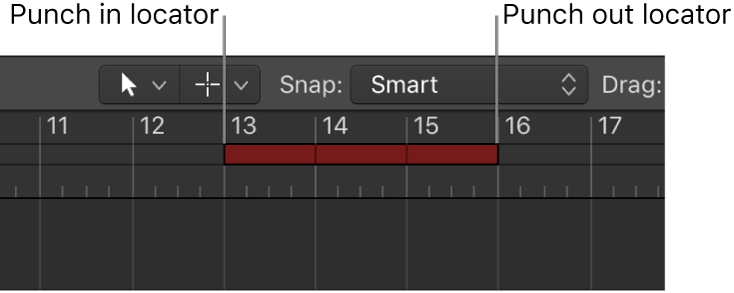
Set the location where recording will stop.

No need to harass the tape operator 😉

Punch in and out of audio recordings in Logic Pro — Apple Support

Punch recording is a technique you can use to overwrite a portion of a previously recorded track, during playback, without touching any of the recording before or after that portion. You punch in to interrupt playback and make the recording, then punch out to return to playback mode. You can choose between two punch recording modes: Quick Punch-In mode and Autopunch mode.

Set Rounded Locators/Loop by Regions/Events/Marquee — Logic Pro X keyboard command of the day

  Set Rounded Locators/Loop by Regions/Events/Marquee

New and improved over the previous ‘Set Rounded Locators by Regions/Events’ command. I don’t think I ever have wanted to do this without enabling the loop at the same time. The ‘U’ command gets the job done, and if I _really_ don’t want to have the cycle turned on I can simply use the ‘Cycle Mode’ command — ‘C’. A simple U — C sequence.

I rarely use rounded locators, preferring the ‘⌘U’ version — ‘Set Locators…’. I habitually type ‘⌘UC’ to set the locators.

If I have planned things, or examined them and made _notes_ I will have markers at the relevant location. With markers I can move around and cycle easily as well.

Use the cycle area in Logic Pro — Apple Support

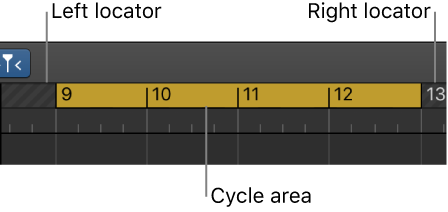
You can use the cycle area to repeatedly play a particular part of a project. The cycle area can be used for composing, practicing a part before recording, recording multiple takes, and other purposes.

Set Rounded Locators/Loop by Regions/Events/Marquee
Set Rounded Locators/Loop by Regions/Events/Marquee and Enable Cycle/Loop U

Increment Row Step Rate ⌃= — Logic Pro X keyboard command of the day

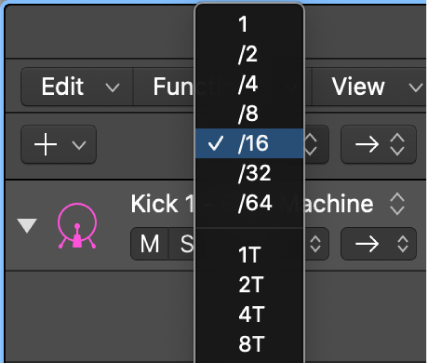
  Increment Row Step Rate    ⌃=

Programmed music at its finest. Talking about the mega-drum machine.

A step sequencer ‘pattern’ has a step rate. The step rate is changed with the _Increment Pattern Step Rate_ command (control-shift-equal — ⌃⇧=). The rows of a pattern use the pattern step rate by default. Each row can have an independent step rate which is adjusted using the _Row Step Rate_ commands.

Adjusting the Pattern Step Rate resets all Row Step Rates to the Pattern Step Rate.

Logic Pro Step Sequencer overview — Apple Support

Step Sequencer is inspired by classic hardware step sequencers that have rows of configurable switches or knobs used to generate repeating musical patterns. In Step Sequencer, you create patterns by editing multifunctional steps in the step grid. Each row controls either a sound (which can be a drum kit piece, a note on an instrument, or a range of notes) or an automation parameter (letting you create automation changes over time in the pattern). Each step represents a definable length of musical time–by default, steps are of equal length, but you can change the length for individual rows or steps. You can adjust a wide range of parameters for individual steps, including velocity, pitch, gate time, and more; and edit pattern and row settings including pattern length, row loop start and end points, playback position, and rotation.

Step Sequencer key commands in Logic Pro — Apple Support

The following table reflects default key commands included in the U.S. factory preset.

Hardly close to the the available Step Sequencer commands…
Silence ⌃⌫ — Logic Pro X keyboard command of the day

  Silence    ⌃⌫

Set the level of the selected audio to minus infinity — amplitude zero.

I am not sure of the difference (at least what it means to me) between Silence and Trim. Certainly with Trim a new audio file must be created when joining regions.

Seems like a destructive ‘Remove Silence’ command.

The ‘Remove Silence’ command behaves a bit differently depending on where the audio has been selected. If you select audio in the Tracks window the ‘Remove Silence’ command will replace the region on the track with newly-created regions. If you are working in the Project Audio window you will be given the option of replacing the region on tracks where it is used, or simply creating regions that you can use for other purposes.

Trim or silence audio files in Logic Pro — Apple Support

You can use the Silence command to set all amplitude values to 0, rather than removing (with Cut, Delete, or Trim) all data from the selected area of an audio file. This function is generally used to silence unwanted background noise in quiet passages.

Trim regions in the Logic Pro Audio Track Editor — Apple Support

You can trim an audio region in the Audio Track Editor to remove part of the beginning or end of the region.

Uses for Remove Silence in Logic Pro — Apple Support

You can use Remove Silence for a variety of different situations.

Toggle Hide Group 35 — Logic Pro X keyboard command of the day

  Toggle Hide Group 35

Some days it is good to have a _softball_ command. The ‘Toggle Hide Group’ commands show or hide channels that belong to a particular group. Very useful. There are only 32 groups, so this command is a _futures_ command.

Group hiding affects both mixer windows and track windows. This is good for keeping things visually oriented.

I usually think of groups as things that want to be edited together, or treat as a _virtual AUX_ that gets parameters adjusted as a unit. I use Track Stacks to treat the audio as a group, so the changing of parameter in sync isn’t a typical use case for me.

If I consider groups as logical collections of tracks (instruments, voices) that might want to be treated as a whole I can make groups cross Track Stacks. Groups like “Deep Reverb”, “Move position on outro”, “Mute during bridge” or what have you. This could be very useful as a production or mixing tool.

Food for thought.