@StudioIntern1 #LogicProX
Today’s ‘command’ was “MIDI Environment”. I know so little. I have the chapter in the Logic Pro X User Manual.
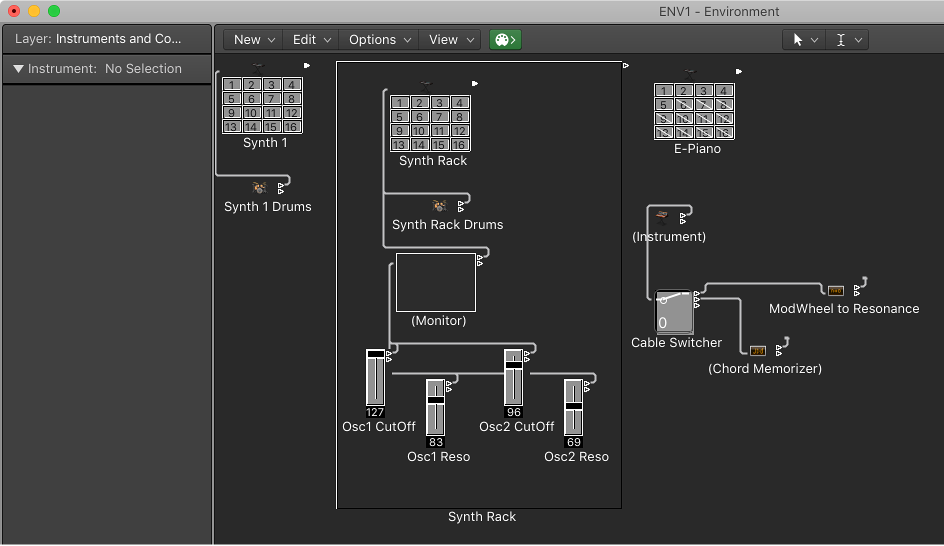
“Environment overview
The Environment refers to the virtual environment of Logic Pro inside your computer. It provides a virtual view of your MIDI studio, giving you complete control over your MIDI setup, and includes the following objects.”
Excerpt From: Apple Inc. “Logic Pro X User Guide.” iBooks.
Off hunting for resources out there in the internet.
Logic Pro X — Route MIDI to Multiple Instruments with MIDI Environment
Logic and The Environment, Part 1: The Simple Truths
Logic and The Environment, Part 2: The Clicks and Ports Layer
Top 5 Reasons NOT to be Afraid of Logic’s Environment
Lots more to review and read.