Show All Regions ⌥↓ — Logic Pro X keyboard command of the day

Logic Pro X keyboard command of the day. #LogicProX @StudioIntern1

  Show All Regions    ⌥↓

Expands all audio file (and groups) to show all of the regions in the Project Audio window. I don’t work much here, but I suspect this is the equivalent of the clip list in ProTools. I haven’t found the equivalent spot for a list of all of the MIDI regions in a project, yet.

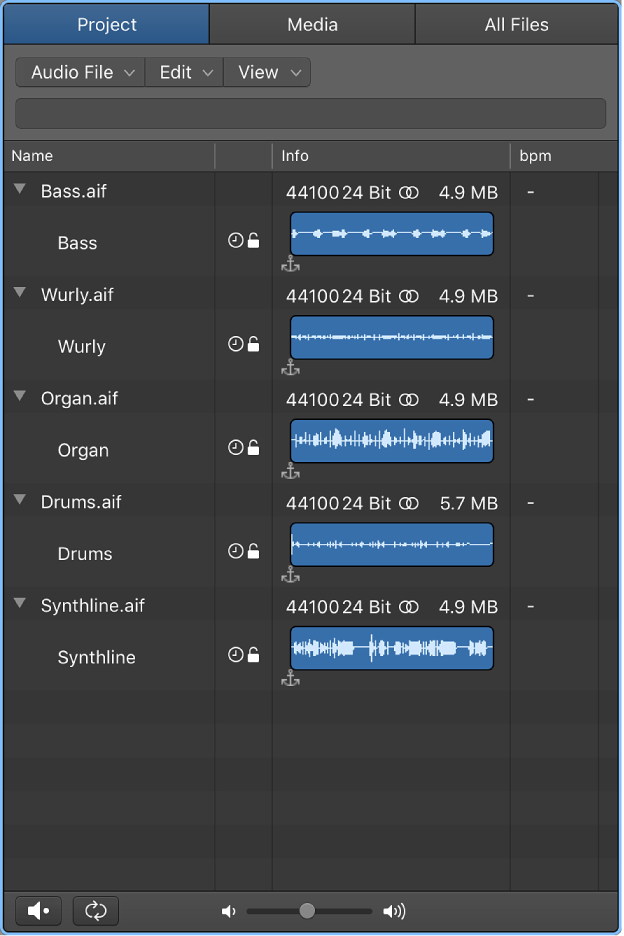
Project Audio Browser overview — Logic Pro X:

The Project Audio Browser shows all audio files and regions that have been added to or recorded in your project, whether or not they are used in the Tracks area. Regions shown in the Project Audio Browser that are not used in the Tracks area are indicated in red.

You can add, edit, delete, and rename audio files and regions in the Project Audio Browser. You can add audio files to your project by dragging them from the Project Audio Browser into the Tracks area, where you can edit, move, and copy them.

You can also open a separate Project Audio window.

⇧ SHIFT – ⌃ CONTROL – ⌥ OPTION – ⌘ COMMAND

Audio Crossfade Options for Merge… ⌥X — Logic Pro X keyboard command of the day

Logic Pro X keyboard command of the day. #LogicProX @StudioIntern1

  Audio Crossfade Options for Merge…    ⌥X

I need to remember to use crossfades when I am doing tiny edits.

Join regions in the Tracks area — Logic Pro X:

Audio crossfades in Digital Mixdown
Digital Mixdown supports crossfades between selected regions.

The Crossfade parameters are defined by choosingLogic Pro > Preferences > Audio > Editing (or using the Audio Crossfade Options for Merge key command).

Create automatic crossfades — Logic Pro X:

Logic Pro can automatically create crossfades on overlapping audio regions on a track to smoothly segue between adjacent (or overlapping) audio regions.

⇧ SHIFT – ⌃ CONTROL – ⌥ OPTION – ⌘ COMMAND

Set Automation Curve Tool — Logic Pro X keyboard command of the day

Logic Pro X keyboard command of the day. #LogicProX @StudioIntern1

  Set Automation Curve Tool

It appears that the ‘W’ key selects the Automation Curve Tool. It is highly unlikely that I will use key commands. I have set the right mouse button to show both tools and menu commands. Lots of visual reinforcement.

Show automation curves — Logic Pro X:

Before you can add automation points to a track’s automation curves, you need to show the automation curves. Automation curves are displayed as colored curves and points on top of audio and MIDI regions across the track, running the length of the project. You can choose whether to view and edit automation across the track (track-based automation) or only within the track’s regions (region-based automation).

⇧ SHIFT – ⌃ CONTROL – ⌥ OPTION – ⌘ COMMAND

Toggle Hide Group 8 ⌃⇧8 — Logic Pro X keyboard command of the day

Logic Pro X keyboard command of the day. #LogicProX @StudioIntern1

  Toggle Hide Group 8    ⌃⇧8

Shows/hides all channel strips and tracks that are in Group 8.

Using numbers for groups makes sense, but doesn’t really help. When you look at the group setting in the mixer you can see both the number and the name (if specified) which helps a whole bunch.

Using groups to control sends to things like reverb and delay makes a lot of sense.

One very important thing to know about is the “group clutch”. In earlier versions of Logic ‘group clutch’ was used to describe temporarily disabling group controls so a single channel could be altered without affecting the entire group. Press the clutch in to disengage, release the clutch to engage. I have read about “clutch buttons” in mixer windows, but have never seen one. The important command is

Enable/Disable Groups ⇧G

which does the trick. The group indicators dim when they are disabled. Very few people use clutches these days. Clutch was changed to Enable/Disable in Logic Pro X. My keyboard cover has the right key sequence — ⇧G — but calls it ‘Group Clutch’.

The Control Surface manual still describes group clutch. The Mackie Control uses the ‘CONTROL’ keep to engage the clutch. Hold down ‘CONTROL’ while changing a setting on a member of a group.

Groups inspector — Logic Pro X:

You use the Groups inspector to define the behavior of each Mixer group. The Groups inspector appears in the Track inspector when one or more groups have been created, and it can be opened as a floating window as well. It contains the following settings:

⇧ SHIFT – ⌃ CONTROL – ⌥ OPTION – ⌘ COMMAND

Show/Hide Transport Float — Logic Pro X keyboard command of the day

Logic Pro X keyboard command of the day. #LogicProX @StudioIntern1

  Show/Hide Transport Float

I use the floating transport window in my screenset 3 — mixer window and select plugins (usually meters).

My X-Touch sitting at my left side provides transport controls as well. I like having the jog wheel to move around in tracks.

⇧ SHIFT – ⌃ CONTROL – ⌥ OPTION – ⌘ COMMAND