Project Information… — Logic Pro X keyboard command of the day

Logic Pro X keyboard command of the day. #LogicProX @StudioIntern1

  Project Information…

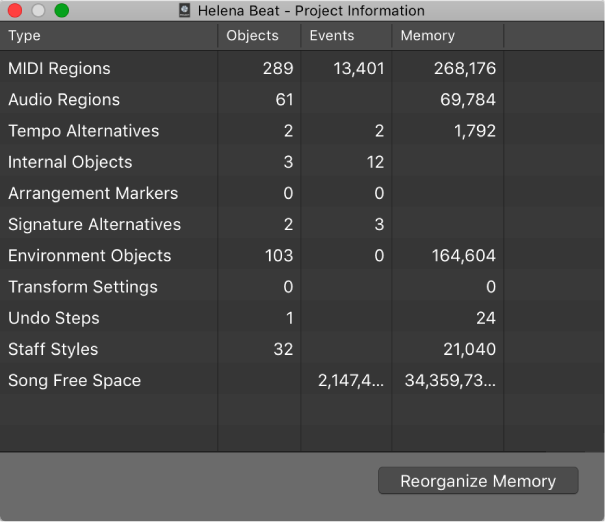
I may have stumbled on this at one point. The displayed information isn’t really meaningful as far as memory goes — there are numbers but no units. Bytes? Kilobytes? Megabytes?

I will keep it in mind.

View project information and reorganize memory — Logic Pro X

In the Project Information window, you can view the number of regions and other objects in a project, the number of different MIDI events, and the amount of memory they use.

⇧ SHIFT – ⌃ CONTROL – ⌥ OPTION – ⌘ COMMAND

Duplicate Screenset… — Logic Pro X keyboard command of the day

Logic Pro X keyboard command of the day. #LogicProX @StudioIntern1

  Duplicate Screenset…

Screensets are very useful. I use a few “standard” setups. Screenset 1 is typically the Arrange window with the mixer displayed in the bottom portion, tracks scaled to fit in the window. Screenset 2 is just the Arrange window with zoom applied. Screenset 3 is a floating transport, floating event, and the full mixer with room for all sends and controls.

Protect, copy, rename, and delete screensets — Logic Pro X

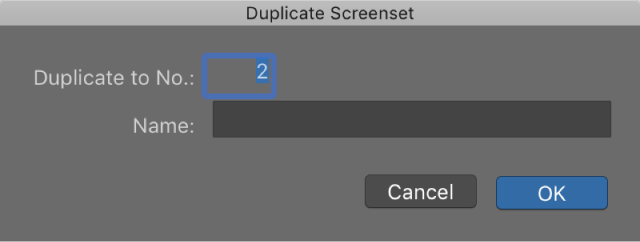
Switch to the screenset you want to copy, then choose Screensets > Duplicate (or use the Duplicate Screenset key command).

This little nifty activity is worth playing with…

Create, recall, and switch screensets — Logic Pro X

Switch a screenset during playback
Select the MIDI region into which you want to insert the meta event.

Set the playhead to the point where you want the screenset to change.

Click the Create button in the Event List, then click the Meta Events button.

The inserted meta event has a default value of 50 (Project Select).

Alter the number in the Num column from 50 to 49.

This changes the name to screenset.

Enter the screenset number in the Val column.

You can stop screenset switching by muting the MIDI region that contains the meta 49 event.

For information about using the Event List, see Event List overview. For information about meta events, see Meta events.

⇧ SHIFT – ⌃ CONTROL – ⌥ OPTION – ⌘ COMMAND
Set MIDI Channel to Voice Number — Logic Pro X keyboard command of the day

Logic Pro X keyboard command of the day. #LogicProX @StudioIntern1

  Set MIDI Channel to Voice Number

Consistent terminology is so important. Polyphony is often described as ‘number of voices’. Unfortunately ‘voice number’ is never adequately defined. Usage of voices isn’t well defined either.

In general ‘Voice’ is used to describe part of a score.

MuseScore defines voices as

A voice is a musical line or part which can have its own rhythm independently of other voices on the same staff. Voices are sometimes called “layers” in other notation software.

NB I found that I can have 11 voices on one staff. Not sure how useful that is.

Split chords in the Piano Roll Editor — Logic Pro X

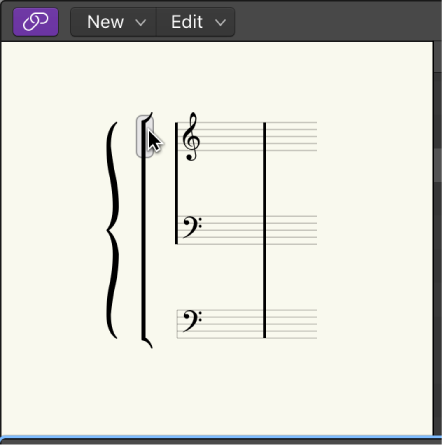
Logic Pro assigns MIDI channel numbers (in ascending order) to individual note pitches in the selected MIDI region. The highest note pitch in each chord is assigned as MIDI channel 1, the next note down in each chord channel 2, and so on.

⇧ SHIFT – ⌃ CONTROL – ⌥ OPTION – ⌘ COMMAND
Create Summing Stack ⇧⌘G — Logic Pro X keyboard command of the day

Logic Pro X keyboard command of the day. #LogicProX @StudioIntern1

  Create Summing Stack    ⇧⌘G

I use Summing Stacks all the time. I group tracks by type, with buses assigned to things like VOX, DRUMS, etc.

If I assign my tracks to the proper bus for output I can select the tracks and create a nice folder (and a track for the AUX) in one step.

Track Stacks overview — Logic Pro X

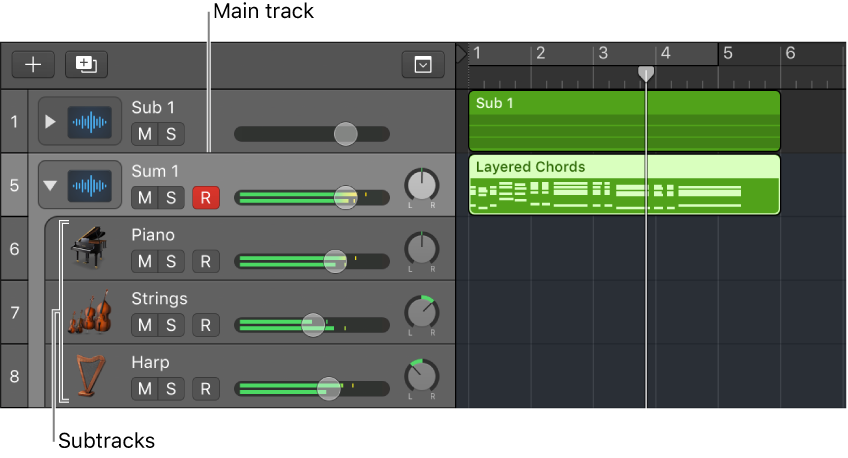
Summing stacks let you combine multiple tracks and route their output to an audio subgroup. When you create a summing stack, the outputs from the subtracks are routed to a bus. The destination aux of the bus is assigned to the main track. When the main track is selected, you can mute, solo, and adjust volume and send levels for the summing stack, and add and edit plug-ins, affecting the sound of all the subtracks in the summing stack. This is similar to the way an audio group works.

⇧ SHIFT – ⌃ CONTROL – ⌥ OPTION – ⌘ COMMAND
Previous Patch, Plug-in Setting or EXS Instrument [ — Logic Pro X keyboard command of the day

Logic Pro X keyboard command of the day. #LogicProX @StudioIntern1

  Previous Patch, Plug-in Setting or EXS Instrument    [

Quick way to listen to various settings. Especially handy if you have a number of saved settings that vary only slightly, it’s like using a knob or slider to adjust.

Work with plug-in settings — Logic Pro X

Plug-in settings are stored with the project file and are automatically recalled the next time the project is opened. In the plug-in window, you can load, copy and paste, compare, save, create default, and delete plug-in settings. You can also load, save, and delete plug-in settings in the Library.

⇧ SHIFT – ⌃ CONTROL – ⌥ OPTION – ⌘ COMMAND