link3531 link3532 link3533 link3534 link3535 link3536 link3537 link3538 link3539 link3540 link3541 link3542 link3543 link3544 link3545 link3546 link3547 link3548 link3549 link3550 link3551 link3552 link3553 link3554 link3555 link3556 link3557 link3558 link3559 link3560 link3561 link3562 link3563 link3564 link3565 link3566 link3567 link3568 link3569 link3570 link3571 link3572 link3573 link3574 link3575 link3576 link3577 link3578 link3579 link3580 link3581 link3582 link3583 link3584 link3585 link3586 link3587 link3588 link3589 link3590 link3591 link3592 link3593 link3594 link3595 link3596 link3597 link3598 link3599 link3600 link3601 link3602 link3603 link3604 link3605 link3606 link3607 link3608 link3609 link3610 link3611 link3612 link3613 link3614 link3615 link3616 link3617 link3618 link3619 link3620 link3621 link3622 link3623 link3624 link3625 link3626 link3627 link3628 link3629 link3630 link3631 link3632 link3633 link3634 link3635 link3636 link3637

Select Unused Instruments ⇧U — Logic Pro X keyboard command of the day

Logic Pro X keyboard command of the day. #LogicProX @StudioIntern1

  Select Unused Instruments    ⇧U

In the MIDI Environment window. “Unused Instruments” is an interesting way of putting it. This command will select all non-instruments in the environment.

Currently I can think of no particular use for this command.

The ⇧U command is also used to select unused audio files in the Project Audio window.

⇧ SHIFT – ⌃ CONTROL – ⌥ OPTION – ⌘ COMMAND
I/O Labels… — Logic Pro X keyboard command of the day

Logic Pro X keyboard command of the day. #LogicProX @StudioIntern1

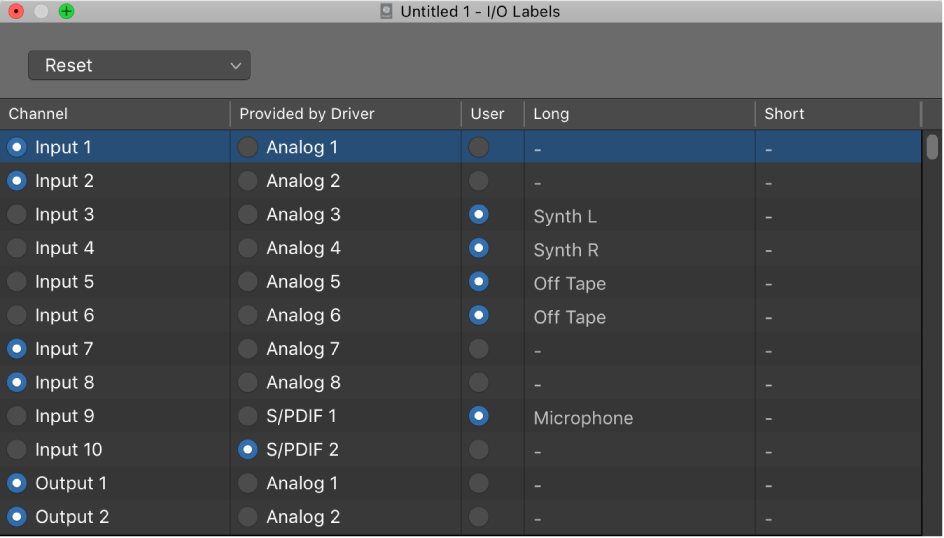
  I/O Labels…

In the Mix menu. I have labelled my interface. I have labelled a number of buses for default uses. I agree with everyone who comments on labelling…I/O Labels should be per-project with a global starting point. It shouldn’t be that hard to implement. It would be nice to have proper names for buses.

harrumph. I really use them a lot. They help.

Use the I/O Labels window — Logic Pro X

You can use the I/O Labels window to define names for all channel strip Input, Output, and Send menu items, which can be used in place of defaults such as “Input 1” or “Output 8.”

⇧ SHIFT – ⌃ CONTROL – ⌥ OPTION – ⌘ COMMAND

Tips & Tricks — The Pultec Passive EQ Collection | Universal Audio

Tips & Tricks — The Pultec Passive EQ Collection | Universal Audio

It’s almost impossible to walk into any commercial studio and not see at least one Pultec EQ in the rack. In production from the early 1950s to the early 80s, Pultec EQs have played an integral part in nearly 50 years of recording history — from tracking to mixing to mastering. Universal Audio has recreated three classic models from the Pultec line with the Pultec Passive EQ Plug-In Collection: the EQP-1A Program EQ, the MEQ-5 Midrange EQ, and the HLF-3C Filter Set. All offer a ton of practical and musical possibilities.

UAD offered up some settings to show off the Pultec EQs. I made some presets for Logic Pro X ‘Vintage EQ’ plugin. Similar results when I pass the audio through the Logic built-ins.

Settings Vintage Tube EQ — UAD.zip

Octave 2 — Logic Pro X keyboard command of the day

Logic Pro X keyboard command of the day. #LogicProX @StudioIntern1

  Octave 2

Switch the Step Input keyboard focus to octave 2 (C2). The Step Input keyboard has octaves 0 through 7 with 7 additional semi-tones below C0. Not quite a Bosendorfer Imperial Grand (97 keys) but close. Lowest note on a traditional piano would be ‘A-1’, highest ‘C7’.

Range is ‘F-1’ to ‘B7’.

⇧ SHIFT – ⌃ CONTROL – ⌥ OPTION – ⌘ COMMAND

Set Downbeat to Playhead Position — Logic Pro X keyboard command of the day

Logic Pro X keyboard command of the day. #LogicProX @StudioIntern1

  Set Downbeat to Playhead Position

I can’t locate any specific documentation for this. The command is found in the Smart Tempo Editor. I currently don’t do anything with beat mapping.

Work in the Smart Tempo Editor — Logic Pro X

You can make adjustments in two different ways: by playing the file or selection and tapping the D and T keys on your computer keyboard to indicate downbeats (D) and beats (T), or by editing beat markers in the main display. When tapping in a selection, only the downbeats or beats in the selected area are changed.

⇧ SHIFT – ⌃ CONTROL – ⌥ OPTION – ⌘ COMMAND