Create Marker for Selected Regions ⌥⇧’ — Logic Pro X keyboard command of the day

#LogicProX @StudioIntern1

  Create Marker for Selected Regions    ⌥⇧'

I need to use this command a bit more. When I first add tracks to a project for mixing I need to create a structural view of the song (I should, do this, I don’t often do it).

One of the early tasks I do is to strip silence from tracks which helps me focus on the parts of something like a vocal. This would be perfect for getting makers set quickly.

NB you can have multiple, different marker sets.

Add markers in Logic Pro — Apple Support

You can add a marker at any position in your project. When you create a marker, it can be rounded to the nearest quarter note, to the nearest bar, or not rounded.

⇧ SHIFT – ⌃ CONTROL – ⌥ OPTION – ⌘ COMMAND

Customize Control Bar and Display… — Logic Pro X keyboard command of the day

#LogicProX @StudioIntern1

  Customize Control Bar and Display…

Opens the configuration panel for the Control Bar (drops down from the display). Many options. I have been in the mode of having far too many buttons and displays on the Control Bar. Distracting. I recently learned that I can “push” the control bar off of the main window by dragging it up. The real value comes if the Control Bar and Display settings are “per screenset” as opposed to global for all main windows.

I have just finished reading early chapters of the Logic Pro 9 manual. Specifically the “Working with Projects” and “Basic Operations” chapters. “Working with Projects” led me to ask questions about the displays in screensets. This command fits perfectly.

The state of Control Bar visibility is per screenset. The customization of the Control Bar is per screenset. The state of the “floating Transport” window is per screenset (it should be properly called floating Control Bar). The configuration of the “floating Transport” and the Control Bar are independent, per screenset.

Customize the Logic Pro control bar — Apple Support

The control bar offers a default set of buttons and other controls, providing commonly used options. In the center of the control bar is the LCD, which shows the playhead position and the project tempo, key, and time signature.

⇧ SHIFT – ⌃ CONTROL – ⌥ OPTION – ⌘ COMMAND

New Mapped Instrument — Logic Pro X keyboard command of the day

#LogicProX @StudioIntern1

  New Mapped Instrument

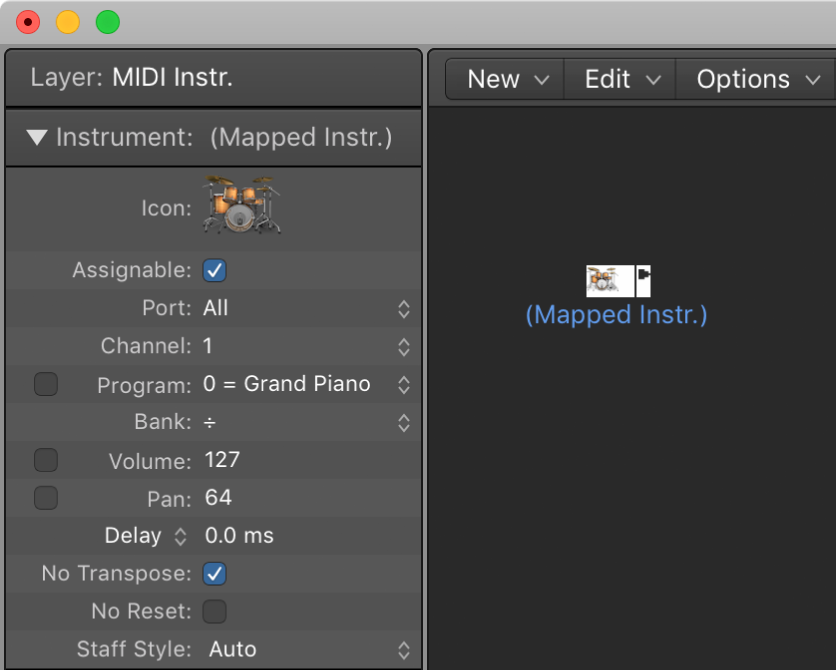
You need to be working in the MIDI Environment.

Mapped instruments in the Logic Pro Environment — Apple Support

A mapped instrument is particularly useful for drum instruments or any drum-mode MIDI device. A drum-mode device has different sounds assigned to different MIDI notes, but only uses a single MIDI channel; for example, a drum kit loaded into the Sampler, or MIDI channel 10 of a GM-compliant sound module, or a drum machine.

⇧ SHIFT – ⌃ CONTROL – ⌥ OPTION – ⌘ COMMAND
1/16 Note 5 — Logic Pro X keyboard command of the day

#LogicProX @StudioIntern1

  1/16 Note  5

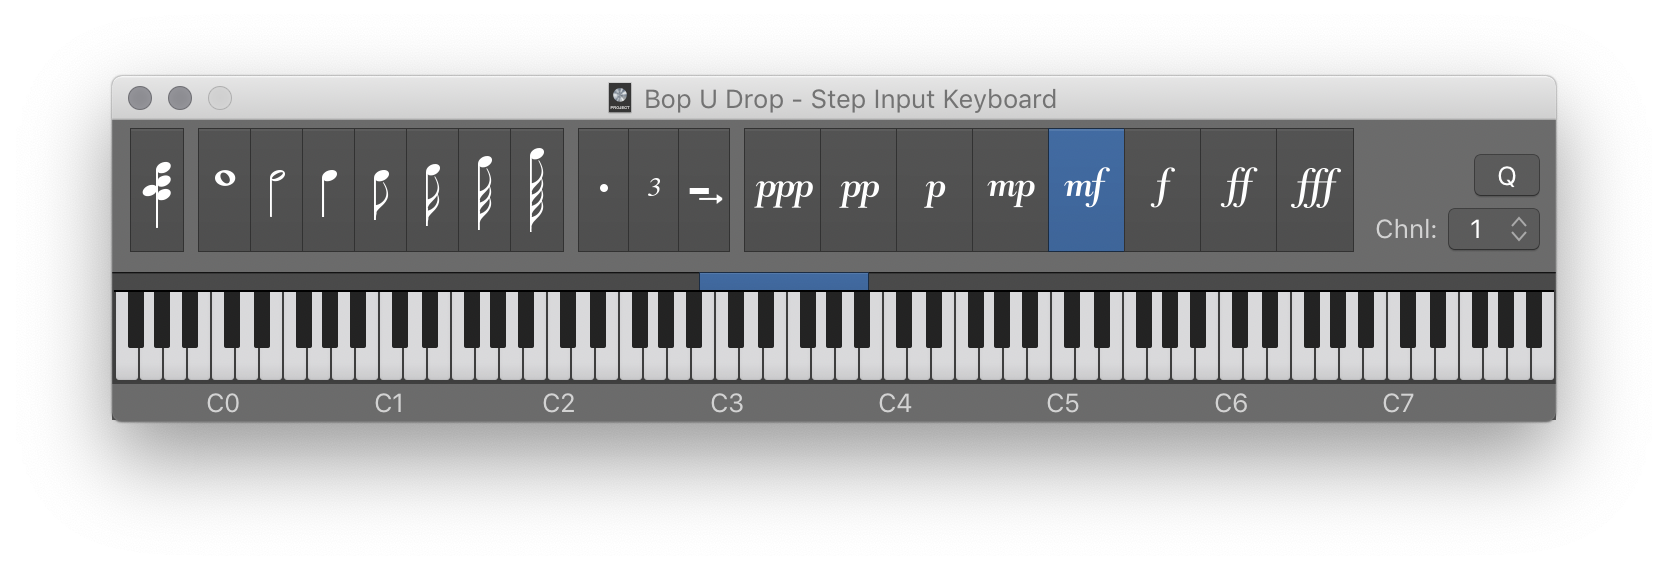
Switches the note/rest value to a sixteenth note. Any notes/rests entered will be sixteenths.

I can’t remember far enough back to compare the Logic ‘Step Input’ with Finale or Studio Vision (the tools I used in 1990) but with a bit of practice single voice part entry could be almost as fast as using a pen on paper — possibly even faster.

Use step input recording in Logic Pro — Apple Support

Step input allows you to insert MIDI notes when you’re not recording in real time. You can use step input to create note runs that may be too fast for you to play or to replicate sheet music that’s too difficult for you to play.

⇧ SHIFT  –  ⌃ CONTROL  –  ⌥ OPTION  –  ⌘ COMMAND– Step Input Keyboard

Step Input Keyboard

Note “C” A
Note “C#” W
Note “D” S
Note “D#” E
Note “E” D
Note “F” F
Note “F#” T
Note “G” G
Note “G#” Y
Note “A” H
Note “A#” U
Note “B” J
Rest ˽
Next note will be sharp ⇧3
Next note will be flat ⇧B
Chord Mode `
Delete - Step Input ⌃⌫
Step Backwards ←
Step Forward →
Octave 0
Octave 1
Octave 2
Octave 3
Octave 4
Octave 5
Octave 6
Octave - 2 ⇧Z
Octave - 1 Z
Octave + 1 X
Octave + 2 ⇧X
1/1 Note 1
1/2 Note 2
1/4 Note 3
1/8 Note 4
1/16 Note 5
1/32 Note 6
1/64 Note 7
1/128 Note 8
Triplets on/off 9
Dotted note values on/off 0
Velocity 16 (ppp) C
Velocity 32 (pp) V
Velocity 48 (p) B
Velocity 64 (mp) N
Velocity 80 (mf) M
Velocity 96 (f) ,
Velocity 112 (ff) .
Velocity 127 (fff) /
Quantize note starts On/Off Q

Apply Transform User Preset 19 to selected Events — Logic Pro X keyboard command of the day

#LogicProX @StudioIntern1

  Apply Transform User Preset 19 to selected Events

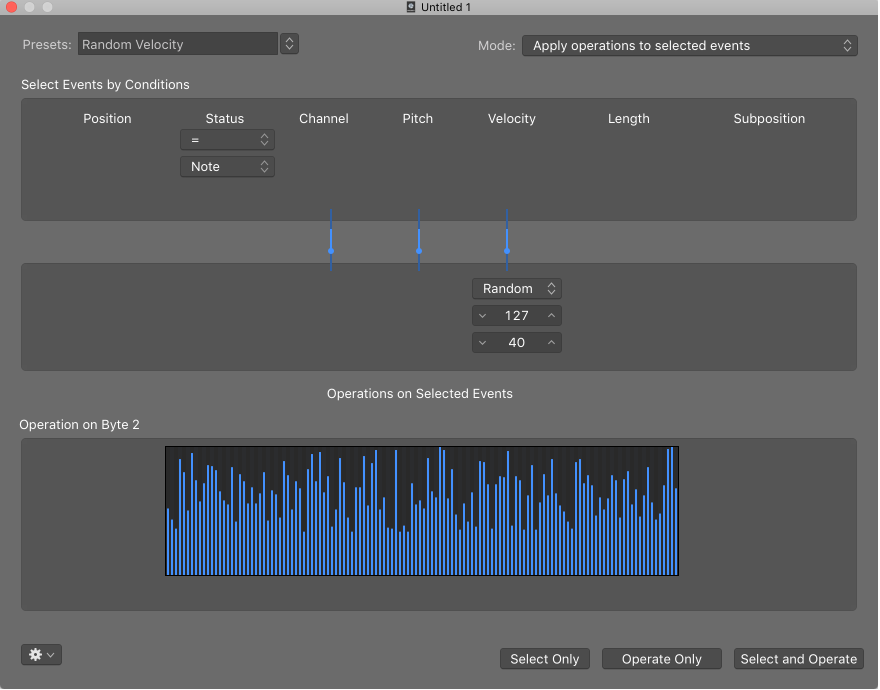
This is one of the 30 user transform commands. There are two ways to apply transforms — “Apply Transform” and “Select and Operate”. Looking at the Transform window I see that there are the options to “Select Only”, “Operate Only”, and “Select and Operate”. Sort of like PERL for MIDI events 😉

The best introduction I could find for MIDI Transform Sets is the table that describes the pre-defined transforms. The operations and selection criteria help me to understand what is possible.

Logic Pro MIDI Transform presets overview — Apple Support

The table below describes the operations performed by the MIDI Transform window presets in Logic Pro.

 Logic Pro MIDI Transform window overview — Apple Support

The MIDI Transform window is so-named because it transforms MIDI events—based on conditions, operations, and values you choose—into different types of events, or events with different values.

⇧ SHIFT  –  ⌃ CONTROL  –  ⌥ OPTION  –  ⌘ COMMAND