Apply Transform User Preset 4 to selected Events — Logic Pro X keyboard command of the day

Logic Pro X keyboard command of the day. #LogicProX @StudioIntern1

  Apply Transform User Preset 4 to selected Events

The MIDI Transform window. All things programatic start here. It appears that we can define 30 presets for the transformation window. It would be good to remember the variant “Select and Operate Preset”. See tomorrow’s post.

MIDI Transform window overview — Logic Pro X:

The MIDI Transform window is so-named because it transforms MIDI events—based on conditions, operations, and values you choose—into different types of events, or events with different values.

The MIDI Transform window is a powerful tool for edits that would otherwise be impossible (or tedious). For example, imagine an orchestral project that has been sent to you for editing. The individual violin and viola parts were recorded with a different string library. Two hundred MIDI regions contain aftertouch information that introduces an unpleasant pitch modulation, and some sample layer switching artifacts when played with your string samples. After looking at this aftertouch information, you discover that only a small range of values is causing the problem. Your options: edit your sampler instruments, manually remove all aftertouch information (region by region, or globally, thus losing the performance benefits that the aftertouch information provides), or alter the problematic values in the MIDI Transform window.

A number of preset transform sets are available for many common editing tasks. These may be all you’ll ever require, but should the need arise, you can create and save your own transform sets, and recall them later.

⇧ SHIFT – ⌃ CONTROL – ⌥ OPTION – ⌘ COMMAND

Solo Mode ⌃S — Logic Pro X keyboard command of the day

Logic Pro X keyboard command of the day. #LogicProX @StudioIntern1

  Solo Mode    ⌃S

Solo the selected region(s). I have learned to use the Solo Tool for listening to tracks to investigate. Using Solo Mode will help me during mixing and editing.

Mute and solo regions in the Tracks area — Logic Pro X:

You can mute one or more regions in the Tracks area to exclude them from playback. You can also solo individual regions, to hear them in isolation, and lock the solo status of regions.

⇧ SHIFT – ⌃ CONTROL – ⌥ OPTION – ⌘ COMMAND
Set Smart Tempo MTR Handling to Ignore — Logic Pro X keyboard command of the day

Logic Pro X keyboard command of the day. #LogicProX @StudioIntern1

  Set Smart Tempo MTR Handling to Ignore

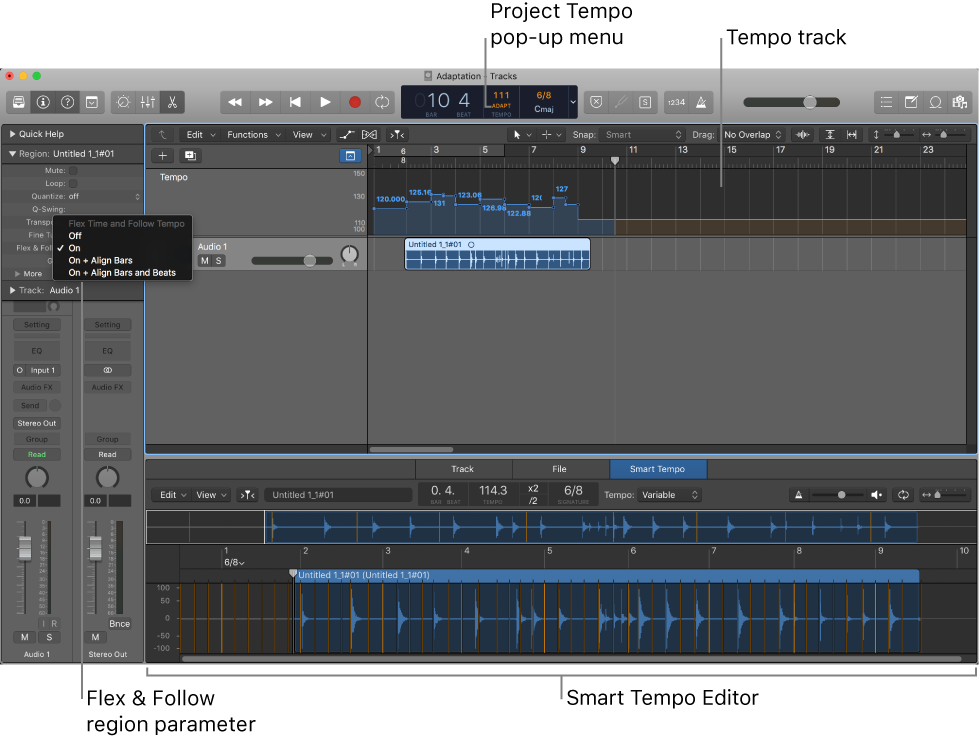
Nothing. Zip. Nada. Cannot locate anything that remotely refers to “MTR Handling”.

Unless that is shorthand for “Musical tempo reference” which I found here…

Smart Tempo overview — Logic Pro X:

Musical tempo reference

When using Smart Tempo in Adapt mode (or when Auto uses Adapt behavior), the results depend on whether a musical tempo reference is present in the part of the project to which you are recording or adding a file. A musical tempo reference exists when the metronome is active, when audio, MIDI, or Drummer regions are present in the part of the project where you are working, or when Cycle mode is turned on.

In most cases, when you hear any musical material while recording, a musical tempo reference is present. If you do not hear any material, no musical tempo reference is present.

Tip: To avoid having a musical tempo reference while recording, solo the track you are recording to before recording.

Given the description here the commands start to make sense. Setting MTR Handling to “ignore” would have the same effect as soloing the track being recorded to, except that you would still hear the musical reference.

Toggle Smart Tempo Mode (Keep/Adapt)
Set Smart Tempo Mode to Keep
Set Smart Tempo Mode to Adapt
Set Smart Tempo Mode to Automatic ⌃⌥8⃣
Toggle Smart Tempo MTR Handling
Set Smart Tempo MTR Handling to Write
Set Smart Tempo MTR Handling to Ignore
Toggle Smart Tempo Trim to Downbeat

⇧ SHIFT – ⌃ CONTROL – ⌥ OPTION – ⌘ COMMAND
Set Layout Tool — Logic Pro X keyboard command of the day

Logic Pro X keyboard command of the day. #LogicProX @StudioIntern1

  Set Layout Tool


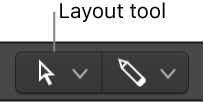
Choose the “Layout Tool” in the “left-click” tool drop down (same place as pointer, solo, et al.)

The Layout Tool is what you use to change the position of a note in the score without affecting the actual time placement of the note. If you use the Pointer Tool to drag a note from 4 1 1 1 to the left to 3 1 1 1 the note will move, and apparently “replace” anything that used to be between 3 1 1 1 and 4 1 1 1.

If you use the Layout Tool to move the note left or right (no vertical movement is possible) the placement of the event in time will not change. You can move a note at 4 1 1 1 to the left to get it closer to the bar line, or to the right to get closer to the next note. Timing will not change.

It is best to use a MIDI loop and play with it in the Score Editor to get a feeling for what is possible.

Position items graphically in the Score Editor — Logic Pro X:

Using the Layout tool: The Layout tool is used to graphically move events in the Score Editor, in order to optimize the display without altering the timing of MIDI events.

⇧ SHIFT – ⌃ CONTROL – ⌥ OPTION – ⌘ COMMAND
Open System Performance…  — Logic Pro X keyboard command of the day

Logic Pro X keyboard command of the day. #LogicProX @StudioIntern1

  Open System Performance…


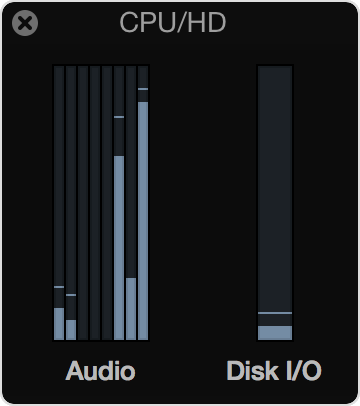
Opens the performance meters. Typically I get to this window by double-clicking on the performance meter in the control bar.

System overload alerts in Logic Pro X — Apple Support:

Use the meters in the Logic Pro CPU/HD window to monitor system performance while working on a project. To view the CPU/HD window:

1. Choose View > Customize Control Bar and Display.

2. Choose Custom from the pop-up menu in the LCD section.

3. Select the Load Meters (CPU/HD) checkbox, then click OK.

4.A CPU/HD meter appears on the right side of the LCD. Double-click the CPU meter to open it in a new, expanded window.

⇧ SHIFT – ⌃ CONTROL – ⌥ OPTION – ⌘ COMMAND