Set Quantize Parameter to Previous Value — Logic Pro X keyboard command of the day

Logic Pro X keyboard command of the day. #LogicProX @StudioIntern1

  Set Quantize Parameter to Previous Value

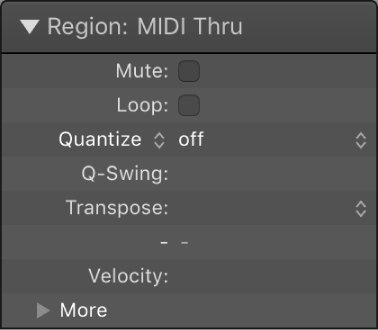
Normally I would use the popup menu in the Region window. If I was working heavily with MIDI notes I would probably set the previous/next commands up.

Quantize parameter values — Logic Pro X:

You can quantize selected audio or MIDI regions (including a mixed region selection) using the Quantize parameter in the Region inspector. This parameter determines the division of the quantization grid.

⇧ SHIFT – ⌃ CONTROL – ⌥ OPTION – ⌘ COMMAND

Set Region Anchor to Next Transient — Logic Pro X keyboard command of the day

Logic Pro X keyboard command of the day. #LogicProX @StudioIntern1

  Set Region Anchor to Next Transient

I haven’t found a good explanation of “the anchor”. Sometimes it says start of audio in file, sometimes a position in the Audio File editor. Time for me to find some books that “teach” Logic Pro.

Use transient markers to make selections — Logic Pro X:

You can use transient markers to select part of an audio file for editing purposes.

⇧ SHIFT – ⌃ CONTROL – ⌥ OPTION – ⌘ COMMAND

Show All Regions ⌥↓ — Logic Pro X keyboard command of the day

Logic Pro X keyboard command of the day. #LogicProX @StudioIntern1

  Show All Regions    ⌥↓

Expands all audio file (and groups) to show all of the regions in the Project Audio window. I don’t work much here, but I suspect this is the equivalent of the clip list in ProTools. I haven’t found the equivalent spot for a list of all of the MIDI regions in a project, yet.

Project Audio Browser overview — Logic Pro X:

The Project Audio Browser shows all audio files and regions that have been added to or recorded in your project, whether or not they are used in the Tracks area. Regions shown in the Project Audio Browser that are not used in the Tracks area are indicated in red.

You can add, edit, delete, and rename audio files and regions in the Project Audio Browser. You can add audio files to your project by dragging them from the Project Audio Browser into the Tracks area, where you can edit, move, and copy them.

You can also open a separate Project Audio window.

⇧ SHIFT – ⌃ CONTROL – ⌥ OPTION – ⌘ COMMAND

Audio Crossfade Options for Merge… ⌥X — Logic Pro X keyboard command of the day

Logic Pro X keyboard command of the day. #LogicProX @StudioIntern1

  Audio Crossfade Options for Merge…    ⌥X

I need to remember to use crossfades when I am doing tiny edits.

Join regions in the Tracks area — Logic Pro X:

Audio crossfades in Digital Mixdown
Digital Mixdown supports crossfades between selected regions.

The Crossfade parameters are defined by choosingLogic Pro > Preferences > Audio > Editing (or using the Audio Crossfade Options for Merge key command).

Create automatic crossfades — Logic Pro X:

Logic Pro can automatically create crossfades on overlapping audio regions on a track to smoothly segue between adjacent (or overlapping) audio regions.

⇧ SHIFT – ⌃ CONTROL – ⌥ OPTION – ⌘ COMMAND

Set Automation Curve Tool — Logic Pro X keyboard command of the day

Logic Pro X keyboard command of the day. #LogicProX @StudioIntern1

  Set Automation Curve Tool

It appears that the ‘W’ key selects the Automation Curve Tool. It is highly unlikely that I will use key commands. I have set the right mouse button to show both tools and menu commands. Lots of visual reinforcement.

Show automation curves — Logic Pro X:

Before you can add automation points to a track’s automation curves, you need to show the automation curves. Automation curves are displayed as colored curves and points on top of audio and MIDI regions across the track, running the length of the project. You can choose whether to view and edit automation across the track (track-based automation) or only within the track’s regions (region-based automation).

⇧ SHIFT – ⌃ CONTROL – ⌥ OPTION – ⌘ COMMAND