Toggle Vertical Auto Zoom — Logic Pro X keyboard command of the day

Logic Pro X keyboard command of the day. #LogicProX @StudioIntern1

  Toggle Vertical Auto Zoom

I am very bad at using the zoom controls in Logic. I always find my view at the wrong zoom level. I have different screensets that I use to try and keep my zoom controlled. All to no avail.

What I think I want is for Logic to understand what I want to do. What I probably do is use the marquee tool to select my area of interest and then zoom the track(s) to an appropriate level.

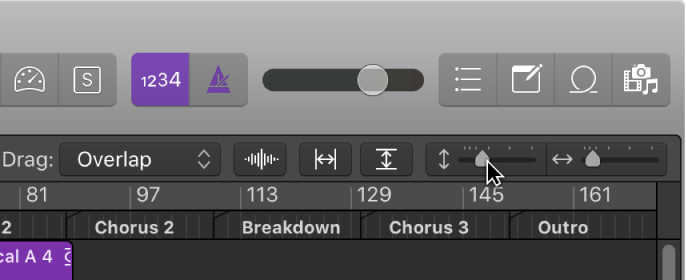
This command controls the auto zoom button at the top of the arrange window — the one with the vertical arrows. My default screenset has both horizontal and vertical auto zoom buttons engaged. I should try working differently.

I just changed my secondary tool (hold down command) to the zoom tool. Dragging across an area of a track with the zoom tool while option is held down does pretty much what I want it to.

Since I have the marquee tool enabled in the lower half of a track I don’t really need it in the secondary tool slot.

Lots of practice required.

  1. Use marquee tool to select area
  2. Set locators by marquee — ⌘U
  3. Zoom to fit locators and store Navigation Snapshot — ⌃⇧Z

Now to discover what “Navigation Snapshot” is all about.

Navigation back/forward — ⌥Z / ⌥⇧Z

Toggles between the zoomed section that I get with the 3 steps from above. This works.

“Individual Track Zoom Reset for All Tracks” — ⌃⌥⇧⌘⌫

Zoom windows — Logic Pro X:

When you zoom in or out, the top-left (and selected) event or region remains in the visible area of the screen. If no selected region or event is visible, zooming is centered around the playhead. If the playhead isn’t visible, the current center of the window is retained.

You can store three different zoom settings for each window using the Save as Zoom 1–3 key commands. Use the Recall Zoom 1–3 key commands to recall your zoomed settings. These commands only apply to the active window or window area.

⇧ SHIFT – ⌃ CONTROL – ⌥ OPTION – ⌘ COMMAND

Open Mixer… ⌘2 — Logic Pro X keyboard command of the day

Logic Pro X keyboard command of the day. #LogicProX @StudioIntern1

  Open Mixer…    ⌘2

Some commands go without saying. For today’s homework I should find out the equivalent function on the X-Touch.

Normally I have screenset 3 with the mixer wide open, the floating transport, and region/event windows open.

Toggling the mixer window from the X-Touch is “SHIFT” “F2”. The Logic open window commands correspond to “SHIFT” “Fn”.

In the Arrange window the mixer section is toggled with the “X” key.

NB the selection of Single/Tracks/All for the mixer is tracked independently in the Arrange window and the Mixer window. I can have the Arrange mixer in “Single” mode and the mixer window in “Tracks” mode. This can be useful.

You can have as many Mixer windows open as you want. My new screenset 3 has 3 mixer windows and a transport bar. The windows are set to ‘Single’, ‘Tracks’, and ‘All’ respectively. The X-Touch shifts as I select the different windows. Handy.

⇧ SHIFT – ⌃ CONTROL – ⌥ OPTION – ⌘ COMMAND

Part Box: 1/16 Note — Logic Pro X keyboard command of the day

Logic Pro X keyboard command of the day. #LogicProX @StudioIntern1

  Part Box: 1/16 Note

In the Score Editor. This command selects the 1/16 note in the “Part Box”. With the combination of the pencil tool and keys mapped to change note value I can enter notes on a staff far faster than other tools. Probably even faster than writing by hand.

Score Editor overview — Logic Pro X:

The Score Editor can display a single MIDI region or software instrument track. In the Score Editor, each track appears as a separate staff. Notes, rests, and other musical events in the MIDI regions on the track are displayed in standard musical notation.

⇧ SHIFT – ⌃ CONTROL – ⌥ OPTION – ⌘ COMMAND

Event Channel = 15 — Logic Pro X keyboard command of the day

Logic Pro X keyboard command of the day. #LogicProX @StudioIntern1

  Event Channel =  15

Set the MIDI channel of the select(ed) event(s) to 15. Somehow I don’t think I would map a key command to set a specific channel, but I might map the ‘Event Channel +1’ and ‘Event Channel -1’ commands.

My most typical use would be to change an entire MIDI region’s channel to “other than 1” for use with my orchestral instruments (Miroslav Philharmonik) or SampleTank. Put the MIDI region on the proper track for making parts, change the channel to match the ‘multi’ settings on the instrument. Far easier than trying to split the keyboard.

My KORG software instruments are a candidate as well — M1 and Wavestation.

Event List overview — Logic Pro X:

The Event List is the most powerful, flexible, and complete MIDI editor in Logic Pro. All MIDI event types are listed alphanumerically in the Event List.

You can:

View all aspects of events—start and end points, length, channel, and values

View all events in a region

Filter the list to restrict this view to one or more event types, such as notes, pitch bend events, or both

Customized Event List views are saved to screensets and are displayed when screensets are recalled. This makes the selection and editing of events faster and simpler.

All functions and options are shown at the top of the Event List area. The events themselves are shown in the list below.

⇧ SHIFT – ⌃ CONTROL – ⌥ OPTION – ⌘ COMMAND

Show/Hide Zones/Groups View — Logic Pro X keyboard command of the day

Logic Pro X keyboard command of the day. #LogicProX @StudioIntern1

  Show/Hide Zones/Groups View

The EXS24 Instrument Editor. The 24-bit sampler that is the basis for practically all of the internal sounds in Logic. There’s a new sheriff in town, Alchemy, but that doesn’t change the basic instruments in any way.

EXS24 mkII overview — Logic Pro X:

EXS24 mkII is a software sampler. It plays back audio files, called samples, that you load into it. These samples are combined into tuned, organized collections called sampler instruments. Because sampler instruments are based on audio recordings, they are ideally suited to emulating real instruments such as guitars, pianos, and drums.

EXS24 mkII lets you play, edit, and create sampler instruments. You can assign the samples in sampler instruments to specific key and velocity ranges and process them with EXS24 mkII filters and modulators.

EXS24 mkII offers powerful modulation and editing features and is a flexible synthesizer in its own right. This enables you to create expressive sounds by using any sample as a basic synthesizer waveform.

EXS24 mkII can be used as a mono or stereo instrument, or you can route loaded samples to multiple audio outputs. This enables you to independently process individual drum sounds in a drum kit, for example.

You can use samples of almost unlimited length in EXS24 mkII by streaming them directly from a hard disk. This lets you use many of the multigigabyte sample libraries available.

EXS24 mkII provides an extensive library of sampler instruments that includes piano, string, drum, acoustic and electric guitar, and many other sounds.

The EXS24 mkII native file format—the EXS format—is supported by most sample library providers. You can also import sampler instruments in the Gigasampler, DLS, and SoundFont2 sample file formats.

⇧ SHIFT – ⌃ CONTROL – ⌥ OPTION – ⌘ COMMAND