Logic Pro X keyboard command of the day. #LogicProX @StudioIntern1
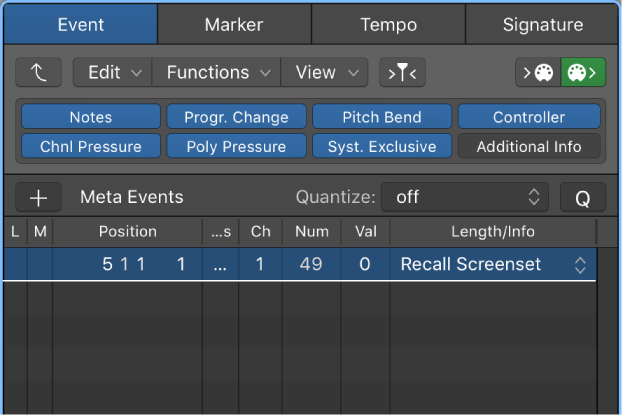
Recall Screenset 2x ⌃2
I don’t imagine that I would have 20 or more screensets, but I can certainly imagine situations where that might happen. Easy to imagine 20 or more scenes in a movie or show where a screenset is used to help keep things arranged (and now I can see where numbered markers might help as well.) I can also see the value of being able to program screenset changes into playback.
Seems that I have the screenset recalls mapped to SHIFT-number as opposed to CONTROL-number.
Create, recall, and switch screensets — Logic Pro X
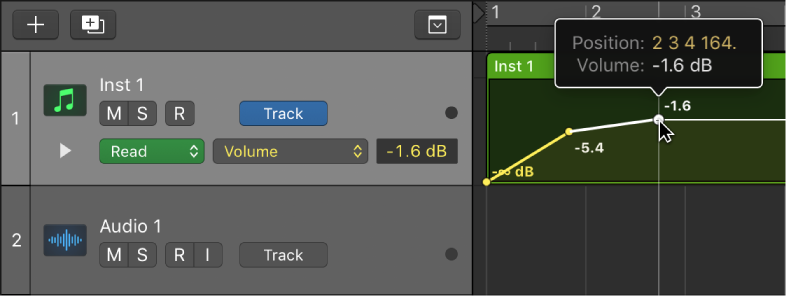
You position windows in a layout that suits the way you work. This layout of various windows, including their display size, zoom levels, position, and other settings, is called a screenset. Once defined, you can save, and freely switch between different screensets, much as you might between different computer displays.
⇧ SHIFT – ⌃ CONTROL – ⌥ OPTION – ⌘ COMMAND
Command    Key Touch Bar


- Global Commands


Recall Screenset 1 1


Recall Screenset 2 2


Recall Screenset 3 3


Recall Screenset 4 4


Recall Screenset 5 5


Recall Screenset 6 6


Recall Screenset 7 7


Recall Screenset 8 8


Recall Screenset 9 9


Recall Screenset 1x ⇧1


Recall Screenset 2x ⇧2


Recall Screenset 3x ⇧3


Recall Screenset 4x ⇧4


Recall Screenset 5x ⇧5


Recall Screenset 6x ⇧6


Recall Screenset 7x ⇧7


Recall Screenset 8x ⇧8


Recall Screenset 9x ⇧9