Logic Pro X keyboard command of the day. #LogicProX @StudioIntern1
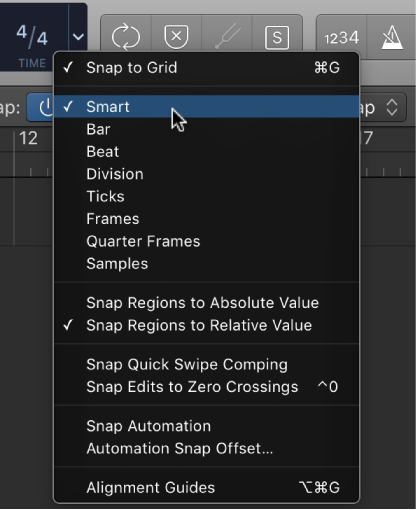
Snap Regions to Relative Value
I should work with some of the options for snapping audio to the grid. I struggle to align reference tracks that I put into the project. This is the visual editing of the regions…something that I don’t do a lot of yet.
It is easy to practice using MIDI loops with the region zoomed horizontally to display fine timing resolution.
Snap items to the grid — Logic Pro X:
By default, the Snap function is relative. When you move or edit an item, it retains the same relative distance from its original grid position. For example, if a region is placed at position 1.2.1.16, and you move the region two beats forward (with the Snap value set to Bar), the region snaps to position 2.2.1.16, not 2.1.1.1 (or 2.2.1.1). You can move items so that they align with the nearest grid value by choosing Snap to Absolute Value from the Snap pop-up menu.
You can show the grid in the Tracks area, to help you visualize the positions of items in the Tracks area relative to the Snap value.
⇧ SHIFT – ⌃ CONTROL – ⌥ OPTION – ⌘ COMMAND