link0 link1 link2 link3 link4 link5 link6 link7 link8 link9 link10 link11 link12 link13 link14 link15 link16 link17 link18 link19 link20 link21 link22 link23 link24 link25 link26 link27 link28 link29 link30 link31 link32 link33 link34 link35 link36 link37 link38 link39 link40 link41 link42 link43 link44 link45 link46 link47 link48 link49 link50 link51 link52 link53 link54 link55 link56 link57 link58 link59 link60 link61 link62 link63 link64 link65 link66 link67 link68 link69 link70 link71 link72 link73 link74 link75 link76 link77 link78 link79 link80 link81 link82 link83 link84 link85 link86 link87 link88 link89 link90 link91 link92 link93 link94 link95 link96 link97 link98 link99 link100 link101 link102 link103 link104 link105 link106

Logic Pro X: Resize regions in the Tracks area

Logic Pro X: Resize regions in the Tracks area

You can shorten both audio and MIDI regions so that only part of the region plays. You can lengthen MIDI regions to add silence to the beginning or end of the region. In addition, you can resize the common edge of two adjacent regions to control the transition between them and remove overlaps.

My latest exercise had me using ‘Edit>Trim>Fill within Locators’ followed by ‘Join Regions’ followed by ‘Set Region Start to Playhead position’. Locators were at the beginning and ending of the project.

Follow that with ‘Bounce and Replace Tracks’. I need to remember to create a new alternative before I do the replace…

Alternative 1 — mix as printed for release

Alternative 2 — make all audio tracks single region for processing

Alternative 3 — bounce and replace tracks

Interesting note — Folder stacks get bounced as well, effectively giving me a VCA stem…it also bounces the mix bus if it is a track!
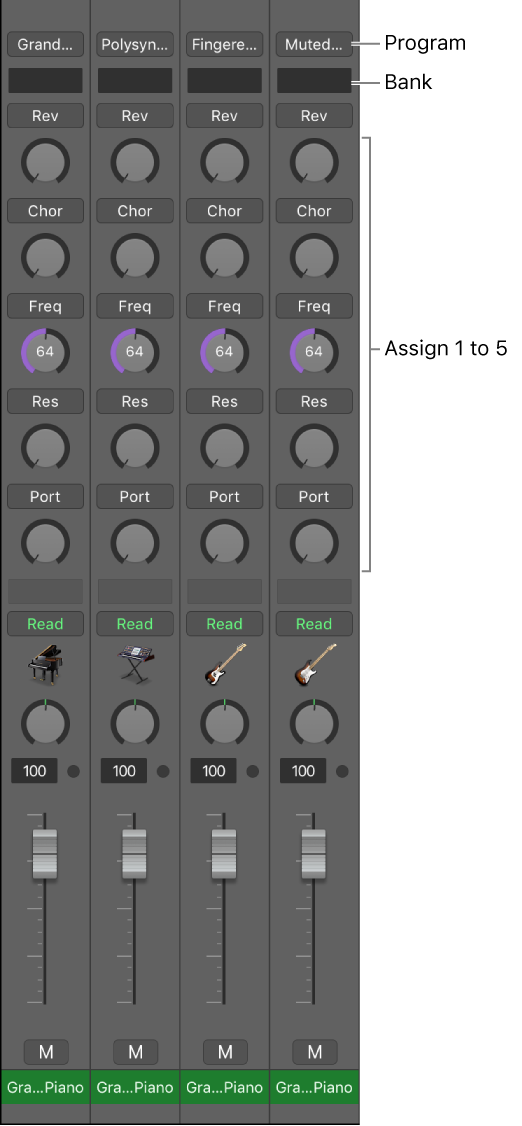
Show/Hide Assign 3 — Logic Pro X keyboard command of the day

Logic Pro X keyboard command of the day. #LogicProX @StudioIntern1

  Show/Hide Assign 3

There are 5 assignable controls on a MIDI channel strip. Can be quite useful — automatable.

MIDI channel strips overview — Logic Pro X

MIDI channel strips in the Mixer work as remote controls for the mixing parameters of your MIDI-controlled sound modules and synthesizers, such as volume and pan.

⇧ SHIFT – ⌃ CONTROL – ⌥ OPTION – ⌘ COMMAND

Forward by Division Value — Logic Pro X keyboard command of the day

Logic Pro X keyboard command of the day. #LogicProX @StudioIntern1

  Forward by Division Value

Move the selected events forward in time (and position in the score.)

Move and copy items in the Score Editor — Logic Pro X

To move the selected events forward or backward one division step (as set in the LCD): Use Nudge Region/Event Position Left by Division and Nudge Region/Event Position Right by Division.

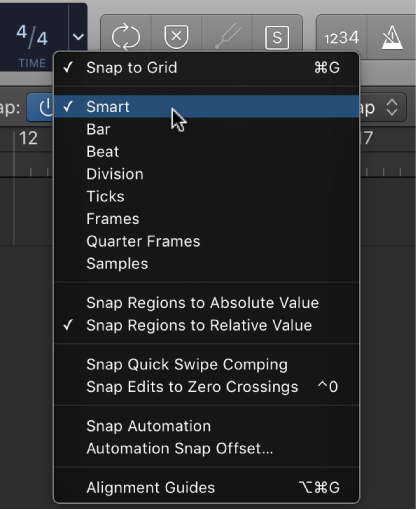
It was not immediately clear what was meant by “division”. The best definition I could find is

Snap items to the grid — Logic Pro X

Division: Edit operations snap to the nearest division value. (This is the time signature shown in the LCD and the ruler.)

⇧ SHIFT – ⌃ CONTROL – ⌥ OPTION – ⌘ COMMAND

Apply Transform User Preset 15 to selected Events — Logic Pro X keyboard command of the day

Logic Pro X keyboard command of the day. #LogicProX @StudioIntern1

  Apply Transform User Preset  15 to selected Events

The MIDI Transform window can be opened from the Window menu, or by entering ‘⌘9’. There are 30 ‘Apply Transform User Preset … to selected Events’.

Use transform sets — Logic Pro X:

1. Choose Create New Transform Set from the Presets pop-up menu.

2. Set conditions and operations.

3. Select the “Hide unused parameters” checkbox. This helps to avoid changes to conditions and operations that aren’t required for (or may disturb) your transform set.

4. Choose New Parameter Set (Number) from the Presets pop-up menu. Enter a new name for your transform set.

This transform set now appears at the bottom of the Presets list in all MIDI Transform windows for this project. You should consider saving your user transform sets in one or more template projects. This way, they are always available to you in all future projects.

Tip: Renaming an existing transform set creates a new transform set that is identical to the original. The existing (source) transform set is retained.

⇧ SHIFT – ⌃ CONTROL – ⌥ OPTION – ⌘ COMMAND

Delete Unselected within Selection — Logic Pro X keyboard command of the day

Logic Pro X keyboard command of the day. #LogicProX @StudioIntern1

  Delete Unselected within Selection

Would you say this is a mouthful of words? The text in the documentation helps a bit by rephrasing the command a bit

Unselected Within Selection: Erases all unselected MIDI events within a selection, such as between locators.

My confusion comes from the wrongful expectation that the “highlighted area” like a Marquee selection, or an entire region (with highlight) constitutes a ‘selection’. Clearly the use of the example of ‘between locators’ means that a selection has been made, if not necessarily highlighted.

Deleting the ‘selected within selection’ is a simple matter of the DELETE key or other gestures.

Mute and delete regions and events — Logic Pro X

The Mute and Delete functions go hand in hand, because you often want to remove events you have muted.

⇧ SHIFT – ⌃ CONTROL – ⌥ OPTION – ⌘ COMMAND