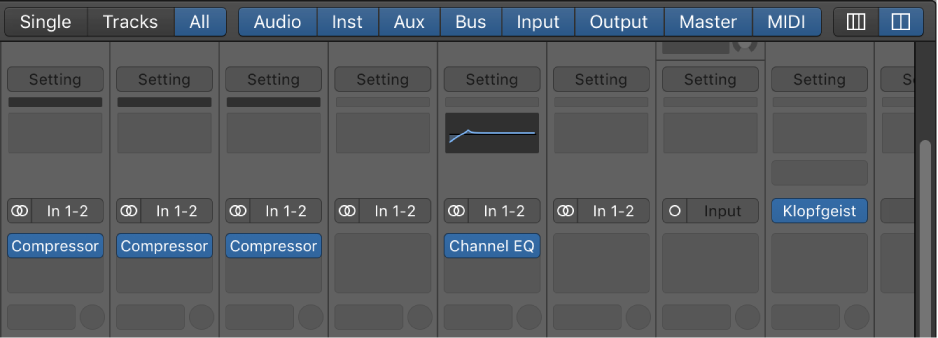
Show/Hide Output Channel Strips ⇧:four: — Logic Pro X keyboard command of the day

Logic Pro X keyboard command of the day. #LogicProX @StudioIntern1

  Show/Hide Output Channel Strips        ⇧:four:

I have yet to find any mention of this in the user guides. The mixing overview calls the 8 buttons “filters”.

 Audio | Inst | Aux | Bus | Input | Output | Master/VCA | MIDI

I don’t often change the mixer view, but leaving out the Output strips does save a tiny bit of room.

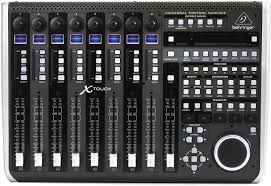
The X-Touch has “dedicated” buttons to filter the channel strips when it is in “Global” mode. This caused me great confusion until I started the serious examination of how (and why) the Mackie Control/Logic Control is used.

Mixing overview — Logic Pro X:

When you mix a project, you balance the different parts and blend them into a cohesive whole. You can also add effects to alter the sound, use routing and grouping to control the signal flow, and use automation to create dynamic changes in your project over time. You do this in the Mixer, which opens below the Tracks area or as a separate window.

⇧ SHIFT – ⌃ CONTROL – ⌥ OPTION – ⌘ COMMAND
Nudge Region/Event Position Left by Tick — Logic Pro X keyboard command of the day

Logic Pro X keyboard command of the day. #LogicProX @StudioIntern1

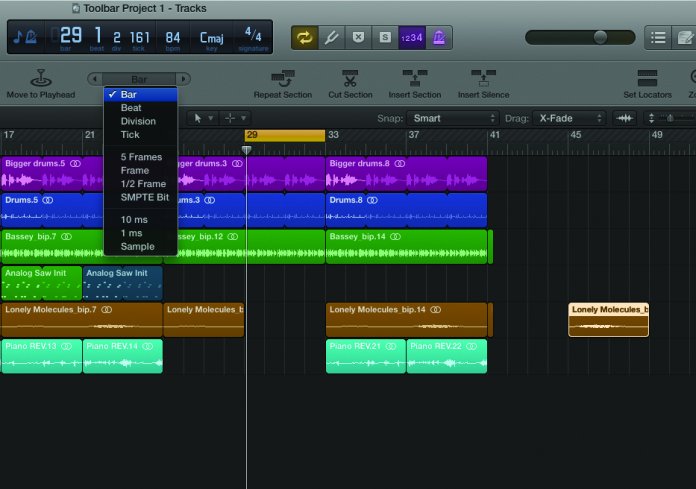
  Nudge Region/Event Position Left by Tick

This is a powerful tool when editing. The X-Touch has a nudge mode, so left/right movement of regions can be done from the controller as well. I am pleased when I find commands that are useful and that are implemented on my control surface. Makes me smile. Things I will use.

Move regions in the Tracks area — Logic Pro X:

Nudge regions by a set value
Use one of the following key commands:

Mackie Control Nudge button overview — Control Surfaces Help:

The NUDGE button allows you to move (nudge) selected audio or MIDI regions (or events) in Small, Large, or Temporary Nudge mode.

Large Nudge mode — Control Surfaces Help:

Hold down the SHIFT button, then press the NUDGE button to show eight functions on the LCD that are mapped to the corresponding V-Pot buttons. These functions allow you to move the selected region or events by various amounts or to a specific position. Press the NUDGE button a second time to turn off Large Nudge mode.

⇧ SHIFT – ⌃ CONTROL – ⌥ OPTION – ⌘ COMMAND
Go to Marker Number 3 3 — Logic Pro X keyboard command of the day

Logic Pro X keyboard command of the day. #LogicProX @StudioIntern1

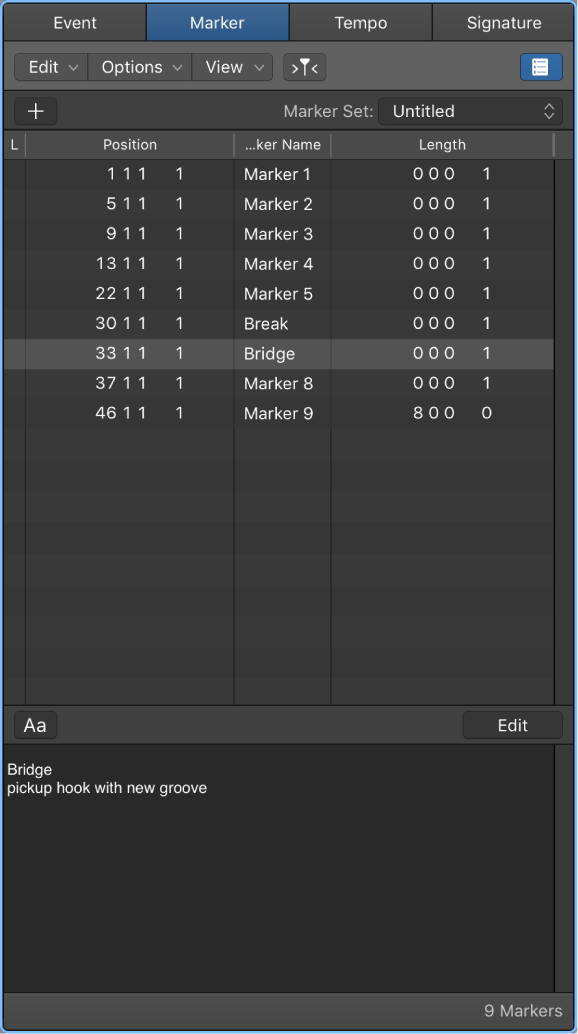
  Go to Marker Number 3    3

Markers are so useful. I try to make it a habit to “drop markers” during listening passes. If I hear something I want to investigate put a marker there.

I still don’t like navigating by numbers, but so it is. I deleted all of the keyboard commands like the one listed.

I a practicing creating markers (⌥’) and typing anything I need to remind me. If I position the cursor in just the right place in the marker list I can do it…

When I am simply listening and balancing busses I use the X-Touch in marker mode and press the V-pot to create the markers.

Navigate using markers — Logic Pro X:

You can navigate through your project using markers. This is useful when you want to quickly jump to, and edit, regions or events at a specific position in your project, for example.

⇧ SHIFT – ⌃ CONTROL – ⌥ OPTION – ⌘ COMMAND
Control button stays lit

Control button stays lit:

I found a copy of the eMagic Logic Control manual.

Handy little chart of all the switches and LEDs on the device. I have modified it a bit…

On my Mac I can use the ‘send midi’ command to flash the CONTROL light like this

Nudge Region/Event Length Left by 10 ms — Logic Pro X keyboard command of the day

Logic Pro X keyboard command of the day. #LogicProX @StudioIntern1

  Nudge Region/Event Length Left by 10 ms
 

I usually set the nudge value using the toolbar, then do left/right nudging. Almost always I am trying to align multiple mixes of a song I am mixing to get things set up for level matching and comparison.

  • Set the nudge value to 10ms — ⌃⌥0
  • Set the nudge value to 1ms — ⌃⌥1
  • Set the nudge value to Sample — ⌃⌥S
  • Nudge left — ⌥←
  • Nudge right — ⌥→

Those handy control and option keys.

Move regions in the Tracks area — Logic Pro X:

You can move regions to a different point in the same track, or move them to another track of the same type. You can move an audio region to another audio track, for example, but not to a software instrument track, or vice versa. You can also move regions between open Tracks area windows, or between different open projects.

Side note — nudging regions from X-Touch? The answer is yes.

Mackie Control Nudge button overview — Control Surfaces Help:

The NUDGE button allows you to move (nudge) selected audio or MIDI regions (or events) in Small, Large, or Temporary Nudge mode.

⇧ SHIFT – ⌃ CONTROL – ⌥ OPTION – ⌘ COMMAND