Next Channel Strip Setting of focused Track ⇧] — Logic Pro X keyboard command of the day

Logic Pro X keyboard command of the day. #LogicProX @StudioIntern1

  Next Channel Strip Setting of focused Track    ⇧]

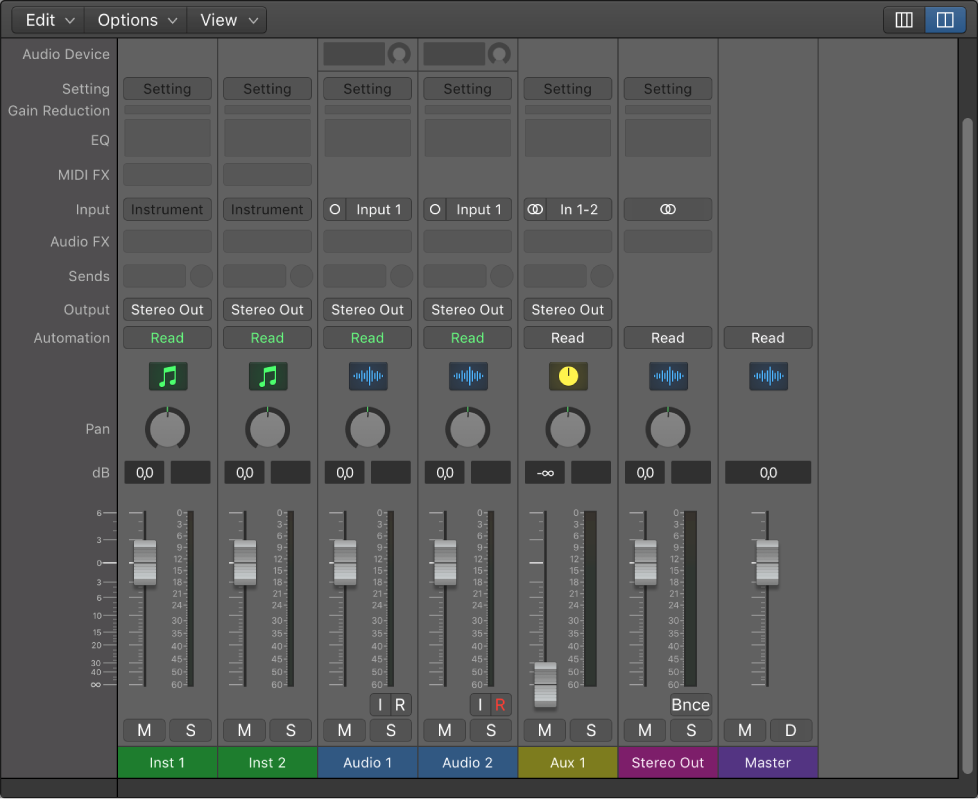
Very easy to audition settings for channels. This controls the channel strip settings (from the Settings menu). The user-defined settings are first, followed by Logic and GarageBand channels.

The user settings are contained in

~/Music/Audio Music Apps/Channel Strip Settings/

There are a lot of pre-defined strips that are used by Logic for the software instruments, delays, reverbs, and other useful things.

Today I’ll read the introductory chapters on plug-ins and channel strips.

Work with plug-in settings — Logic Pro X:

Plug-in settings are stored with the project file and are automatically recalled the next time the project is opened. In the plug-in window, you can load, copy and paste, compare, save, create default, and delete plug-in settings. You can also load, save, and delete plug-in settings in the Library.

⇧ SHIFT – ⌃ CONTROL – ⌥ OPTION – ⌘ COMMAND

Show/Hide Track Number — Logic Pro X keyboard command of the day

Logic Pro X keyboard command of the day. #LogicProX @StudioIntern1

  Show/Hide Track Number

I don’t normally use track numbers. I display them in my mixer screenset. I suspect that many things go back to the days of the “environment” where all things are possible. I think that I should spend a little time looking at historical versions of Logic Pro. Best resource for the moment is Sound on Sound magazine.

⇧ SHIFT – ⌃ CONTROL – ⌥ OPTION – ⌘ COMMAND

Trim Region Start to Next Transient ⌃⇧] — Logic Pro X keyboard command of the day

Logic Pro X keyboard command of the day. #LogicProX @StudioIntern1

  Trim Region Start to Next Transient    ⌃⇧]

Straight-forward. Remove the front of the region up to the next transient. Handy for editing.

Trim audio regions in the Audio Track Editor — Logic Pro X:

You can trim an audio region in the Audio Track Editor to remove part of the beginning or end of the region.

⇧ SHIFT – ⌃ CONTROL – ⌥ OPTION – ⌘ COMMAND

New Zone ⌃Z — Logic Pro X keyboard command of the day

Logic Pro X keyboard command of the day. #LogicProX @StudioIntern1

  New Zone    ⌃Z
 

I have used control-Z to change auto-zoom mode. Looks like the key command is mode specific?

The EXS24 Editor makes use of this. I have only used EXS24 as the man behind the curtain of the instrument library in Logic. This can open a whole new world of sounds.

EXS24 mkII Zones and Groups view — Logic Pro X:

There are two views in the Instrument Editor window: Zones and Groups.

In Zones view, the area above the keyboard displays the Zones area. The general menus, buttons, and so on, are displayed in both Zones and Groups views.

⇧ SHIFT – ⌃ CONTROL – ⌥ OPTION – ⌘ COMMAND

Settings: MIDI Meaning ⌃⌥⇧M — Logic Pro X keyboard command of the day

Logic Pro X keyboard command of the day. #LogicProX @StudioIntern1

  Settings: MIDI Meaning    ⌃⌥⇧M
 

Score Editing. The note included in the documentation is probably the best bit of advice. Why it is located at the end of the section is beyond me. Important tips on usage should be placed at the first likely point of contact — the lead paragraph of the section. The command is in the ‘Layout’ menu in the Score Editor window.

MIDI Meaning settings — Logic Pro X:

Important: If you do use MIDI Meaning, you need to adjust the settings before you begin to insert accents and so on. This is because the settings have no influence on accents and phrasing marks that have already been inserted.

⇧ SHIFT – ⌃ CONTROL – ⌥ OPTION – ⌘ COMMAND