Separate MIDI Region by MIDI Channel — Logic Pro X keyboard command of the day

Logic Pro X keyboard command of the day. #LogicProX @StudioIntern1

  Separate MIDI Region by MIDI Channel

Splits a MIDI region into separate regions, one per MIDI channel.

Who knew that we would find this under ‘demix’?

Demix MIDI regions in the Tracks area — Logic Pro X

You can split, or demix, a MIDI region (or a standard MIDI file of format 1 or 0) into separate regions by event channels or by note pitch.

Very handy. Player Piano roll time.

⇧ SHIFT – ⌃ CONTROL – ⌥ OPTION – ⌘ COMMAND

Color Tracks by Region Color ⌥⇧⌘C — Logic Pro X keyboard command of the day

Logic Pro X keyboard command of the day. #LogicProX @StudioIntern1

  Color Tracks by Region Color    ⌥⇧⌘C

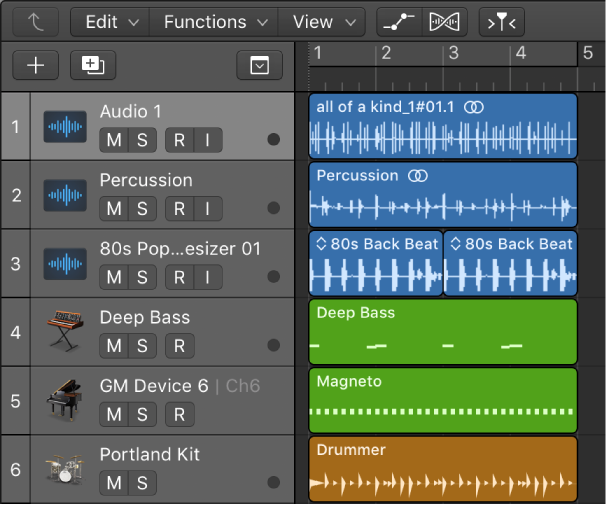
Set the color of the tracks of the selected regions to the region color.

I typically color my tracks when I start working on a new project. Tracks are grouped (summing stacks) with the AUX track the same color.

It might make some work easier to follow if I colored the region I am working on, and changed the track color to match. That would let me see the track in the Arrange window and the mixer — make it stand out from all the rest.

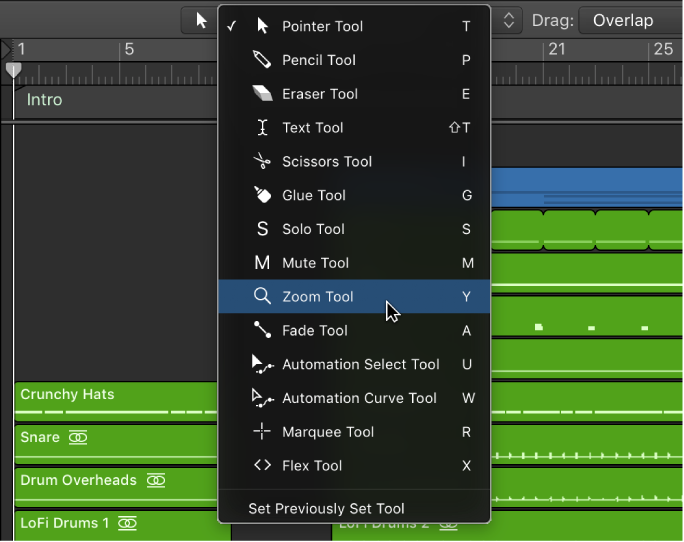
Workflow would be — use Marquee tool to select the working region. Press ‘U’ to set rounded locators and enable cycle. Press ‘⌃⌘T’ to split the region at the locators. Press ‘⌥C’ to show color palette. Select the color. Press ‘⌥⇧⌘C’ to change the track color.

Seems like a lot of work/steps. I could make a macro to do everything up to the color selection. That works OK, except that ‘⌥C’ to show/hide colors is a toggle. I can’t seem to find a ‘Show Colors’ command as opposed to the toggle. I can do a three finger tap on my Magic Mouse, click on a color, press ‘⌥⇧⌘C’, and it is done. To finish with a flourish I use a three finger “TipTap 2 fingers — middle” — hold index and ring finger on mouse, tap with middle finger — to do the awkward change track color command.

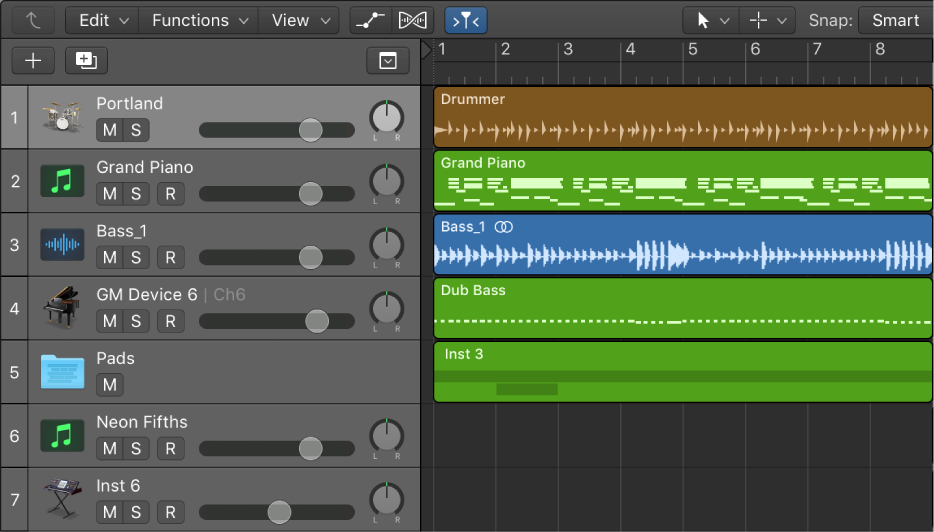
Change the color of regions in the Tracks area — Logic Pro X

You can change the color of regions to identify sections of your arrangement, distinguish between track types, or for other uses. Newly recorded or added regions use the color of the track channel strip.

⇧ SHIFT – ⌃ CONTROL – ⌥ OPTION – ⌘ COMMAND

BetterTouchTool

folivora.ai — Great Tools for your Mac!

BetterTouchTool is a great, feature packed app that allows you to customize various input devices on your Mac.

Mute Notes/Regions/Folders On/Off ⌃M — Logic Pro X keyboard command of the day

Logic Pro X keyboard command of the day. #LogicProX @StudioIntern1

  Mute Notes/Regions/Folders On/Off    ⌃M

Toggle Mute on the selected item(s). Use the Mute Tool to mute an item, or a few of them. The ‘Select Muted Regions/Events ⇧M’ command will select everything that has been muted.

I am thinking about comparing muted notes and regions as a kind of subtractive EQ — remove some sound to expose or clarify, toggle as necessary to help focus on the desired action.

Mute and solo regions in the Tracks area — Logic Pro X

You can mute one or more regions in the Tracks area to exclude them from playback. You can also solo individual regions, to hear them in isolation, and lock the solo status of regions.

Mute and delete regions and events — Logic Pro X

The Mute and Delete functions go hand in hand, because you often want to remove events you have muted.

⇧ SHIFT – ⌃ CONTROL – ⌥ OPTION – ⌘ COMMAND

- Global Commands
Mute Movie Audio On/Off
Toggle writing Mute Automation in Write Mode
Toggle Channel Strip Mute M

- Main Window Tracks and Various Editors
Select Muted Regions/Events ⇧M
Mute Notes/Regions/Folders On/Off ⌃M

- Mixer
Select Muted Channel Strips ⇧M

New Audio Track ⌥⌘A ⌃6⃣ — Logic Pro X keyboard command of the day

Logic Pro X keyboard command of the day. #LogicProX @StudioIntern1

  New Audio Track    ⌥⌘A    ⌃6⃣

My apologies for the :SIX: if it doesn’t appear as an emoji. The Touch Bar buttons are indicated by numbers in boxes.

Creates a new Audio Track after the currently selected track.

Create tracks — Logic Pro X

You add tracks to a project to hold your recordings, loops, and other material. When you add a track, you can choose the track type, format, input source (for audio tracks), and output, and create multiple tracks. The options in the New Tracks dialog vary, depending on the type of track you are creating.

Tracks overview — Logic Pro X

When you create a track, you choose the track type, format, and output. You can also choose a patch, which controls the sound of the track, and modify the sound of a patch using Smart Controls.

⇧ SHIFT – ⌃ CONTROL – ⌥ OPTION – ⌘ COMMAND

Octave + 1 X — Logic Pro X keyboard command of the day

Logic Pro X keyboard command of the day. #LogicProX @StudioIntern1

  Octave + 1    X

Step Input controls.

Use step input recording techniques — Logic Pro X

Step input allows you to insert MIDI notes when you’re not recording in real time. You can use step input to create note runs that may be too fast for you to play or to replicate sheet music that’s too difficult for you to play.

You can use one or more of the following for step input:

Musical Typing keyboard

Step Input keyboard

MIDI keyboard

⇧ SHIFT – ⌃ CONTROL – ⌥ OPTION – ⌘ COMMAND