Select Used Instruments — Logic Pro X keyboard command of the day

Logic Pro X keyboard command of the day. #LogicProX @StudioIntern1

  Select Used Instruments

Personally I prefer new instruments…

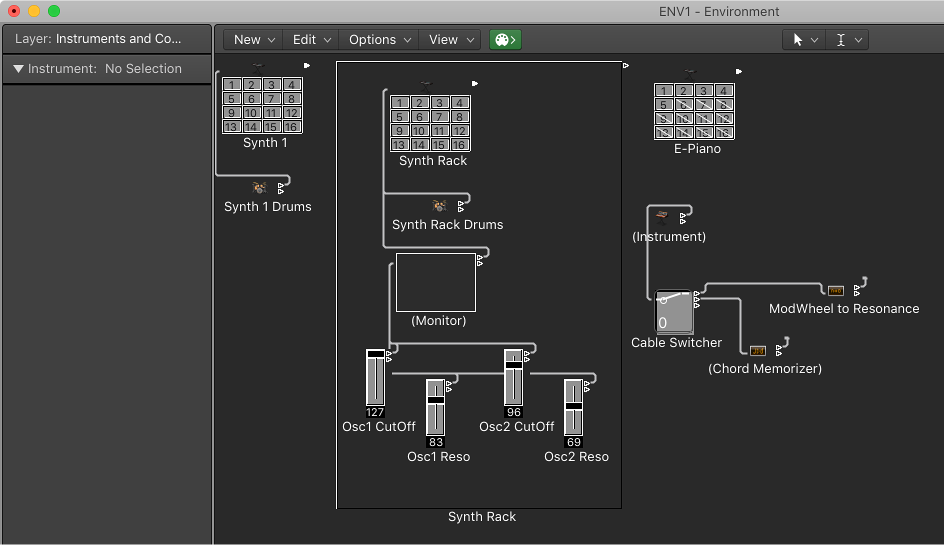
In the Environment. Part of the arcana of Logic Pro X. I don’t see myself building amazing MIDI environments in the near future.

Use advanced selection commands — Logic Pro X

Select Used Instruments: Selects all objects that are assigned to the selected track in the main window, or are connected to such objects via cables.

⇧ SHIFT – ⌃ CONTROL – ⌥ OPTION – ⌘ COMMAND

Set Scissors Tool ⌥3⃣ — Logic Pro X keyboard command of the day

Logic Pro X keyboard command of the day. #LogicProX @StudioIntern1

  Set Scissors Tool        ⌥3⃣

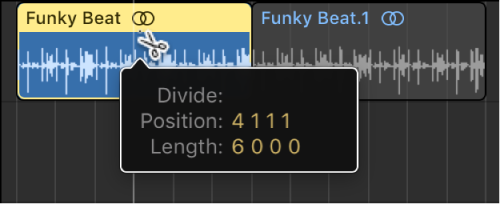
Change the cursor tool to Scissors. Not something I do at all. I expect I should do more editing.

Normally I am splitting regions at song-length boundaries which I do by positioning the playhead at the proper location, select ALL the tracks, and “Split at Playhead”. I also create a marker at the playhead position.

Split regions in the Tracks area — Logic Pro X

You can split a region in the Tracks area, and use the split segments of the region in different places in the Tracks area.

Common tools — Logic Pro X

Use the Scissors tool to split regions and events, allowing individual sections to be copied, moved, or deleted.

⇧ SHIFT – ⌃ CONTROL – ⌥ OPTION – ⌘ COMMAND

Stop and Go to Beginning — Logic Pro X keyboard command of the day

Logic Pro X keyboard command of the day. #LogicProX @StudioIntern1

  Stop and Go to Beginning

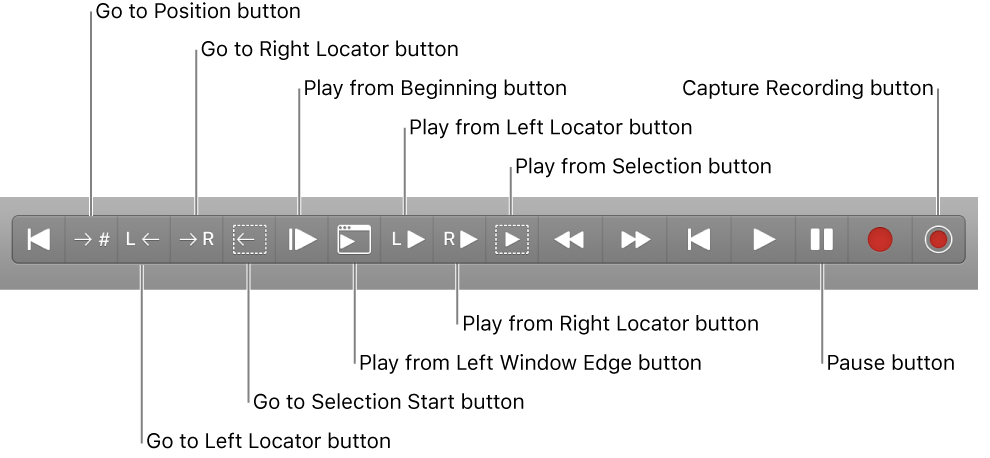
Defining keyboard commands for the various stop and play commands can speed up repetitive work. I need to practice setting my transport buttons (and commands) to better match how I am working — mixing a song, segmenting a live audio session into multiple songs or chapters.

Use transport key commands — Logic Pro X

Stop and Go to Beginning: Stops playback and moves the playhead to the project start position.

⇧ SHIFT – ⌃ CONTROL – ⌥ OPTION – ⌘ COMMAND

Create Multiple Lanes… — Logic Pro X keyboard command of the day

Logic Pro X keyboard command of the day. #LogicProX @StudioIntern1

  Create Multiple Lanes…

I quoted the help document below.

I keep thinking back to Vision in the 1990s and how I wouldn’t even consider Notator…I think I may have missed out on a true power tool.

⇧ SHIFT – ⌃ CONTROL – ⌥ OPTION – ⌘ COMMAND

Create lanes — Logic Pro X

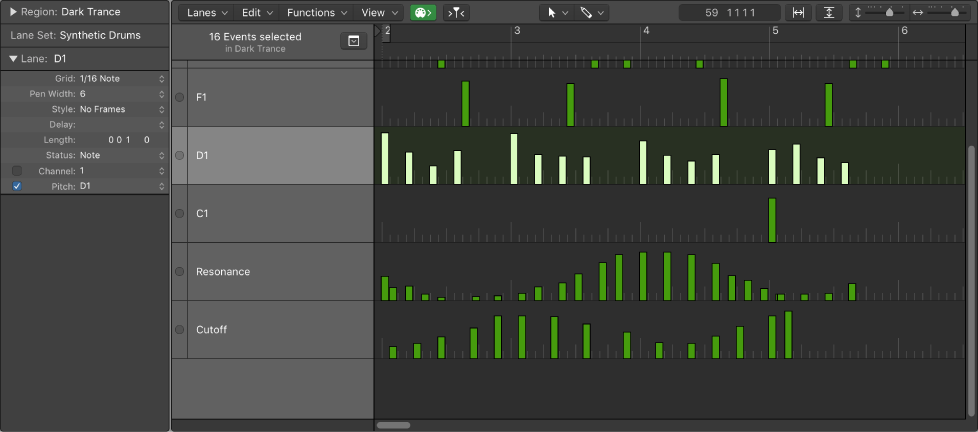
Create lanes for all event types in a region
Select the region.

Choose Lanes > Create Multiple Lanes (or use the corresponding key command).

In the dialog that appears, click the All button to confirm that you want to create lanes for all types of events in the region.

Tip: It’s a good idea to create a new Lane Set before creating a group of new lanes. For more information, see Use Lane Sets.

Use Lane Sets — Logic Pro X

You can store a combination of lanes as a Lane Set. When a Lane Set is saved, the vertical zoom setting of the Step Editor is stored. You can save as many Lane Sets as required in each project.

Step Editor overview — Logic Pro X

The Step Editor is a graphical editor that can be used to create or edit MIDI note and controller data. You can use the Step Editor to view and edit different MIDI event types, shown as vertical beams—or steps—along a timeline within a region.
Select Soloed Tracks  — Logic Pro X keyboard command of the day

Logic Pro X keyboard command of the day. #LogicProX @StudioIntern1

  Select Soloed Tracks


Selects all tracks that are currently soloed. This can be very useful. At the minimum a quick way to be able to pan or level control the current group of playing tracks. Only available in the Edit>Select Tracks> menu, or by command. The command only works when the Arrange window is the current focus.

Solo tracks — Logic Pro X

You can solo a track, silencing all tracks that are not also soloed. Soloing tracks is useful when you want to work on a track individually, or work on a few tracks, without hearing the other tracks in the project.

⇧ SHIFT – ⌃ CONTROL – ⌥ OPTION – ⌘ COMMAND