Apply Transform User Preset 4 to selected Events — Logic Pro X keyboard command of the day

Logic Pro X keyboard command of the day. #LogicProX @StudioIntern1

  Apply Transform User Preset 4 to selected Events

The MIDI Transform window. All things programatic start here. It appears that we can define 30 presets for the transformation window. It would be good to remember the variant “Select and Operate Preset”. See tomorrow’s post.

MIDI Transform window overview — Logic Pro X:

The MIDI Transform window is so-named because it transforms MIDI events—based on conditions, operations, and values you choose—into different types of events, or events with different values.

The MIDI Transform window is a powerful tool for edits that would otherwise be impossible (or tedious). For example, imagine an orchestral project that has been sent to you for editing. The individual violin and viola parts were recorded with a different string library. Two hundred MIDI regions contain aftertouch information that introduces an unpleasant pitch modulation, and some sample layer switching artifacts when played with your string samples. After looking at this aftertouch information, you discover that only a small range of values is causing the problem. Your options: edit your sampler instruments, manually remove all aftertouch information (region by region, or globally, thus losing the performance benefits that the aftertouch information provides), or alter the problematic values in the MIDI Transform window.

A number of preset transform sets are available for many common editing tasks. These may be all you’ll ever require, but should the need arise, you can create and save your own transform sets, and recall them later.

⇧ SHIFT – ⌃ CONTROL – ⌥ OPTION – ⌘ COMMAND
Set Layout Tool — Logic Pro X keyboard command of the day

Logic Pro X keyboard command of the day. #LogicProX @StudioIntern1

  Set Layout Tool


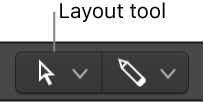
Choose the “Layout Tool” in the “left-click” tool drop down (same place as pointer, solo, et al.)

The Layout Tool is what you use to change the position of a note in the score without affecting the actual time placement of the note. If you use the Pointer Tool to drag a note from 4 1 1 1 to the left to 3 1 1 1 the note will move, and apparently “replace” anything that used to be between 3 1 1 1 and 4 1 1 1.

If you use the Layout Tool to move the note left or right (no vertical movement is possible) the placement of the event in time will not change. You can move a note at 4 1 1 1 to the left to get it closer to the bar line, or to the right to get closer to the next note. Timing will not change.

It is best to use a MIDI loop and play with it in the Score Editor to get a feeling for what is possible.

Position items graphically in the Score Editor — Logic Pro X:

Using the Layout tool: The Layout tool is used to graphically move events in the Score Editor, in order to optimize the display without altering the timing of MIDI events.

⇧ SHIFT – ⌃ CONTROL – ⌥ OPTION – ⌘ COMMAND
– Piano Roll — Logic Pro X keyboard command of the day

Logic Pro X keyboard command of the day. #LogicProX @StudioIntern1

  - Piano Roll

Include Non-Note MIDI Events
View Mode: One Track
View Mode: Selected Regions
Toggle View Mode
Toggle Time Handles ⌃T ⌃⌥⌘1⃣
Set Note Color By Region Color
Set Note Color By Velocity
Set Note Color By MIDI Channel
Define Brush Pattern and Set Brush Tool ⌃⇧B
Reset Brush Pattern ⌃⇧⌫
Toggle Collapse Mode

Today we get a “section” of commands — the Piano Roll commands.

Piano Roll Editor overview — Logic Pro X:

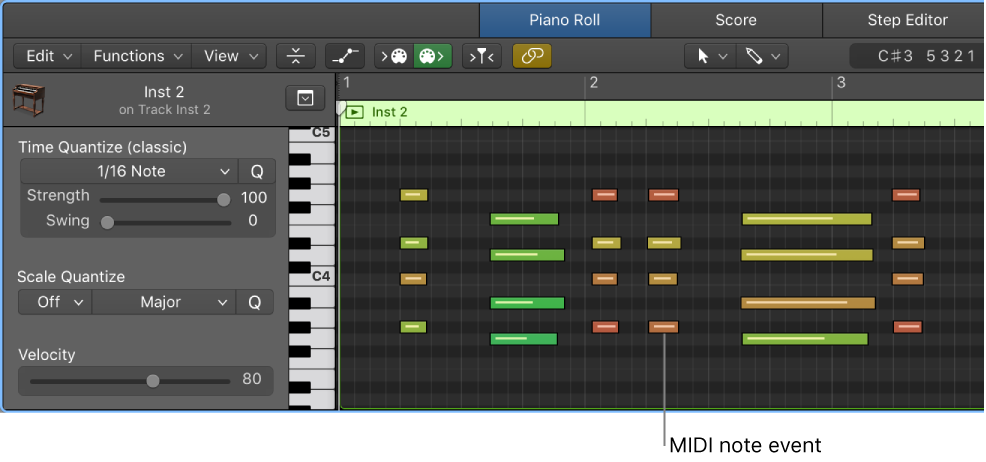
The Piano Roll Editor shows the notes in a MIDI region as colored bars in a time grid. Horizontal lines show the time position, while vertical lines indicate pitch. A keyboard along the left edge of the Piano Roll Editor provides a reference for the pitches of notes. The info display in the Piano Roll Editor menu bar shows the note name and time position under the pointer.

⇧ SHIFT – ⌃ CONTROL – ⌥ OPTION – ⌘ COMMAND
Set Track and MIDI Thru Parameters by Region/Folder — Logic Pro X keyboard command of the day

Logic Pro X keyboard command of the day. #LogicProX @StudioIntern1

  Set Track and MIDI Thru Parameters by Region/Folder

This was hard to track down.

My current description is…with a region (or multiple regions) selected the command will set the defaults for track and MIDI regions to the settings of the selected region(s).

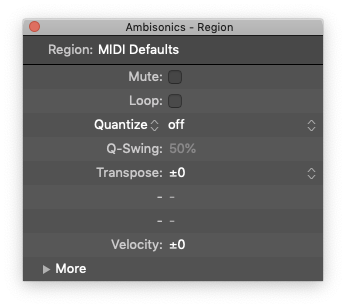
Much confusion occurred. Documentation refers to “MIDI Thru” as the region name. I have seen that. I tested the command and changed some MIDI defaults. Now the defaulted region is named “MIDI Defaults”. The latest documentation doesn’t reference “MIDI Thru” and uses the term defaults.

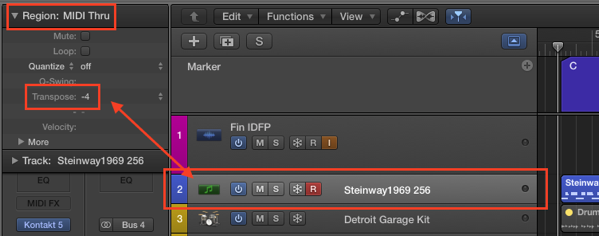
A “simpler” description is the region named “MIDI Thru” contains the MIDI settings that are applied to any MIDI coming in to Logic — like a MIDI Thru port — probably not the easiest thing for the non-MIDI generation to understand as the implication of the word “Thru”.

My Logic now reads “MIDI Defaults” — checking a different system to see what it looks like. My other Mac says “MIDI Defaults”. Following is an image from Apple…MIDI Thru Lives!

Region inspector — Logic Pro X:

The Region inspector shows parameters for the selected region or regions, including Quantize and other parameters. Some parameters are shared, while others are available for only audio or MIDI regions. There are additional advanced quantization parameters that you can view and edit by clicking the More disclosure triangle.

You can also open the Region inspector in a separate floating window.

⇧ SHIFT – ⌃ CONTROL – ⌥ OPTION – ⌘ COMMAND
MIDI Thru Lives!

Apply Transform User Preset 8 to selected Events — Logic Pro X keyboard command of the day

Logic Pro X keyboard command of the day. #LogicProX @StudioIntern1

  Apply Transform User Preset  8 to selected Events

The MIDI Transform window can be opened from the Window menu, or by entering ‘⌘9’. There are 30 ‘Apply Transform User Preset … to selected Events’.

Use transform sets — Logic Pro X:

1. Choose Create New Transform Set from the Presets pop-up menu.

2. Set conditions and operations.

3. Select the “Hide unused parameters” checkbox. This helps to avoid changes to conditions and operations that aren’t required for (or may disturb) your transform set.

4. Choose New Parameter Set (Number) from the Presets pop-up menu. Enter a new name for your transform set.

This transform set now appears at the bottom of the Presets list in all MIDI Transform windows for this project. You should consider saving your user transform sets in one or more template projects. This way, they are always available to you in all future projects.

Tip: Renaming an existing transform set creates a new transform set that is identical to the original. The existing (source) transform set is retained.

⇧ SHIFT – ⌃ CONTROL – ⌥ OPTION – ⌘ COMMAND