Settings: Global Format ⌃⌥⇧F — Logic Pro X keyboard command of the day

Logic Pro X keyboard command of the day. #LogicProX @StudioIntern1

  Settings: Global Format    ⌃⌥⇧F

Open the Global Settings panel for the Score Editor. The command will not work unless the Score Editor has keyboard focus.

Global Score settings — Logic Pro X

Global Score settings define global formatting options, such as page margins, note spacing, bars per line, and more.

⇧ SHIFT – ⌃ CONTROL – ⌥ OPTION – ⌘ COMMAND

Clear Overload Flag in Audio Channel Display ⌃⌥⌘C — Logic Pro X keyboard command of the day

Logic Pro X keyboard command of the day. #LogicProX @StudioIntern1

  Clear Overload Flag in Audio Channel Display   ⌃⌥⌘C

Clears the overload flag as well as clearing the peak level display. A red peak level indicates clipping in the output signal (24 or 16 bit) which results in distortion and lost signal. An orange peak level indicates clipping in the 32 bit domain, so it is not necessarily bad, but is certainly an indicator that there may be problems to be dealt with prior to output.

On the MCU/X-Touch the clip LED (red at top of meter) is cleared. This had not been the case in some versions of Logic Pro X, but it is functional as of version 10.4.8.

The overload indicator can be cleared from the X-Touch by pressing CONTROL and NAME/VALUE.

The overload indicator can be cleared by clicking on any of the peak level indicators in the display.

Peak level display and signal clipping — Logic Pro X

The peak level display is a numerical display located above the level meter. It updates during playback to show the peak level reached, after the entire signal has been played through to the end, and provides a guide that should be used to set the Volume fader.

Mackie Control display control buttons — Control Surfaces Help

Hold down the CONTROL button, then press the NAME/VALUE button to clear any overload (clipping) indicators in the Logic Pro Mixer and in the LCD if the Horizontal with Peak Hold mode is active.

⇧ SHIFT – ⌃ CONTROL – ⌥ OPTION – ⌘ COMMAND

Toggle Channel Strip Record Enable — Logic Pro X keyboard command of the day

Logic Pro X keyboard command of the day. #LogicProX @StudioIntern1

  Toggle Channel Strip Record Enable

The Toggle Channel Strip commands affect the channel strip associated with the track that is selected in the Arrange window.

It may appear that the commands work on the channel selected in the Mixer window (when Arrange is closed), but as the selection of channels changes to auxiliary strips the changes continue to affect the last track selected in the Arrange window.

⇧ SHIFT – ⌃ CONTROL – ⌥ OPTION – ⌘ COMMAND

Command    Key Touch Bar
- Global Commands
Toggle Channel Strip Mute M
Toggle Channel Strip Solo S
Toggle Channel Strip Record Enable
Toggle Channel Strip Input Monitoring ⌃I
Toggle Channel Strip Format (mono/stereo) ⌃⇧S
Toggle Channel Strip Arpeggiator

Object move right ⌥→ — Logic Pro X keyboard command of the day

Logic Pro X keyboard command of the day. #LogicProX @StudioIntern1

  Object move right    ⌥→

Move the selected object to the right.

Move and copy objects — Logic Pro X

You can move and copy objects within a layer or between layers, using a variety of techniques.

⇧ SHIFT – ⌃ CONTROL – ⌥ OPTION – ⌘ COMMAND

Command    Key Touch Bar
- MIDI Environment
Align Objects
Object move left ⌥←
Object move right ⌥→
Object move up ⌥↑
Object move down ⌥↓
Object Width -1 Pixel ⌥⇧←
Object Width +1 Pixel ⌥⇧→
Object Height -1 Pixel ⌥⇧↑
Object Height +1 Pixel ⌥⇧↓
Go to Layer of Object

Backup File(s) ⌃B — Logic Pro X keyboard command of the day

Logic Pro X keyboard command of the day. #LogicProX @StudioIntern1

  Backup File(s)    ⌃B

In the Audio File Editor. Audio files are large and not so easy to make into discrete chunks. Making a backup copy before altering the audio is a very good idea.

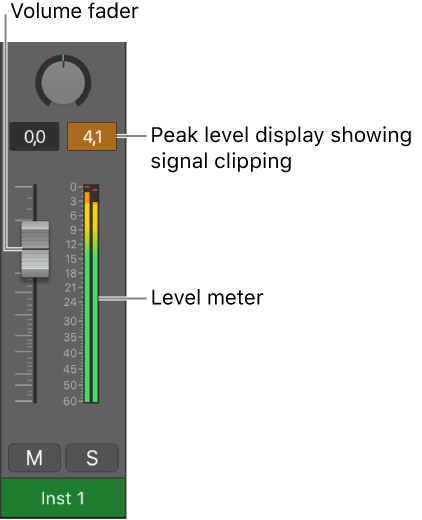
The typical “hard” change that I will make to an audio file is to reduce the gain when the maximum gain is 0.0. Logic does not work well with “normalized” audio tracks with regard to adjusting gain in a non-destructive manner (region gain).

This command is contained in a “local” menu, so some sort of editor or list window. It’s found in the

Project Audio Browser

Select an audio file at the “top” level. Choose “Backup File(s)”. A copy of the file is created in the same location as the original. A file named

 12-8 Acoustic Strum 01.caf

is duplicated as

 12-8 Acoustic Strum 01.caf dup

The duplicated files do not show up in the browser list. If your project is a “bundle” you have to hunt down the project and dive in via the Finder.

I’m not sure about this yet.

The same function, different command name (‘Create Backup’) exists in the Audio File Editor. A backup file gets created with the same trailing ‘dup’. There is a ‘Revert to Backup’ command that will (probably) replace the current audio file with the singular backup file. Apparently only one backup can be created in this manner.

I guess it’s probably a good idea to create a simple backup before doing any kind of processing on the file itself. It is destructive editing, so….

Perform manual backups — Logic Pro X

Although the Undo History and standard Undo functions are available, try to get in the habit of creating backups before processing or editing. This provides a safety copy of your audio recordings in case something unexpected happens, due to a processing error or other unforeseen event.

⇧ SHIFT – ⌃ CONTROL – ⌥ OPTION – ⌘ COMMAND