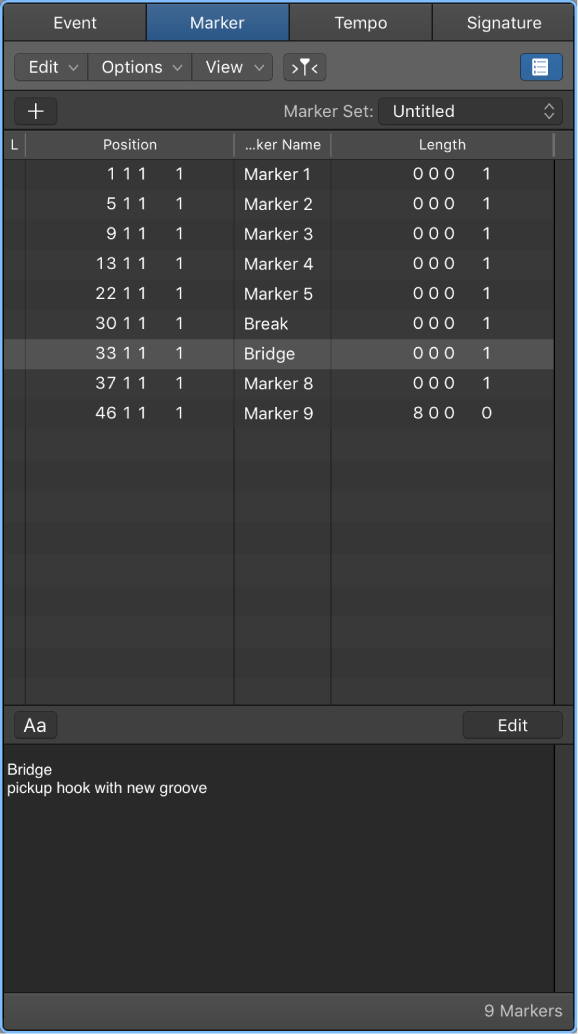
Logic Pro X keyboard command of the day. #LogicProX @StudioIntern1
Octave 1
Set the octave of the Step Input Keyboard. Will set the octave starting at C1.
A more typical case would be to use the Z and X keys for shifting octaves — just like on little 25 key keyboards with octave up/down buttons.
I suspect that with practice I could become a MIDI note “touch-typist”.
Use step input recording techniques — Logic Pro X
Step input allows you to insert MIDI notes when you’re not recording in real time. You can use step input to create note runs that may be too fast for you to play or to replicate sheet music that’s too difficult for you to play.
⇧ SHIFT – ⌃ CONTROL – ⌥ OPTION – ⌘ COMMAND
Command    Key Touch Bar


- Step Input Keyboard


Octave 0 ⌃⌥⇧⌘0


Octave 1 ⌃⌥⇧⌘1


Octave 2 ⌃⌥⇧⌘2


Octave 3 ⌃⌥⇧⌘3


Octave 4 ⌃⌥⇧⌘4


Octave 5 ⌃⌥⇧⌘5


Octave 6 ⌃⌥⇧⌘6


Octave - 2 ⇧Z


Octave - 1 Z


Octave + 1 X


Octave + 2 ⇧X