Logic Pro X keyboard command of the day. #LogicProX @StudioIntern1
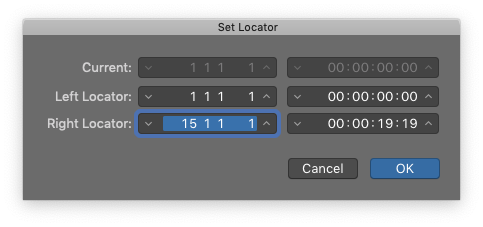
Set Right Locator numerically…
The locators are your friend. How can I set thee? Let me count the ways…
I use buttons on the control bar to set locators, and have been trying to train myself to use the ‘Set Locators by Regions/Events/Marquee and Enable Cycle — ⌘U’, but sometimes setting the position numerically might make sense.
NB the ‘Set Locator numerically’ command opens a modal dialog — nothing else can be accomplished until the dialog is dismissed.
⇧ SHIFT – ⌃ CONTROL – ⌥ OPTION – ⌘ COMMAND
- Global Commands


Set Left Locator numerically…


Set Right Locator numerically…


Set Left Locator by Playhead


Set Left Locator by Rounded Playhead


Set Punch In Locator by Playhead ⌃⌥⌘I


Set Punch In Locator by Rounded Playhead


Set Right Locator by Playhead


Set Right Locator by Rounded Playhead


Set Punch Out Locator by Playhead ⌃⌥⌘O


Set Punch Out Locator Point by Rounded Playhead


Set Locators by Regions/Events/Marquee


Set Locators by Regions/Events/Marquee and Enable Cycle ⌘U


Set Rounded Locators by Regions/Events


Set Rounded Locators by Regions/Events and Enable Cycle U


Set Locators and Play


Set Rounded Locators and Play


Set Rounded Locators and Cycle Play


Set Rounded Locators and Record


Set Rounded Locators and Cycle Record


Set Punch Locators by Regions/Events/Marquee ⌘F1


Set Rounded Punch Locators by Regions/Events


Set Punch Locators by Cycle Locators


Toggle Auto Set Locators


Set Locators by Marker and Enable Cycle ⌃⌥C


Set Locators by Previous Marker and Enable Cycle ⌃⌥,


Set Locators by Next Marker and Enable Cycle ⌃⌥.


Go to Previous Marker And Set Locators ⌥,


Go to Next Marker And Set Locators ⌥.