Live Loops: Show Length as Position — Logic Pro keyboard command of the day (KCotD)

  Live Loops: Show Length as Position

Display the length of the selected cell as positions in bars and beats. A one bar cell has a length of 1 with cell start position of 1 1 and cell end position of 2 1.

I think learning how to translate Ableton Live commands and actions into Live Loops commands and actions might be a very good way to dive in to Live Loops…

Change loop settings for cells in Live Loops for Logic Pro — Apple Support

Cell Length appears as Cell End, Loop Length appears as Loop End, and both show a position value.

Select Playing Cells — Logic Pro keyboard command of the day (KCotD)

  Select Playing Cells

Select all of the cells that are currently playing. I can imagine using this command to prepare to completely stop a Live Loop playback.

Edit Live Loops cells in Logic Pro — Apple Support

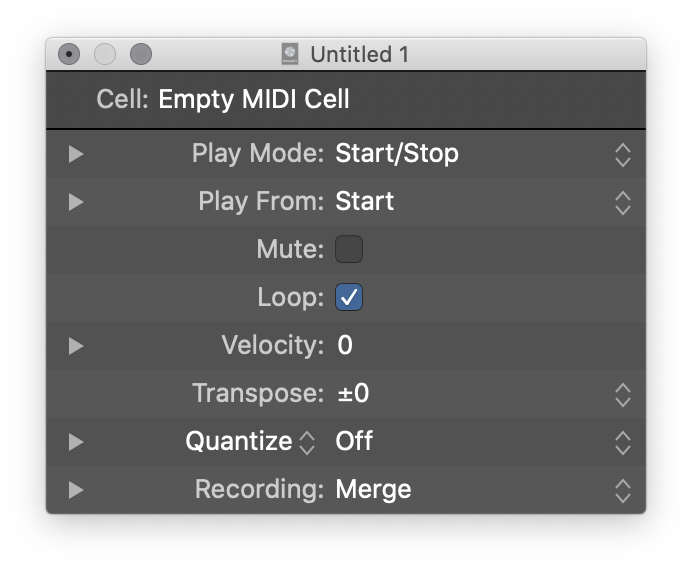
Parameters for selected cells appear in the Cell inspector, which replaces the Region inspector when cells are selected. When you select a single cell, the title bar of the Cell inspector shows the cell name; when you select multiple cells, the title bar shows the number of selected cells.

#KCotD

Copy to Live Loops: Transforming regions into cells in Logic Pro — 9to5Mac

Copy to Live Loops: Transforming regions into cells in Logic Pro — 9to5Mac

Today we are taking a look at the copy to Live Loops function and transforming your regions into cells. While we previously explored some of the more performance-based applications of Launchpads and Live Loops, arguably the most obvious use for Apple’s grid-based production environment is in arrangement. You can easily and quickly experiment with transitions from one part to any other without having to start dragging and dropping huge, unwieldy chunks of regions around. Sure, that’s nothing some Marquee tool or skip/cycle wizardry can’t handle on the regular timeline, but there’s really no comparing that to the musical immediacy and hands-on immersion of triggering these sections with a single Launchpad button, all-synced to the timeline and without having to commit to anything until you’ve experienced the change.

Logic Pro Live Loops performance and sound design — 9to5Mac

Logic Pro Live Loops performance and sound design — 9to5Mac:

We are checking in today to talk about Live Loops performance, sound design, and composition. The obvious application of Novation’s Launchpad integration with Apple’s Live Loops has to be the ability to trigger various vertical slices of a song project in order to rearrange it or just simply perform and record new versions of the original idea. But it is the more creative side of things we are particularly interested in, taking collections of our musical parts not just to alter the arrangement of the verses and choruses but also to create layered sounds and rhythmic ideas that can result in entirely new song ideas/audio resources. Today’s Logic Pros Live Loops Launchpad Diary is here to explore some of the elements and functionality to best accomodate this kind of creative approach.

Extend Cell, or Track Selection Down ⇧↓ — Logic Pro keyboard command of the day

  Extend Cell, or Track Selection Down    ⇧↓

Adds the next cell or track to the selection. I need to remember this while working with mix preparations.

Edit Live Loops cells in Logic Pro — Apple Support

You can arrange and edit cells in the Live Loops grid much as you do when working with regions. Basic functions to cut, copy, paste, move, or delete cells are similar to the equivalent functions for regions in the Tracks area.

Parameters for selected cells appear in the Cell inspector, which replaces the Region inspector when cells are selected. When you select a single cell, the title bar of the Cell inspector shows the cell name; when you select multiple cells, the title bar shows the number of selected cells.

Select tracks in Logic Pro — Apple Support

You can select multiple tracks. When multiple tracks are selected, the first selected track is the focused track. Some operations, such as choosing a patch in the Library, only affect the focused track when multiple tracks are selected.

When multiple tracks are selected, the track number of the focused track also appears selected (lighter gray color) on the left edge of the track header, unlike the other selected tracks.

NB Extending the selection of channels in the mixer works in a similar fashion using the left and right arrow keys. Select a channel, use shift-left and shift-right to extend the selection. Interestingly the extension is from the focused track, so using these commands extends selection from the focused track. De-selecting requires a shift-click.