Logic Pro X keyboard command of the day. #LogicProX @StudioIntern1
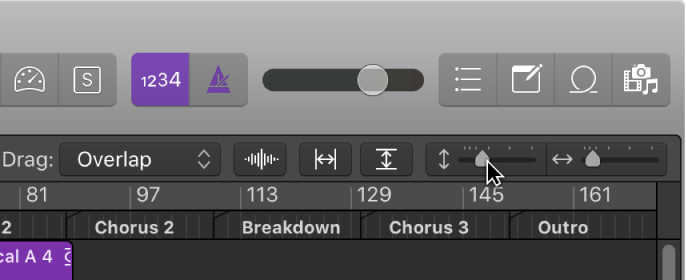
Toggle Vertical Auto Zoom
I am very bad at using the zoom controls in Logic. I always find my view at the wrong zoom level. I have different screensets that I use to try and keep my zoom controlled. All to no avail.
What I think I want is for Logic to understand what I want to do. What I probably do is use the marquee tool to select my area of interest and then zoom the track(s) to an appropriate level.
This command controls the auto zoom button at the top of the arrange window — the one with the vertical arrows. My default screenset has both horizontal and vertical auto zoom buttons engaged. I should try working differently.
I just changed my secondary tool (hold down command) to the zoom tool. Dragging across an area of a track with the zoom tool while option is held down does pretty much what I want it to.
Since I have the marquee tool enabled in the lower half of a track I don’t really need it in the secondary tool slot.
Lots of practice required.
- Use marquee tool to select area
- Set locators by marquee — ⌘U
- Zoom to fit locators and store Navigation Snapshot — ⌃⇧Z
Now to discover what “Navigation Snapshot” is all about.
Navigation back/forward — ⌥Z / ⌥⇧Z
Toggles between the zoomed section that I get with the 3 steps from above. This works.
“Individual Track Zoom Reset for All Tracks” — ⌃⌥⇧⌘⌫
Zoom windows — Logic Pro X:
When you zoom in or out, the top-left (and selected) event or region remains in the visible area of the screen. If no selected region or event is visible, zooming is centered around the playhead. If the playhead isn’t visible, the current center of the window is retained.
You can store three different zoom settings for each window using the Save as Zoom 1–3 key commands. Use the Recall Zoom 1–3 key commands to recall your zoomed settings. These commands only apply to the active window or window area.
⇧ SHIFT – ⌃ CONTROL – ⌥ OPTION – ⌘ COMMAND


