Set Locators by Previous Marker and Enable Cycle ⌃⌥, — Logic Pro X keyboard command of the day

Logic Pro X keyboard command of the day. #LogicProX @StudioIntern1

  Set Locators by Previous Marker and Enable Cycle    ⌃⌥,

Today it’s like we have a theme. Yesterday we reviewed “Go to Previous Marker”. I had a lot to say about using markers for making notes, keeping track of places where work needs to be done, etc.

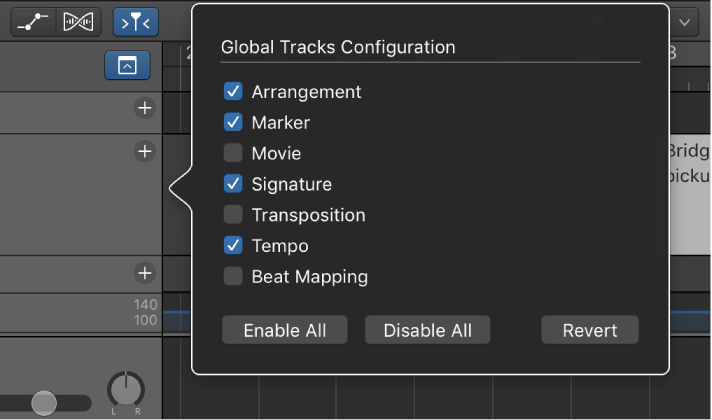
I need to get better at describing/defining “arrangement” — things like Intro, Chorus, Verse, Bridge — and create the Arrangement track as well. The Arrangement probably won’t change much during mixing. Markers will probably change or be added to after every mix review.

The previous marker is determined by the position of the locators. If the locators are at the beginning then selecting the “previous” marker actually selects the first marker.

All of these navigation tools reinforce my efforts to “map out” what it is I am actually working with. A lot like Dr. Billie Rae Erling’s “look at the piece of music from 50,000 feet and figure out where it is going”.

⇧ SHIFT – ⌃ CONTROL – ⌥ OPTION – ⌘ COMMAND
Go to Previous Marker — Logic Pro X keyboard command of the day

Logic Pro X keyboard command of the day. #LogicProX @StudioIntern1

  Go to Previous Marker

Markers are handy things. I try to make it a point to create a marker track for a mix, and to place markers at points that stand out to me. During an initial listening pass I simply create a marker so I can return later. It is almost easy to create a marker and enter a bit of text to describe what is of interest, but attempting to type notes during the first listen can make me miss an important point.

Lots of ways to move around using markers. We can have different marker sets as well. I can make notes about a recording, mix it, and add a new marker set at each phase of the mix. A handy way to incorporate feedback in the project with a useful tool — a location in the project.

Navigating between markers is very easy on the X-Touch — press the MARKER button and use the FAST FWD or REWIND buttons.

Mackie Control Marker button overview — Control Surfaces Help:

Press the MARKER button to activate one of three marker modes: Small Marker mode, Large Marker mode, and Temporary Marker mode. You can use these modes to create or delete markers and jump to markers in your project.

I will be using markers to make notes as I work through “training” videos.

⇧ SHIFT – ⌃ CONTROL – ⌥ OPTION – ⌘ COMMAND

- Global Commands
Create Marker ⌥'
Create Marker without rounding ⌃⌥'
Create Marker for Selected Regions ⌥⇧'
Delete Marker ⌥⌫
Open Marker List ⌃⌥⇧8⃣
Open Marker Text
Set Locators by Marker and Enable Cycle ⌃⌥C
Set Locators by Previous Marker and Enable Cycle ⌃⌥,
Set Locators by Next Marker and Enable Cycle ⌃⌥.
Go to Previous Marker
Go to Next Marker
Go to Previous Marker And Set Locators ⌥,
Go to Next Marker And Set Locators ⌥.
Go to Marker Number… ⌥/
Rename Marker ⇧'
Go to Marker Number 1

Go to Marker Number 20
Create Arrangement Marker
Show/Hide Marker List
Create Scene Markers (Auto Range)
Remove Scene Markers (Auto Range)

- Views showing Time Ruler
Show/Hide Marker Track ⇧⌘K
Show/Hide Marker Track Only '

Remove Overlaps \ — Logic Pro X keyboard command of the day

Logic Pro X keyboard command of the day. #LogicProX @StudioIntern1

  Remove Overlaps    \

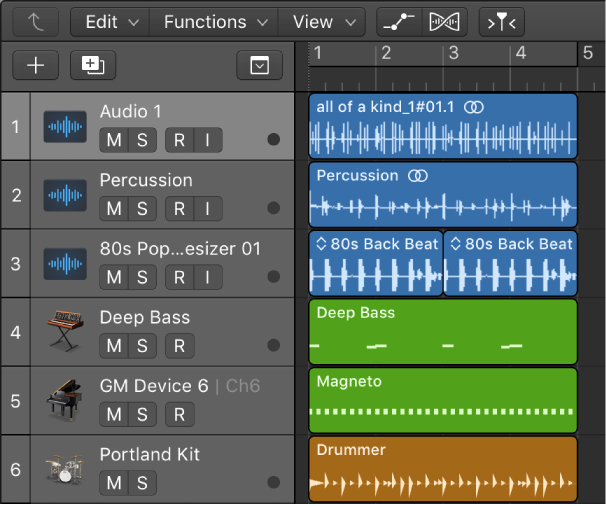
Removing overlaps is essentially the same as the “Trim Region” commands. If there are no overlapping regions the command changes nothing.

Resize regions in the Tracks area — Logic Pro X:

Remove overlaps between regions

Select the overlapping regions, or select all regions on the track by clicking the track header.

Choose Edit > Trim > Remove Overlaps (or press \).

Where the selected regions overlap, the length of the left (earlier) region is reduced to remove the overlap.

⇧ SHIFT – ⌃ CONTROL – ⌥ OPTION – ⌘ COMMAND
- Main Window Tracks
Trim Region End to Next Region ⇧\
Trim Region Start to Previous Region
Trim Regions to Fill within Locators ⌥\
Trim Region Start to Previous Transient ⌃⇧[
Trim Region Start to Next Transient ⌃⇧]
Trim Region End to Previous Transient ⌃[
Trim Region End to Next Transient ⌃]

Default Syncopation — Logic Pro X keyboard command of the day

Logic Pro X keyboard command of the day. #LogicProX @StudioIntern1

  Default Syncopation

Alters notation to minimize ties between notes and odd combinations of smaller notes. Reminiscent of “swinging” eighth notes — two eighth notes are played as a dotted eighth and a sixteenth.

Syncopation — Logic Pro X:

Syncopation involves rhythmic patterns that go against the normal rhythm as defined by the time signature. The Syncopation setting helps you produce a cleaner-looking score by displaying syncopated notes with fewer ties or subdivisions.

Change the syncopation or interpretation of notes — Logic Pro X:

By default, note syncopation and interpretation match the settings chosen in the Region inspector. You can change interpretation settings for individual notes to improve readability.

⇧ SHIFT – ⌃ CONTROL – ⌥ OPTION – ⌘ COMMAND

Select Equal Colored Regions/Events ⇧C — Logic Pro X keyboard command of the day

Logic Pro X keyboard command of the day. #LogicProX @StudioIntern1

  Select Equal Colored Regions/Events    ⇧C

If everything is set to the default colors you can use this to select all audio, all MIDI, etc. Once you start arranging things to group by color this provides an easy way to focus on a group. I usually group things with a summing stack with selected busses.

I will experiment with coloring as I start working on larger mixing projects.

⇧ SHIFT – ⌃ CONTROL – ⌥ OPTION – ⌘ COMMAND