Snap Automation Mode: 1/2 Triplet (1/3) — Logic Pro X keyboard command of the day

Logic Pro X keyboard command of the day. #LogicProX @StudioIntern1

  Snap Automation Mode: 1/2 Triplet (1/3)

When creating things “in tempo” it can be very valuable to apply automation at the proper place in performance.

Can I automate articulations? Doesn’t appear to be possible (or maybe even reasonable.)

Snap automation to grid positions — Logic Pro X

You can snap track automation to grid positions. You can choose if you want automation to automatically use the division value chosen in the Snap menu, or you can choose a different snap value for automation.

⇧ SHIFT – ⌃ CONTROL – ⌥ OPTION – ⌘ COMMAND

Scissors Tool I — Logic Pro X keyboard command of the day

Logic Pro X keyboard command of the day. #LogicProX @StudioIntern1

  Scissors Tool    I

I usually split regions by positioning the playhead at the start or end of the segment and using the ‘Split Regions/Events at Playhead ⌘T’. That’s a bit fiddly. I am learning to use the much? easier ‘Split Regions/Events at Locators or Marquee Selection ⌃⌘T’. It’s pretty quick to zoom out and use the Marquee tool to select the areas of interest.

I suspect that if I spent more time making beats and loops that I would become a real fan of the Scissors tool.

The ‘actual’ key command is T I — T to open the Tool menu, I to choose Scissors.

Split regions in the Tracks area — Logic Pro X

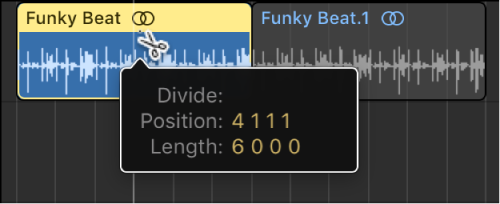
Split regions using the Scissors tool

Common tools — Logic Pro X

Scissors tool
Use the Scissors tool to split regions and events, allowing individual sections to be copied, moved, or deleted.

⇧ SHIFT – ⌃ CONTROL – ⌥ OPTION – ⌘ COMMAND

Open Instrument — Logic Pro X keyboard command of the day

Logic Pro X keyboard command of the day. #LogicProX @StudioIntern1

  Open Instrument

EXS24 command. Very large topic. Some day if I decide to do sampling or make sample-based instruments I will dive in. This should also include Alchemy.

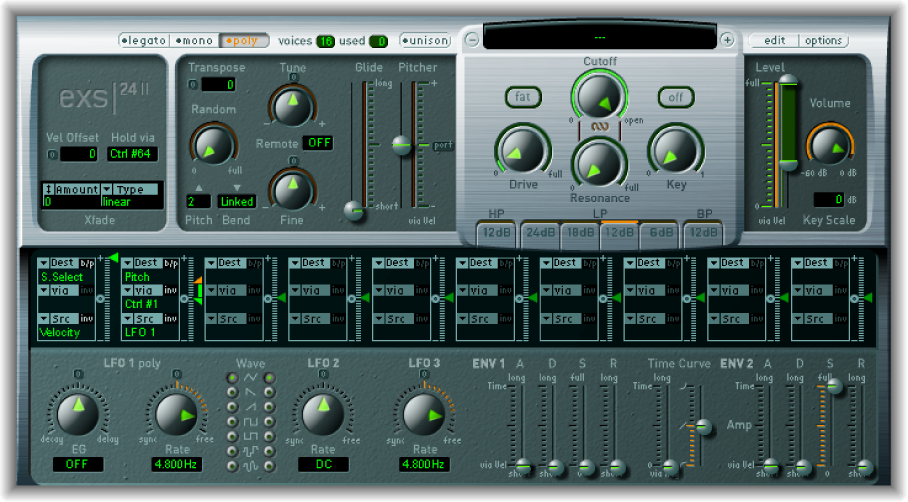
EXS24 mkII overview — Logic Pro X

EXS24 mkII is a software sampler. It plays back audio files, called samples, that you load into it. These samples are combined into tuned, organized collections called sampler instruments. Because sampler instruments are based on audio recordings, they are ideally suited to emulating real instruments such as guitars, pianos, and drums.

Alchemy overview — Logic Pro X

Alchemy is an easy-to-use, yet powerful sample manipulation synthesizer. It offers numerous real-time performance controls and an extensive preset library.

⇧ SHIFT – ⌃ CONTROL – ⌥ OPTION – ⌘ COMMAND

Open Environment Mixer… — Logic Pro X keyboard command of the day

Logic Pro X keyboard command of the day. #LogicProX @StudioIntern1

  Open Environment Mixer…

There isn’t much that can only be done in the Environment Mixer since virtually everything is made available in the Arrange window Mixer view and the Mixer window.

The only practical use I have found — so far — is to create channel strips for audio inputs. You can add insert plugins and sends to the input channel, effectively pre-processing input that gets recorded. Print EQ, compression, and gain!

Channel strip objects overview — Logic Pro X

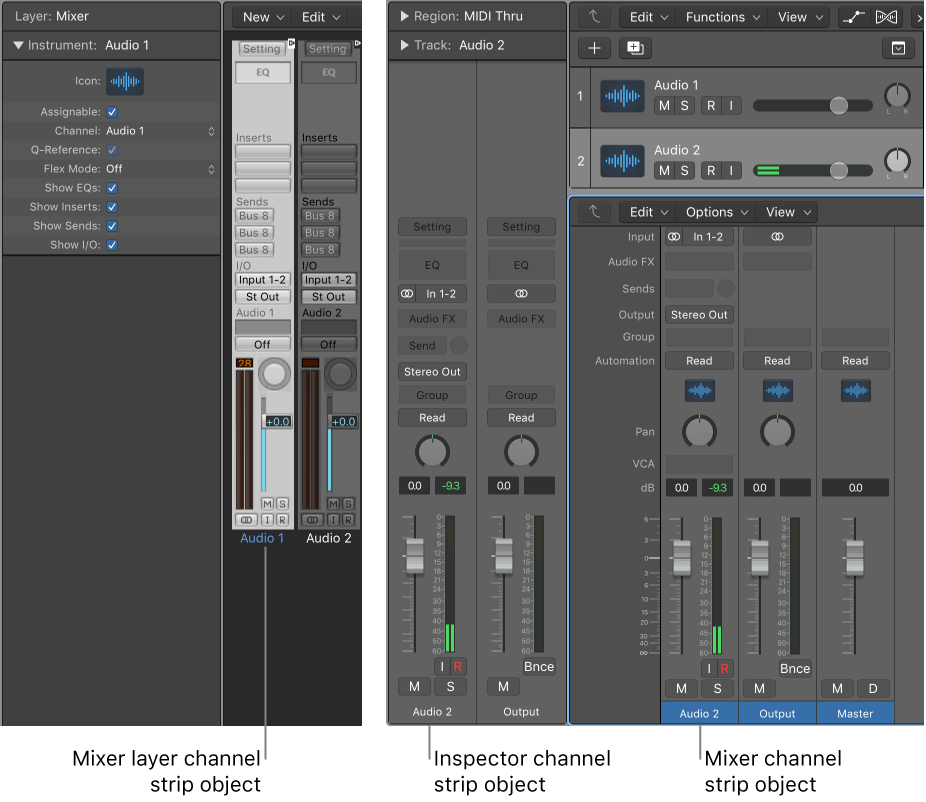
The Environment’s channel strip object is the building block of the Environment’s Mixer layer, the Logic Pro Mixer, and the inspector’s channel strips. For details about channel strip types, see Channel strip types.

⇧ SHIFT – ⌃ CONTROL – ⌥ OPTION – ⌘ COMMAND

Toggle Vertical Auto Zoom — Logic Pro X keyboard command of the day

Logic Pro X keyboard command of the day. #LogicProX @StudioIntern1

  Toggle Vertical Auto Zoom

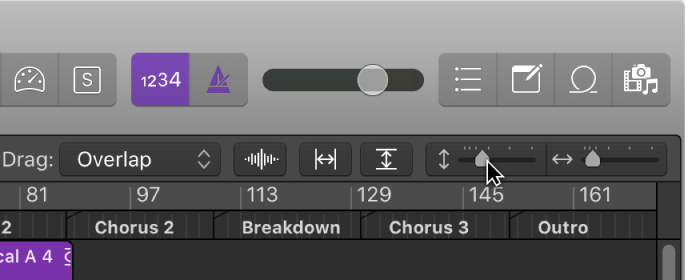
Available as a button in the track displays. I zoom in and out (vertical and horizontal) a bit. I should do it more. I haven’t really spent the time learning zooming, but have found a great use for keypad numbers (I rescued them from jumping to numbered marker positions).

The 3 saved zoom settings are KP1,KP2, and KP3. Setting them is accomplished with ⌃KP1, ⌃KP2, and ⌃KP3. This makes the workflow so much easier!

Zoom windows — Logic Pro X

When you zoom in or out, the top-left (and selected) event or region remains in the visible area of the screen. If no selected region or event is visible, zooming is centered around the playhead. If the playhead isn’t visible, the current center of the window is retained.

⇧ SHIFT – ⌃ CONTROL – ⌥ OPTION – ⌘ COMMAND

Command    Key Touch Bar
- Global Commands
Zoom Window ⌃⌘M

- Various Windows
Set Zoom Tool
Zoom Horizontal Out ⌘←
Zoom Horizontal In ⌘→
Zoom Vertical Out ⌘↑
Zoom Vertical In ⌘↓
Recall Zoom 1 1
Recall Zoom 2 2
Recall Zoom 3 3
Save as Zoom 1 ⌃1
Save as Zoom 2 ⌃2
Save as Zoom 3 ⌃3
Zoom to fit Selection vertically and horizontally, store Navigation Snapshot
Zoom to fit Selection horizontally, store Navigation Snapshot
Zoom to fit Selection vertically, store Navigation Snapshot
Zoom to fit Locators, store Navigation Snapshot ⌃⇧Z
Zoom to fit All Contents, store Navigation Snapshot ⇧⌘F12
Toggle Zoom to fit Selection or All Contents Z
Toggle Horizontal Auto Zoom
Toggle Vertical Auto Zoom

- Main Window Tracks
Individual Track Zoom In ⌃⌥⌘↓
Individual Track Zoom Out ⌃⌥⌘↑
Toggle Individual Track Zoom ⌃⌥⌘Z
Toggle Zoom Focused Track ⌃Z
Reset Individual Track Zoom ⌃⌥⌘⌫
Individual Track Zoom Reset for All Tracks
Waveform Vertical Zoom x 1 (Normal)
Waveform Vertical Zoom x 2
Waveform Vertical Zoom x 4
Waveform Vertical Zoom x 8
Waveform Vertical Zoom Out ⌘-
Waveform Vertical Zoom In ⌘=
Toggle Waveform Vertical Zoom

- Smart Tempo Editor
Zoom All ↑

- Tools Menu
Zoom Tool Y