Logic Pro X keyboard command of the day. #LogicProX @StudioIntern1
Attach Symbol: Jazz 2
Used in the Score Editor. Only available as a key command (not in any menu). I previously posted a scoring command in one of the first entries — “Attach Symbol: Pizzicato” — which basically punted the explanation. I learn.
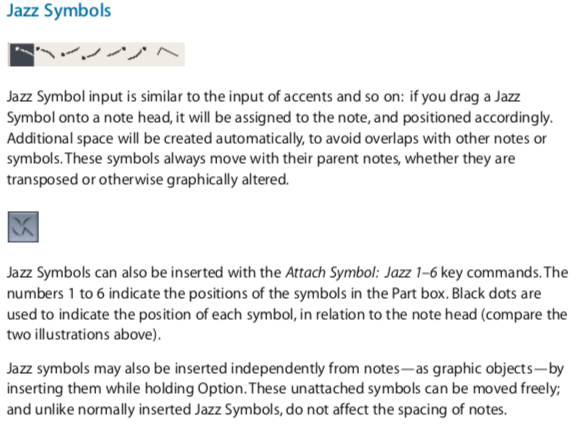
I have searched through the available documentation for Logic Pro X and can find nothing that explains what this command does, or what are the symbols labelled “Jazz”. Nothing. Crickets. I continued my search on the internet (where I discovered my lack of proper work, see above link) and found some interesting pointers. The first real clue came from the “Logic Express 7 — User Manual” in the discussion of the Part Box. Lots of words about palettes and floating palettes. Hmmm. Not happening in Logic Pro X.

Note that there are 7 symbols, but only 6 commands. Odd.
I can now state that today’s command will attach the first Jazz symbol (highlighted in the picture) to the note(s) selected in the score window. Ta-da!
There is a decent description of the Part Box and how to use it in the Logic Pro 9 documentation as well. It is basically the same, with the same methods for use.
The Part Box changed dramatically in Logic Pro X! It doesn’t work the same way. Apparently all of the visual cues from Logic 9 documentation — screenshots of sections in the part box — were removed and replaced with some different textual description of what is where and what it does.
A first-time user of Logic will be utterly lost. No names for the palettes. The revenge of the icon driven user interface. Labels (at least show some text if I hover over it) could be provided.
I am grumpy. I need to “check my work” and make sure that the new, iBooks-only, version of the documentation is incomplete…back in a moment.
Wow…
Reset note attributes
You can reset all note attributes to their default settings if you decide you don’t want to keep your changes. When resetting note attributes, be aware that all symbols directly attached to notes (accents, fermatas, jazz symbols, and so on) are deleted.
Excerpt From: Apple Inc. “Logic Pro X User Guide.” Apple Books. https://itunes.apple.com/us/book/logic-pro-x-user-guide/id960809726?mt=11
Pop/Jazz (3/5/7-all): 5ths, 3rds, and 7ths are changed in this mode. It’s great for Pop and Jazz styles, especially when using sustained chords. It’s less suitable for polyphonic music, as the detuning of the natural 7th is significant. This mode should always be used with a Depth of 90% or 100%, as other values render the natural 7th acoustically ineffective.
Excerpt From: Apple Inc. “Logic Pro X User Guide.” Apple Books. https://itunes.apple.com/us/book/logic-pro-x-user-guide/id960809726?mt=11
Above you will see the three occurrences of the word “jazz” in the latest documentation. First reference to jazz symbols is in the bit about what gets deleted when you reset note attributes.
Kind of unfortunate. I will be keeping my old Logic documentation (whatever I can scour) so I might be able to take full command of the current version.
⇧ SHIFT – ⌃ CONTROL – ⌥ OPTION – ⌘ COMMAND
Command    Key Touch Bar


- Score Editor


Attach Symbol: Jazz 1


Attach Symbol: Jazz 2


Attach Symbol: Jazz 3


Attach Symbol: Jazz 4


Attach Symbol: Jazz 5


Attach Symbol: Jazz 6


