Create Flex Marker At Previous Transient — Logic Pro X keyboard command of the day

Logic Pro X keyboard command of the day. #LogicProX @StudioIntern1

  Create Flex Marker At Previous Transient

I think I would use the methods described in the user guide (see below) to create the three Flex Markers with a simple click as opposed to only creating one of them. Difficult to say, very easy to use and manipulate.

Time stretch using flex markers — Logic Pro X

In the Tracks area, you edit the timing of audio material using flex markers. After adding flex markers to an audio region, you use them to time stretch—compress or expand—the audio material. The boundaries within which this is done are determined by the preceding and following flex markers, or the region start and end positions if there are no preceding and following flex markers.

⇧ SHIFT – ⌃ CONTROL – ⌥ OPTION – ⌘ COMMAND

- Main Window Tracks
Create Flex Marker At Playhead Position F13
Create Flex Marker At Previous Transient F14
Create Flex Marker At Next Transient F15
Slice at Flex Markers

Create 1 Track Automation Point at Region Borders ⌃⇧⌘1 — Logic Pro X keyboard command of the day

Logic Pro X keyboard command of the day. #LogicProX @StudioIntern1

  Create 1 Track Automation Point at Region Borders  ⌃⇧⌘1

Creates automation points that can be used to change the automation of the entire region. Create the points, grab the “curve” and move it.

Region-based vs. track-based automation — Logic Pro X

Logic Pro offers two types of automation: track-based automation, and region-based automation. Track-based automation can be applied to the entire track, from the beginning to the end of your project. Region-based automation only applies to the specific region the automation parameters are connected to. With track-based automation, if you re-record, move or copy regions (either to another point on the same track, or to another track) the automation data remains tied to the initial point on the track in which it was created. With region-based automation, if you re-record the region, the automation is lost; if you move or copy the region (either to another point on the same track, or to another track) the automation remains with the region. Region-based automation is particularly useful when you are automating instrument parameters.

⇧ SHIFT – ⌃ CONTROL – ⌥ OPTION – ⌘ COMMAND

Autoscroll to Selection — Logic Pro X keyboard command of the day

Logic Pro X keyboard command of the day. #LogicProX @StudioIntern1

  Autoscroll to Selection

The normal behavior of the Mixer window is to scroll to reveal the channel strip of a track that is selected in the Arrange window. If you want the mixer to remain where it is, possibly focused on AUX strips, when you select a track in the Arrange window you need to turn off Autoscroll to Selection.

The command is not mapped to any key. The command is located in the View menu Mixer windows. The command is a “toggle”. Mapping a key command allows you to toggle Autoscroll on and off.

What’s new in Logic Pro 10.4 — Logic Pro X

The responsiveness and performance of the Mixer is improved, particularly for projects with high channel strip counts. In addition, the Mixer provides several new capabilities, including creating a default channel strip configuration, disabling autoscrolling to the selected channel strip, and highlighting channel strips corresponding to a send or routing destination. In addition, selecting multiple channel strips also selects the tracks assigned to them.

⇧ SHIFT – ⌃ CONTROL – ⌥ OPTION – ⌘ COMMAND

Deselect All ⇧D — Logic Pro X keyboard command of the day

Logic Pro X keyboard command of the day. #LogicProX @StudioIntern1

  Deselect All   ⇧D

I keep looking for this command every time I have the entire window filled with selected regions. No convenient place to “click on an empty area” of the Arrange window. I should practice using this.

2021-04-22 — as far as I can tell the key assignment changed from option-shift-D to shift-D

⇧ SHIFT – ⌃ CONTROL – ⌥ OPTION – ⌘ COMMAND

Go to Marker Number 14 — Logic Pro X keyboard command of the day

Logic Pro X keyboard command of the day. #LogicProX @StudioIntern1

  Go to Marker Number 14

Another of the numbered marker commands. Not happening for me. I name my markers or use the forward/backward marker commands and buttons on the X-Touch.

Markers overview — Logic Pro X

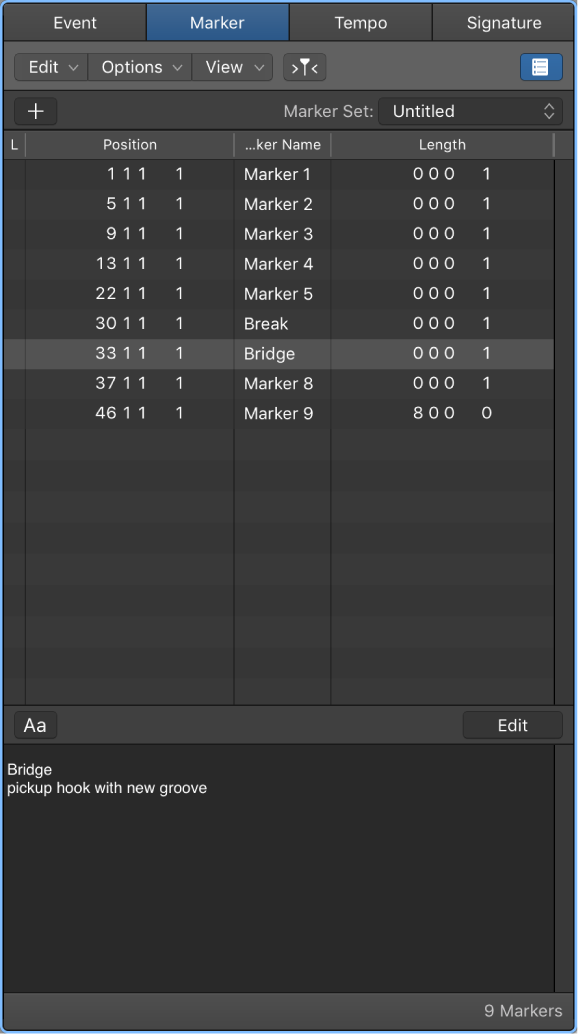
There are several ways to create and edit markers in Logic Pro. You can view and edit markers in the following work areas:

Navigate using markers — Logic Pro X

You can navigate through your project using markers. This is useful when you want to quickly jump to, and edit, regions or events at a specific position in your project, for example.

⇧ SHIFT – ⌃ CONTROL – ⌥ OPTION – ⌘ COMMAND