Collapse/Expand All Inspector Tiles — Logic Pro X keyboard command of the day

  Collapse/Expand All Inspector Tiles

This is a very handy tool. The typical way to collapse/expand things is to click on the disclosure triangle by the name e.g., “Quick Help”, “Region”, and “Track”. If I want to work with the channel strip inspector I often have to move my mouse around and collapse inspectors that are hiding the top of the channel strip. I can move the mouse to the closest inspector and option-click the handle to collapse/expand all the inspectors.

This is a nice additional way to “clear the deck”.

Sometimes I wish I could rearrange the order of the inspectors.
Optimize File(s)… ⌃O — Logic Pro X keyboard command of the day

  Optimize File(s)…    ⌃O

Removes unused audio. It reads like if I have a file with 5 regions and I delete the middle 2 then a new audio file will be created that is the 3 remaining regions. This is not the case in my simple experiments.

General advice is — do not use this command — whatever savings might be achieved isn’t worth the potential of destroying the audio files in your project.

Add and delete audio files in Logic Pro — Apple Support

Logic Pro determines which (file) segments are not contained in any of the regions used in the Tracks area. These segments are deleted, and the remaining portions of the audio file are retained and aligned side-by-side in the file. The regions in the Project Audio Browser are redefined and the project is automatically saved.

Create 2 Track Automation Points at Every Region Border ⌃⌘2 — Logic Pro X keyboard command of the day

  Create 2 Track Automation Points at Every Region Border    ⌃⌘2

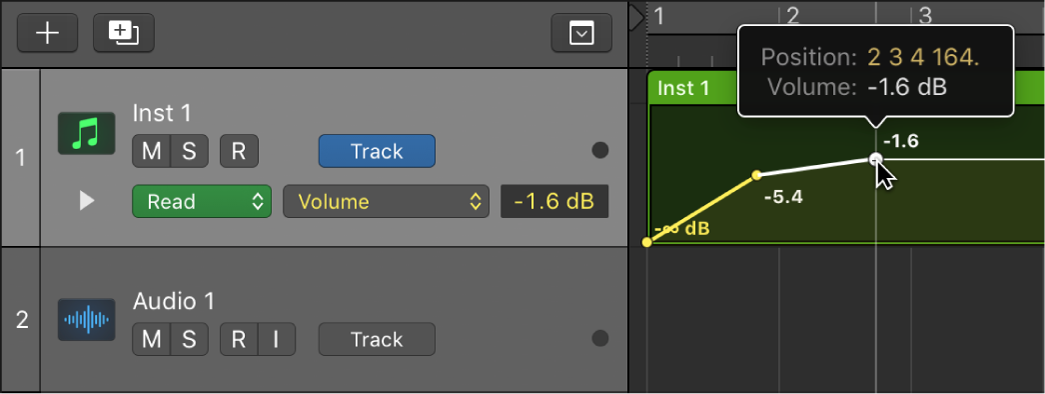
Creates two automation points at every region border. Essentially this creates an automation curve that will effect each region when moved. Compare that to one automation point which will change the automation for the entire track.

Add and adjust automation points in Logic Pro — Apple Support

To create changes over time to volume, pan, and effects settings, you add automation points to a track’s automation curve at different places, and then adjust the automation points so the value of the setting changes. You can adjust automation points by moving them up or down to a new value or by moving them left or right to a new point in the timeline. Numerical values are displayed alongside each automation point. You can also raise or lower the value of MIDI parameters associated with notes in instrument tracks or Drummer tracks. Note and numerical values are displayed alongside each MIDI data point. You can also add automation points at selection area or region borders.

Set Locators/Loop by Regions/Events/Marquee and Enable Cycle/Loop ⌘U — Logic Pro X keyboard command of the day

  Set Locators/Loop by Regions/Events/Marquee and Enable Cycle/Loop  ⌘U

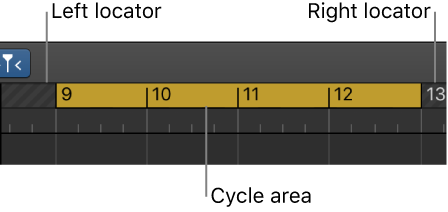
Set the locators based on the current selection. I usually prefer the action of setting the locators by command as opposed to using the auto-set locators.

Use the cycle area in Logic Pro — Apple Support

Set Locators by Regions/Events/Marquee: Sets the locators at the start and end points of the selected regions or events, or the marquee selection.

Select Members of Group 44 — Logic Pro X keyboard command of the day

  Select Members of Group 44

One the phantom group commands — there are currently only 32 groups available.

Overview of groups in Logic Pro — Apple Support

Prior to mixing, you may find it useful to define some logical channel strip groups. You could, for example, group all drum channel strips under one drum group. This would allow you to control the group meters (volume, pan, mute, solo, sends, and so on) using a single control, while still maintaining the relative parameter values of each channel strip.