New Chord Memorizer — Logic Pro X keyboard command of the day

Logic Pro X keyboard command of the day. #LogicProX @StudioIntern1

  New Chord Memorizer

In the environment. This is a good place to lose a few hours some morning. Put a Chord Memorizer into the path and play with it.

Chord Memorizer Keyboard

Chord memorizer objects overview — Logic Pro X:

The easiest way to use a chord memorizer is to connect its output to the instrument that you want to play the chords through, and assign it to a track. You can, of course, place it anywhere else in the MIDI signal path.

⇧ SHIFT – ⌃ CONTROL – ⌥ OPTION – ⌘ COMMAND

Object Height +1 Pixel ⌥⇧↓ — Logic Pro X keyboard command of the day

Logic Pro X keyboard command of the day. #LogicProX @StudioIntern1

  Object Height +1 Pixel    ⌥⇧↓

Found in the Environment. I still don’t get it with the “down” arrow making something bigger. Sort of like computer chips using 1 for false and 0 for true…

The manual says use keyboard commands, but doesn’t list them 😉 The width commands make sense left arrow makes smaller, right arrow makes bigger.

Seems strange that documentation back to version 9 doesn’t actually list the keyboard commands.

Adjust the position and size of objects — Logic Pro X:

Use the following keyboard shortcuts to decrease or increase the width or height of selected objects by 1 pixel:

Object Width −1 Pixel

Object Width +1 Pixel

Object Height −1 Pixel

Object Height +1 Pixel

⇧ SHIFT – ⌃ CONTROL – ⌥ OPTION – ⌘ COMMAND

New Multi-Instrument — Logic Pro X keyboard command of the day

Logic Pro X keyboard command of the day. #LogicProX @StudioIntern1

  New Multi-Instrument

Located in the ‘New’ menu in the environment window. These days I only have one ‘real’ MIDI instrument, my PX330 digital piano. It is multi-timbral. I might find a use for working in the environment sometime.

⇧ SHIFT – ⌃ CONTROL – ⌥ OPTION – ⌘ COMMAND

Object Height +1 Pixel ⌥⇧↓ — Logic Pro X keyboard command of the day

Logic Pro X keyboard command of the day. #LogicProX @StudioIntern1

  Object Height +1 Pixel    ⌥⇧↓
 

Today I will search the online help instead of the user guide. Let’s see if I get quicker or different results.

Resize selected objects using key commands
Use the following key commands to decrease or increase the width or height of selected objects by 1 pixel:

Object Width −1 Pixel
Object Width +1 Pixel
Object Height −1 Pixel
Object Height +1 Pixel

A nice, direct link. Now the User Guide.

Same spot in the User Guide. Working in the Environment.

⇧ SHIFT – ⌃ CONTROL – ⌥ OPTION – ⌘ COMMAND

Apply Buffer Template to Definition — Logic Pro X keyboard command of the day

Logic Pro X keyboard command of the day. #LogicProX @StudioIntern1

  Apply Buffer Template to Definition
 

This appears in the ‘Options’ menu in the Environment window. The best that I can determine is that the “buffer” is actually the clipboard.

Someday I will find a decent tutorial that can help me learn to use the Environment, Big subject.

Environment overview
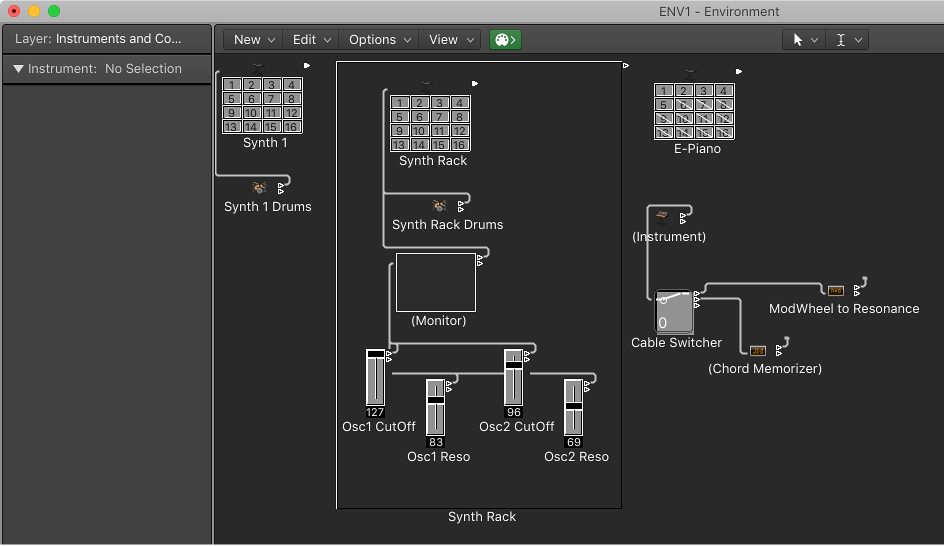
The Environment refers to the virtual environment of Logic Pro inside your computer. It provides a virtual view of your MIDI studio, giving you complete control over your MIDI setup, and includes the following objects.

Physical Input and Sequencer Input objects: Represent the physical MIDI inputs of your MIDI interface and the Logic Pro input.

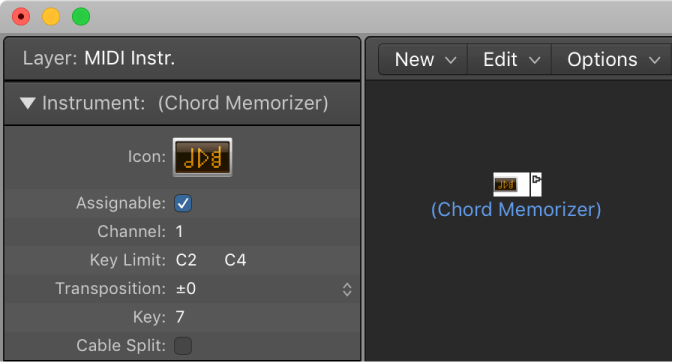
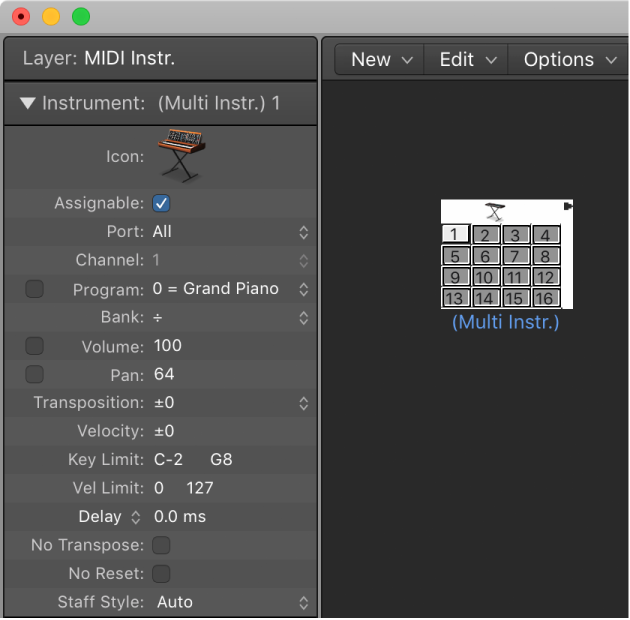
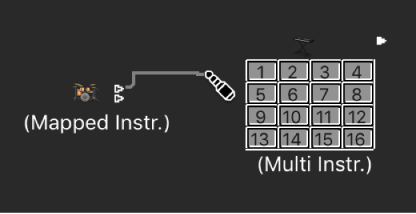
Instrument objects: Virtual representations of each MIDI device (synthesizers and samplers, for example) in your MIDI rig.

Faders, knobs, switches, and other objects: Used to create new data, or to control and modify the MIDI signal flow in real time.”

Excerpt From: Apple Inc. “Logic Pro X User Guide.” iBooks.

⇧ SHIFT – ⌃ CONTROL – ⌥ OPTION – ⌘ COMMAND