Region Automation: Control Change 28 — Logic Pro X keyboard command of the day

Logic Pro X keyboard command of the day. #LogicProX @StudioIntern1

  Region Automation: Control Change 28

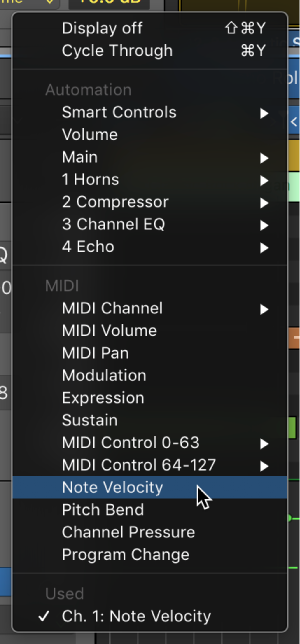
One of the Region Automations that has a command available for setting. With automation showing (press the A key) you click on the “Track” automation button to change it to “Region”. All 128 MIDI CC can be automated, as well as things in the Logic workspace.

Most of the MIDI CC automations actually insert the MIDI CC messages into the Event List.

Use the Automation/MIDI area in the Piano Roll Editor — Logic Pro X

Show region-based automation in the MIDI/Automation area

⇧ SHIFT – ⌃ CONTROL – ⌥ OPTION – ⌘ COMMAND

Four VCA Channel Applications — PreSonus Blog

A VCA is a useful tool. In Logic Pro X you can create a VCA with a “Folder Stack”.

Four VCA Channel Applications — PreSonus Blog

A VCA Channel has a fader, but it doesn’t pass audio. Instead, the fader acts like a gain control for other channels, or groups of channels. In some ways, you can think of a VCA Channel as “remote control” for other channels. If you assign a VCA to control a channel, you can adjust the channel gain, without having to move the associated channel’s fader. The VCA Channel fader does it for you.

Region Automation: Control Change 23 — Logic Pro X keyboard command of the day

Logic Pro X keyboard command of the day. #LogicProX @StudioIntern1

  Region Automation: Control Change 23

Program MIDI Control Change 23 for the selected region.

Drawing in MIDI CC messages using Region Automation can be far simpler than trying to insert events in the event list or adding them in the Step Editor.

Music Programming 301.

MIDI CC23 — called Control Change in Logic — is an undefined Continuous Controller. CC23 contains the MSB (most significant bits) of the control value. MIDI CC55 contains the LSB (least significant bits) or “fine control” values.

Control Change Messages (Data Bytes)

The following table lists all currently defined Control Change messages and Channel Mode messages, in control number order (adapted from “MIDI by the Numbers” by D. Valenti-Electronic Musician 2/88, and updated by the MIDI Manufacturers Association.) This table is intended as an overview of MIDI, and is by no means complete.

Show automation curves — Logic Pro X

Before you can add automation points to a track’s automation curves, you need to show the automation curves. Automation curves are displayed as colored curves and points on top of audio and MIDI regions across the track, running the length of the project. You can choose whether to view and edit automation across the track (track-based automation) or only within the track’s regions (region-based automation).

⇧ SHIFT – ⌃ CONTROL – ⌥ OPTION – ⌘ COMMAND
Snap Automation Mode: 1/64 Triplet (1/96) — Logic Pro X keyboard command of the day

Logic Pro X keyboard command of the day. #LogicProX @StudioIntern1

  Snap Automation Mode: 1/64 Triplet (1/96)

Events and time. The abstraction of note duration and interpretation is intriguing. I have seen 64th notes (hemisemidemiquaver) in scores, but I don’t think I’ve ever seen a 64th note triplet. The abstraction tends to break down about this point in the mapping. This is the point where I would be switching to SMPTE frames for alignment.

Snap automation to grid positions — Logic Pro X

You can snap track automation to grid positions. You can choose if you want automation to automatically use the division value chosen in the Snap menu, or you can choose a different snap value for automation.

⇧ SHIFT – ⌃ CONTROL – ⌥ OPTION – ⌘ COMMAND

While I was chasing down hemidemisemiquaver I read a bit about 128th notes on Wikipedia. This little gem was in the first paragraph. Hmmm.

Since human pitch perception begins at 20 Hz (1200/minute), then a 128th-note tremolo becomes a single pitch in perception at quarter note= 37.5 bpm.

Region Automation: Pitch Bend — Logic Pro X keyboard command of the day

Logic Pro X keyboard command of the day. #LogicProX @StudioIntern1

  Region Automation: Pitch Bend

One of the nice things about region automation is the ability to create MIDI events (they show up in the event list) using the pencil tool while working in the track/region context. Editing without using the Piano Roll or Event List.

Region-based vs. track-based automation — Logic Pro X

Logic Pro offers two types of automation: track-based automation, and region-based automation. Track-based automation can be applied to the entire track, from the beginning to the end of your project. Region-based automation only applies to the specific region the automation parameters are connected to. With track-based automation, if you re-record, move or copy regions (either to another point on the same track, or to another track) the automation data remains tied to the initial point on the track in which it was created. With region-based automation, if you re-record the region, the automation is lost; if you move or copy the region (either to another point on the same track, or to another track) the automation remains with the region. Region-based automation is particularly useful when you are automating instrument parameters.

Show automation curves — Logic Pro X

Before you can add automation points to a track’s automation curves, you need to show the automation curves. Automation curves are displayed as colored curves and points on top of audio and MIDI regions across the track, running the length of the project. You can choose whether to view and edit automation across the track (track-based automation) or only within the track’s regions (region-based automation).

⇧ SHIFT – ⌃ CONTROL – ⌥ OPTION – ⌘ COMMAND