Octave + 2 ⇧X — Logic Pro X keyboard command of the day

Logic Pro X keyboard command of the day. #LogicProX @StudioIntern1

  Octave + 2 ⇧X

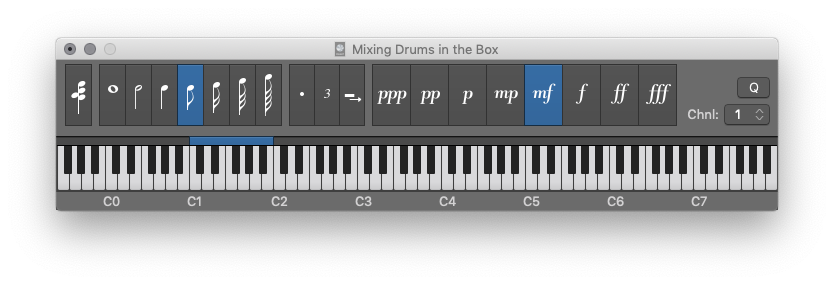
Move the Step Input keyboard focus up 2 octaves. This command does not appear to be documented, but moving a single octave is — the X without SHIFT.

The same is true for the Musical Typing keyboard.

The current octave is not synchronized between the Step Input keyboard and the Musical Typing keyboard.

Use step input recording techniques — Logic Pro X

To move down or up by octaves: Press Z or X.

⇧ SHIFT – ⌃ CONTROL – ⌥ OPTION – ⌘ COMMAND

Note “F” F — Logic Pro X keyboard command of the day

Logic Pro X keyboard command of the day. #LogicProX @StudioIntern1

  Note “F”    F

Don’t be fooled. Note “F” is the only “Note” command that actually matches. The “note” keys are arranged as an octave on a piano keyboard. The keys are the same in the ‘Step Input’ keyboard and the ‘Musical Typing’ keyboard. Typing a note key adjusts the octave on the “piano keyboard” so the note is at the center of the octave. You can change the octave by clicking on one of the piano keys in the window. Very handy.

Use step input recording techniques — Logic Pro X

Step input allows you to insert MIDI notes when you’re not recording in real time. You can use step input to create note runs that may be too fast for you to play or to replicate sheet music that’s too difficult for you to play.

⇧ SHIFT – ⌃ CONTROL – ⌥ OPTION – ⌘ COMMAND

- Step Input Keyboard
Note “C” A
Note “C#” W
Note “D” S
Note “D#” E
Note “E” D
Note “F” F
Note “F#” T
Note “G” G
Note “G#” Y
Note “A” H
Note “A#” U
Note “B” J
Next note will be sharp ⇧3
Next note will be flat ⇧B
1/1 Note 1
1/2 Note 2
1/4 Note 3
1/8 Note 4
1/16 Note 5
1/32 Note 6
1/64 Note 7
1/128 Note 8
Dotted note values on/off 0
Quantize note starts On/Off Q

Show/Hide Tempo Track Only — Logic Pro X keyboard command of the day

Logic Pro X keyboard command of the day. #LogicProX @StudioIntern1

  Show/Hide Tempo Track Only

Sometimes we just want to see a single one of the ‘Global’ tracks. I don’t do much work where the Tempo track is something that I pay attention to.

I am reminded that I can ‘Show/Hide Marker Track Only’ which would certainly be useful to me in my work.

I need to remember that Global tracks can be different in different windows, and in different areas. Global track views are saved with screensets.

It is time for me to pay some serious attention to screensets and the kind of work I want to accomplish in each of them. Speed tools are a good thing.

Global tracks overview — Logic Pro X

Logic Pro includes a set of global tracks that you can use to control different aspects of the overall project. You can show global tracks in the Tracks area and in the time-based editors (including the Audio Track Editor, Piano Roll Editor, and Step Editor). When you show the global tracks, they appear below the ruler for that particular area.

⇧ SHIFT – ⌃ CONTROL – ⌥ OPTION – ⌘ COMMAND

- Views Showing Time Ruler
Show/Hide Background Grid Lines
Show/Hide Global Tracks G
Show/Hide Arrangement Track ⇧⌘A
Show/Hide Marker Track ⇧⌘K
Show/Hide Movie Track ⇧⌘O
Show/Hide Signature Track
Show/Hide Transposition Track ⇧⌘X
Show/Hide Tempo Track ⇧⌘T
Show/Hide Beat Mapping Track ⇧⌘B
Show/Hide Arrangement Track Only
Show/Hide Marker Track Only '
Show/Hide Movie Track Only
Show/Hide Signature Track Only
Show/Hide Transposition Track Only
Show/Hide Tempo Track Only ⌥⇧⌘T
Show/Hide Beat Mapping Track Only
Toggle Individual Track Zoom ⌃⌥⌘Z — Logic Pro X keyboard command of the day

Logic Pro X keyboard command of the day. #LogicProX @StudioIntern1

  Toggle Individual Track Zoom    ⌃⌥⌘Z

I need to constantly remind myself to work with and learn the zoom mechanisms. I work on a 27″ iMac (non-Retina). I usually zoom everything even though I want to focus on a section of the screen (e.g. a region of audio.)

I also work on a 15″ MacBook Pro with the screen scaled to maximum pixels so things are small. I need to practice.

Zoom tracks — Logic Pro X

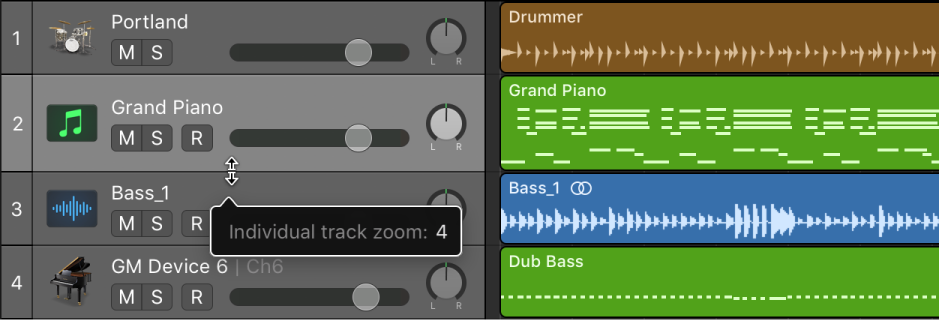
Toggle Individual Track Zoom: Switches the selected track between its individual zoom level and the window zoom level. This option is useful for zooming in on a track to edit its automation data. After editing, use the Toggle Individual Track Zoom key command to return to the original zoom level.

⇧ SHIFT – ⌃ CONTROL – ⌥ OPTION – ⌘ COMMAND

Set Nudge Value to 1/1 Note — Logic Pro X keyboard command of the day

Logic Pro X keyboard command of the day. #LogicProX @StudioIntern1

  Set Nudge Value to 1/1 Note

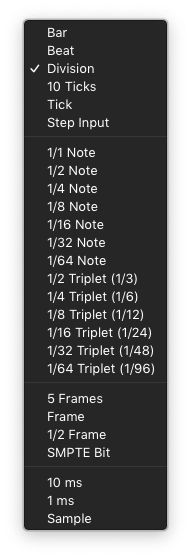
That’s a whole note, friends. The list of nudge values is contained in a pop-up menu in the Tool Bar (useful to have this open while exploring.)

Nudge values can be used to adjust positions, and to adjust lengths.

I find nudging to be very useful when trying to align audio tracks (DI and mic on amp), or adjusting rough mixes (imported) to the proper positions for lining up with the tracks.

Move regions in the Tracks area — Logic Pro X

You can move regions to a different point in the same track, or move them to another track of the same type. You can move an audio region to another audio track, for example, but not to a software instrument track, or vice versa. You can also move regions between open Tracks area windows, or between different open projects.

⇧ SHIFT – ⌃ CONTROL – ⌥ OPTION – ⌘ COMMAND