Append Track to Track List — Logic Pro X keyboard command of the day

Logic Pro X keyboard command of the day. #LogicProX @StudioIntern1

  Append Track to Track List

Add a new track at the bottom of the Track List (the tracks in the Arrange window).

I can’t find any specific documentation about this.

Experimentally I find that appending a track in a project with MIDI (software instruments, etc.) I get an Instrument track. If I append in a project with strictly audio files I get an audio track.

⇧ SHIFT – ⌃ CONTROL – ⌥ OPTION – ⌘ COMMAND

Show/Hide Loop Browser O — Logic Pro X keyboard command of the day

Logic Pro X keyboard command of the day. #LogicProX @StudioIntern1

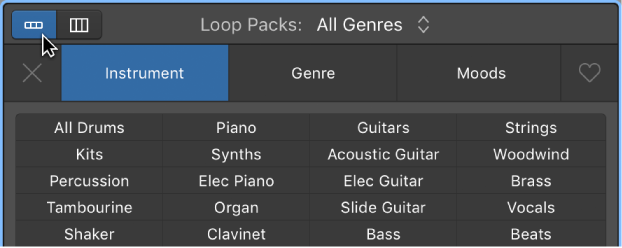
  Show/Hide Loop Browser O

Opens/closes the Loop Browser panel in the Arrange window.

Get started with Apple Loops — Logic Pro X

Apple Loops are prerecorded musical patterns that you can use to quickly add drum beats, rhythm parts, and other musical phrases to a project. Apple Loops contain musical patterns that can be repeated over and over, seamlessly. After you add a loop to the Tracks area, you can extend it to fill any amount of time. When you add an Apple Loop to a project, it automatically matches the project tempo and key.

⇧ SHIFT – ⌃ CONTROL – ⌥ OPTION – ⌘ COMMAND

Region Automation: Control Change 27 — Logic Pro X keyboard command of the day

Logic Pro X keyboard command of the day. #LogicProX @StudioIntern1

  Region Automation: Control Change 27

Select CC27 for Region Automation. There a lots of things that can be automated. When you “Display Automation” for a track (happens if you use this command) you can see the enormous set of parameters that can be manipulated. You can even automate a change of MIDI channel!

Automation is the “program” that is applied to the tracks in the project. The sounds that are made come from the MIDI instruments or audio files that “sound” at a point in time. What happens to the sound is modified by plugins. All of the things that can occur over time — changes to plugins, volume, pan, all of it — the automation — is the program that gets written to create the finished product.

It appears that almost every single bit of what Logic can do is available as an “automation” parameter. We program the environment through automation, and allow real-time control to be applied — and recorded!

From the past — “MIDI Draw” — need to check old manuals to learn more about this. This leads me back to the days of Opcode Vision and the entire MIDI orchestra world.

Use the Automation/MIDI area in the Piano Roll Editor — Logic Pro X:

When track-based automation is displayed in the Automation/MIDI area, the displayed automation curve is identical to the automation curve displayed in the automation lane in the Tracks area. Any adjustments to the automation curve made in either location is reflected immediately in the other. However, with region-based automation, you can choose to display either the automation curve associated with the region in the Tracks area automation lane or the MIDI data associated with individual notes. Therefore, with region-based automation it is possible to have the automation lane in the Tracks area showing the automation curve associated with the region and the Automation/MIDI area displaying MIDI data associated with each note (or vice versa).

⇧ SHIFT – ⌃ CONTROL – ⌥ OPTION – ⌘ COMMAND
Toggle Hide Group 27 — Logic Pro X keyboard command of the day

Logic Pro X keyboard command of the day. #LogicProX @StudioIntern1

  Toggle Hide Group 27

Hmm. 32 groups. The keyboard commands for 1 through 9 are ⌃⇧1 to ⌃⇧9 .

The commands do what I expect. If there is a group numbered ‘n’ the command toggles the view of the tracks/channels. Hidden, but not like “Hide Track”.

Groups appear to be very useful. I should use them more. I fooled around with them a bit to try and change colors more easily, but they do so much more.

Groups are “mixer groups”. The overview helps us get started.

Groups overview
The Mixer groups feature is only available when Show Advanced Tools is selected in the Advanced preferences pane.

Prior to mixing, you may find it useful to define some logical channel strip groups. You could, for example, group all drum channel strips under one drum group. This would allow you to control the group meters (volume, pan, mute, solo, sends, and so on) using a single control, while still maintaining the relative parameter values of each channel strip.

Excerpt From: Apple Inc. “Logic Pro X User Guide.” iBooks.

⇧ SHIFT – ⌃ CONTROL – ⌥ OPTION – ⌘ COMMAND