Logic Pro 9 User Manual: Basic Operations

Logic Pro 9 User Manual: Basic Operations

There are a number of techniques to choose from when making selections and editing items in Logic Pro. In this chapter, you’ll learn about basic operating, selection, and editing techniques, as well as a number of shortcuts and features that help to accelerate your workflow.

This is a. sadly, missing chapter from Logic Pro X documentation. I find it fascinating to learn of the nifty shortcuts and naming tools…

Recall Screenset 1 1 — Logic Pro X keyboard command of the day

Logic Pro X keyboard command of the day. #LogicProX @StudioIntern1

  Recall Screenset 1    1

That is so weird. I opened Safari and clicked on my “pinned” tab that is the Logic Pro X help documentation. The page that is showing is “Create, recall, and switch screensets” — exactly what I wanted.

Normally I don’t spend a lot of time on each iteration of a command that has ten to thirty variations simply by number, but screensets are worth repeating — all 99 times if necessary.

I have 4 screensets that are in my templates — 1, 2, 3, and 9. Nine is where I have the project notepad open and *should* be making sure I document things.

My workflow should be to get a screen arranged (zoom, auxiliary windows, etc.) and duplicate it, name it, and lock it. That way I might get into the practice of not having to re-discover how to size things properly for my environment. This is also probably very important advice for working on laptop screens.

Someday I will learn what “and other settings” (see quote) includes. It used to be “and so on.” Odd form of documentation.

This layout of various windows, including their display size, zoom levels, position, and other settings, is called a screenset.

⇧ SHIFT – ⌃ CONTROL – ⌥ OPTION – ⌘ COMMAND

Duplicate Screenset…
Rename Screenset…
Delete Screenset
Lock/Unlock Current Screenset
Revert to Saved Screenset
Next Screenset
Previous Screenset
Recall Screenset 1 1
Recall Screenset 2 2
Recall Screenset 3 3
Recall Screenset 4 4
Recall Screenset 5 5
Recall Screenset 6 6
Recall Screenset 7 7
Recall Screenset 8 8
Recall Screenset 9 9
Recall Screenset 1x ⌃1
Recall Screenset 2x ⌃2
Recall Screenset 3x ⌃3
Recall Screenset 4x ⌃4
Recall Screenset 5x ⌃5
Recall Screenset 6x ⌃6
Recall Screenset 7x ⌃7
Recall Screenset 8x ⌃8
Recall Screenset 9x ⌃9
Set Punch In Locator by Rounded Playhead — Logic Pro X keyboard command of the day

Logic Pro X keyboard command of the day. #LogicProX @StudioIntern1

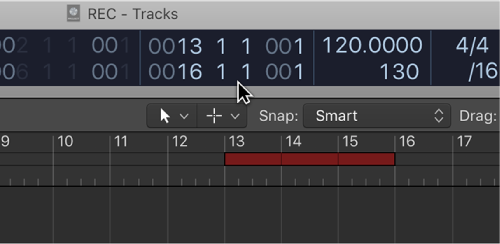
  Set Punch In Locator by Rounded Playhead

Sets the punch in point at the nearest bar. I cannot really tell where the rounded playhead will be when using the SMPTE ruler.

Punch In/Out is such a wonderful thing to have. Take that! magnetic tape 😉

⇧ SHIFT – ⌃ CONTROL – ⌥ OPTION – ⌘ COMMAND

Shift selected Zone(s)/Group(s) Left (Zones incl. Root Key) ⌥⇧← — Logic Pro X keyboard command of the day

Logic Pro X keyboard command of the day. #LogicProX @StudioIntern1

  Shift selected Zone(s)/Group(s) Left (Zones incl. Root Key)    ⌥⇧←

I haven’t used a sampler other than to play back the samples. At some point I might delve into sampling. Certainly having a 24-bit sampler with virtually infinite storage changes the game from the samplers from the 1980s and 1990s.

EXS24 mkII overview — Logic Pro X

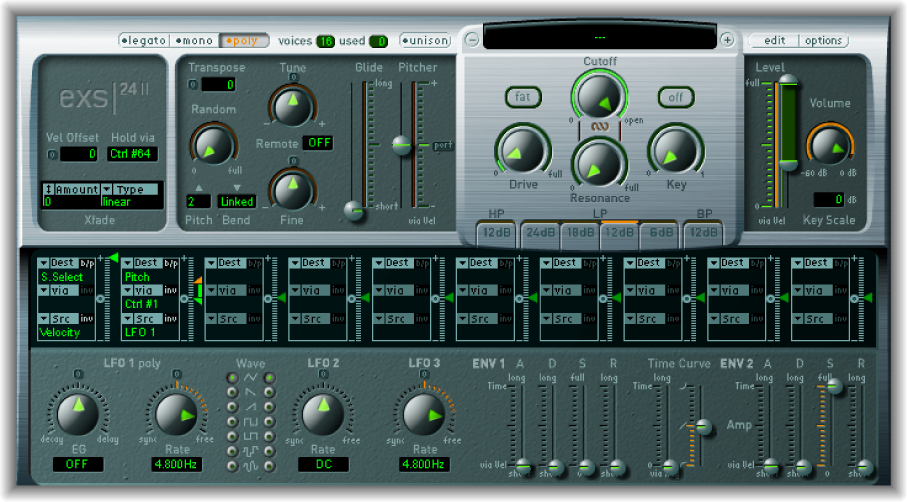
EXS24 mkII is a software sampler. It plays back audio files, called samples, that you load into it. These samples are combined into tuned, organized collections called sampler instruments. Because sampler instruments are based on audio recordings, they are ideally suited to emulating real instruments such as guitars, pianos, and drums.

Graphically edit EXS24 mkII zones and groups — Logic Pro X

You are not limited to editing zones and groups in the Parameters area. You can also graphically edit a number of zone and group parameters in the Zones/Groups Display area above the keyboard. If you want to edit the audio file of a zone, see Edit samples in the Logic Pro X Audio File Editor.

⇧ SHIFT – ⌃ CONTROL – ⌥ OPTION – ⌘ COMMAND

- EXS24 Instrument Editor
Shift selected Zone(s)/Group(s) Left ⌥←
Shift selected Zone(s)/Group(s) Right ⌥→
Shift selected Zone(s)/Group(s) Left (Zones incl. Root Key) ⌥⇧←
Shift selected Zone(s)/Group(s) Right (Zones incl. Root Key) ⌥⇧→

Select Project 15 — Logic Pro X keyboard command of the day

Logic Pro X keyboard command of the day. #LogicProX @StudioIntern1

  Select Project 15

I’m not sure this command actually makes sense in any rational environment. Having multiple projects open at the same time could be useful for copy information, but 6? Not only that — what is Project 15? The sixth project you opened? No. As best as I can tell open projects are listed in the “Window” menu in alphabetical order. Project 15 is the sixth window in the menu.

All the open projects are listed. Projects with windows that are actually visible on the screen have a bullet before the name.

Apparently these commands are holdovers from Logic 8 at which time projects maintained the order in which they were opened. This was how I assumed the commands would work. Not any more.

When the other 19 “Select Project nn” commands show up I will not be documenting them. But I will add this page to the blog.

⇧ SHIFT – ⌃ CONTROL – ⌥ OPTION – ⌘ COMMAND