How to Use FX Chain Transition Curves — PreSonus Blog

How to Use FX Chain Transition Curves — PreSonus Blog

FX Chains are a powerful Studio One feature, yet I can’t help but notice that when I write tips about FX Chains, some people are lost without a download…so I get the impression people might think that making FX chains is difficult. But it isn’t really, and your reward for creating one is a multi-effects processor that you can call up whenever you want, as well as assign controls that allow tweaking parameters without having to open up the effect GUIs themselves.
Freeware Of The Week #27 | Mike Senior on Patreon

Freeware Of The Week #27 | Mike Senior on Patreon

However, the freakiest of the lot comes courtesy of Melda, in the form of their MFreeformPhase plug-in, which allows completely variable frequency-selective phase adjustment via an EQ-like graphical interface. So, for example, if you don’t like what comb-filtering is doing to the low midrange, you can adjust the phase relationships there without affecting the rest of the spectrum.

Frequency Phase Alignment…

Toggle Level of Audio Channel Strips — Logic Pro X keyboard command of the day

Logic Pro X keyboard command of the day. #LogicProX @StudioIntern1

  Toggle Level of Audio Channel Strips

This is quite handy. If you do not adjust the level after you toggle (all faders down) it can effectively work like a “mute all audio channel strips”.

Set channel strip volume levels — Logic Pro X

You can set the volume level of each channel strip independently, balancing the relative volume of the tracks in your project. You can also quickly switch between two different volume levels on a channel strip.

⇧ SHIFT – ⌃ CONTROL – ⌥ OPTION – ⌘ COMMAND

Command    Key Touch Bar
- Global Commands
Toggle Level of Input Channel Strips
Toggle Level of Audio Channel Strips ⌃⌥⇧⌘⌦
Toggle Level of Auxiliary Channel Strips ⌃⌥⇧⌘↘
Toggle Level of Bus Channel Strips
Toggle Level of Output Channel Strips ⌃⌥⇧⌘⇟

Store Channel Strip Configuration as User Default — Logic Pro X keyboard command of the day

Logic Pro X keyboard command of the day. #LogicProX @StudioIntern1

  Store Channel Strip Configuration as User Default

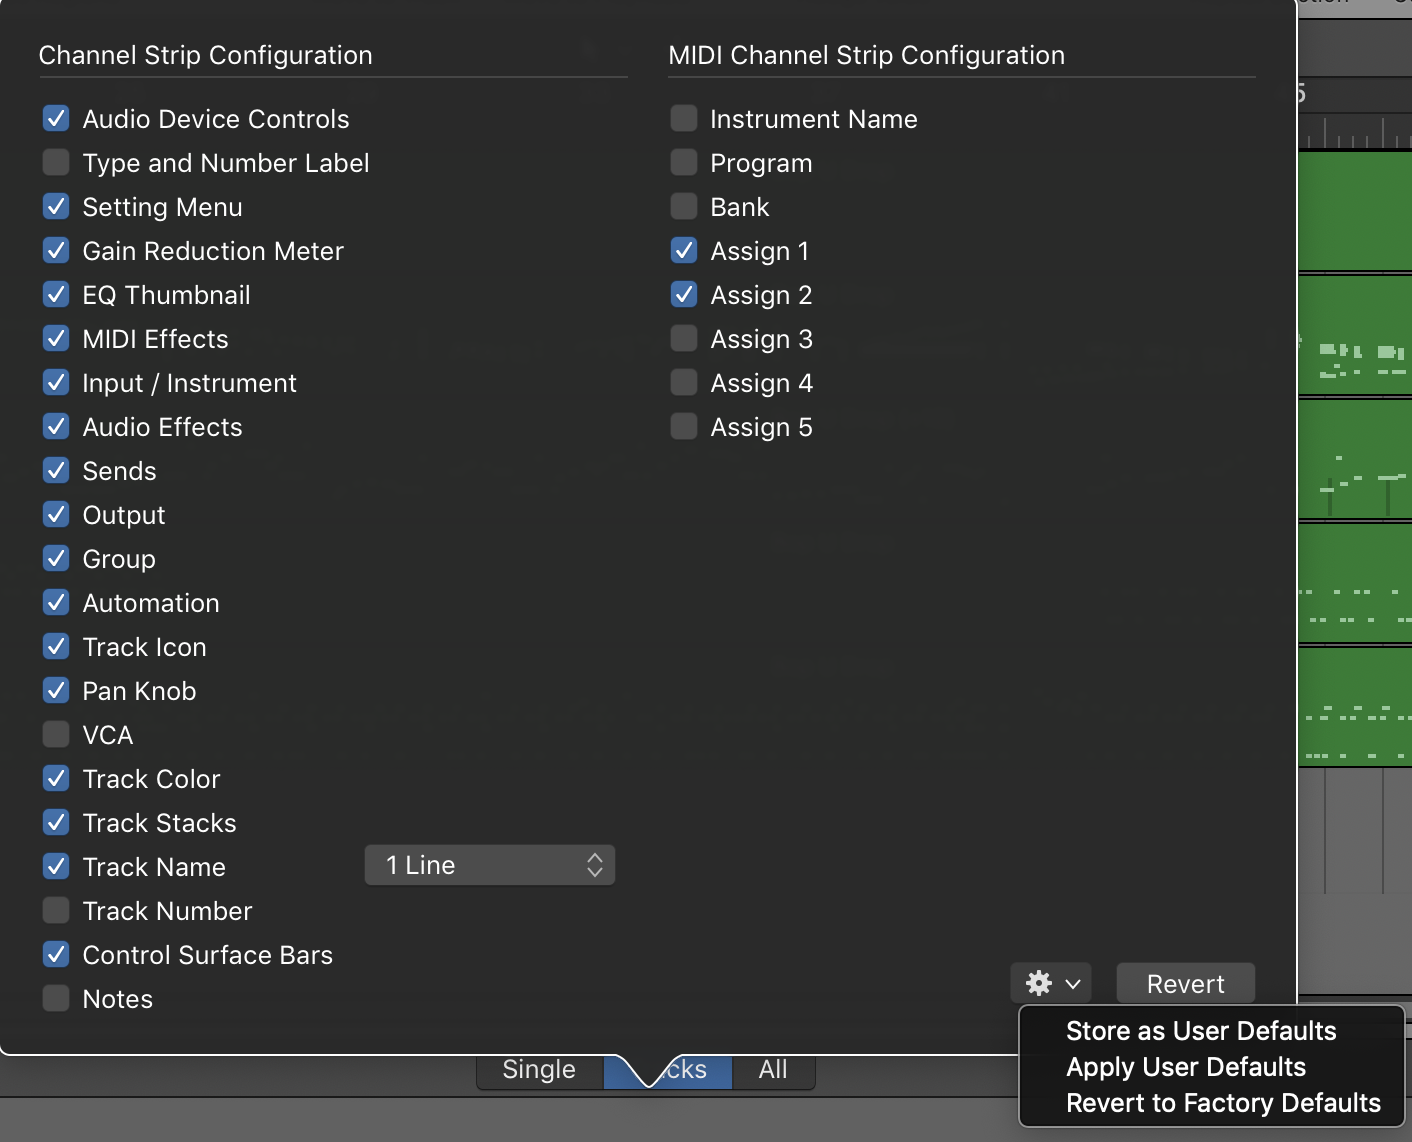
In Logic Pro X version 10.4 the ability to save mixer channel strip configurations was added. There is a tool menu in the configuration dialog that enables the saving of settings as a default.

Some times I want a very detailed channel strip, other times not. I keep forgetting that the channel strip components that are visible are “attached” to a screenset. I can have different components visible in each. This is quite a nice feature.

⇧ SHIFT – ⌃ CONTROL – ⌥ OPTION – ⌘ COMMAND

Solo Movie Audio On/Off — Logic Pro X keyboard command of the day

Logic Pro X keyboard command of the day. #LogicProX @StudioIntern1

  Solo Movie Audio On/Off

One of the difficult ones. There doesn’t seem to be any explanation of what this command does. I have done some experiments and think that I can describe the behavior.

I am not using a separate output for movie audio.

The “Mute Movie Audio” command toggles the Mute button found in the Project Movie settings. This is the place where the movie volume control is located as well.

The “Solo Movie Audio” command toggles the Mute button of the Master channel. When the movie is soloed Logic output is suspended — the muted Master channel.

My current problem is trying to figure out where the Movie audio channels are assigned.

Video and synchronization overview — Logic Pro X

Logic Pro X provides features that let you create or edit the soundtrack of any video or film project. See Add a movie to your project and Work with absolute time code.

⇧ SHIFT – ⌃ CONTROL – ⌥ OPTION – ⌘ COMMAND