Go to Beginning  ↩ ⌃⌥⇧ 6⃣ — Logic Pro X keyboard command of the day

Logic Pro X keyboard command of the day. #LogicProX @StudioIntern1

  Go to Beginning     ↩   ⌃⌥⇧6⃣

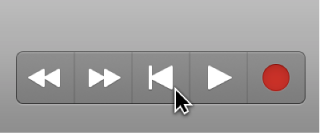
The RETURN key. Moves the playhead to the beginning of the project. Contrast this with the ENTER key which plays from the current playhead position

Get started with playback and navigation — Logic Pro X

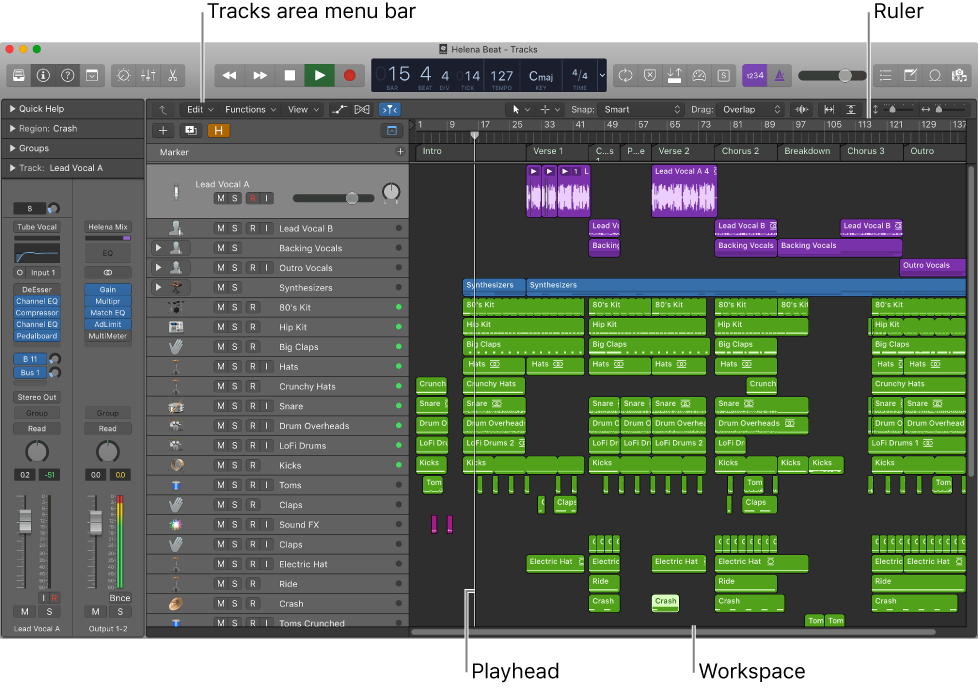
The playhead extends from the top to the bottom of the Tracks area, and moves as the project plays, showing the currently playing point in the project. At the top of the playhead is a triangle that you can drag to move the playhead to a different time position, or scrub the project by moving the playhead across the Tracks area to quickly locate a particular musical passage.

⇧ SHIFT – ⌃ CONTROL – ⌥ OPTION – ⌘ COMMAND

Normalize Region Parameters ⌃N — Logic Pro X keyboard command of the day

Logic Pro X keyboard command of the day. #LogicProX @StudioIntern1

  Normalize Region Parameters    ⌃N

I’m not exactly sure what gets “normalized”. It’s not clear in the online manual. My saved PDF manual has a description in Chapter 10.

Export MIDI regions as standard MIDI files — Logic Pro X

You can export one or more MIDI regions as standard MIDI files, to play in another music app. If your project contains only MIDI regions, you can merge the regions and export the entire project as a MIDI file. Before exporting, you need to perform several steps to prepare the MIDI regions.

I wonder if the technical editors for the Logic Pro X manuals really understand what they are doing when they cause whole sections from the previous versions. There is such a lack of a comprehensive manual/description of Logic Pro X…

⇧ SHIFT – ⌃ CONTROL – ⌥ OPTION – ⌘ COMMAND

Normalize MIDI region parameters

You can normalize the MIDI region parameter settings of all selected MIDI regions and folders
with the MIDI > Region Parameters > Normalize Region Parameters command.

This means that all settings are actually written as data, and playback parameters revert to
normal values. The audible result remains the same. The Loop parameter and extended MIDI
region parameters are not affected. Use of this function is effectively like saying “make these
MIDI region/instrument parameter values permanent.” In most circumstances, it’s better not to
do this, as leaving the original data untouched provides more flexibility. This includes unlimited
opportunities to change your mind about MIDI region edits.

Normalize and MIDI channels

Like the Merge function and the Glue tool, the Normalize function is intelligent in the way it
handles stored MIDI channel numbers. If all stored events have the same MIDI channel number,
the channel is changed to that of the instrument assigned to the current track. If the events are
on different channels, Logic Pro asks whether or not you want to convert the event channels.

The following Normalize options are also available in the MIDI > Region Parameters menu:

Normalize without Channel: Leaves the stored channel number untouched.

Normalize without Channel & Delay: Leaves the stored channel number and Delay
parameters untouched.

If the playback instrument has a channel setting of All, or you’re dealing with a completely
different type of Environment object (a channel splitter used as A-Playback, for example), the
stored MIDI channel numbers are also unaffected by the usual Normalize function.

Note: If you’re editing MIDI regions that appear as notation on a polyphonic staff style, it’s
recommended that you use the Normalize without Channel function, as the event channel is
used to assign notes to individual polyphonic voices in the Score Editor.
Toggle Hide Group 6 ⌃⇧6 — Logic Pro X keyboard command of the day

Logic Pro X keyboard command of the day. #LogicProX @StudioIntern1

  Toggle Hide Group 6    ⌃⇧6

Shows/hides all channel strips and tracks that are in Group 6.

Using numbers for groups makes sense, but doesn’t really help. When you look at the group setting in the mixer you can see both the number and the name (if specified) which helps a whole bunch.

Using groups to control sends to things like reverb and delay makes a lot of sense.

One very important thing to know about is the “group clutch”. In earlier versions of Logic ‘group clutch’ was used to describe temporarily disabling group controls so a single channel could be altered without affecting the entire group. Press the clutch in to disengage, release the clutch to engage. I have read about “clutch buttons” in mixer windows, but have never seen one. The important command is

Enable/Disable Groups ⇧G

which does the trick. The group indicators dim when they are disabled. Very few people use clutches these days. Clutch was changed to Enable/Disable in Logic Pro X. My keyboard cover has the right key sequence — ⇧G — but calls it ‘Group Clutch’.

The Control Surface manual still describes group clutch. The Mackie Control uses the ‘CONTROL’ keep to engage the clutch. Hold down ‘CONTROL’ while changing a setting on a member of a group.

Groups inspector — Logic Pro X:

You use the Groups inspector to define the behavior of each Mixer group. The Groups inspector appears in the Track inspector when one or more groups have been created, and it can be opened as a floating window as well. It contains the following settings:

⇧ SHIFT – ⌃ CONTROL – ⌥ OPTION – ⌘ COMMAND

Waveform Vertical Zoom Out ⌘- — Logic Pro X keyboard command of the day

Logic Pro X keyboard command of the day. #LogicProX @StudioIntern1

  Waveform Vertical Zoom Out    ⌘-

I need to remember these keys. I zoom the waveforms all the time when I am moving around in a project, and can never quite get it to my liking using the Waveform Zoom button (with its hidden slider). I can simply press the Waveform Vertical Zoom keys and make it work. Excellent find for today.

Tracks area interface — Logic Pro X

Tracks area menu bar: Contains local Tracks area menus as well as tool menus, controls for showing track automation and Flex edits, a Catch Playhead button, Snap and Drag pop-up menus, a Waveform Zoom button, and scroll and zoom sliders.

⇧ SHIFT – ⌃ CONTROL – ⌥ OPTION – ⌘ COMMAND

Command    Key Touch Bar
- Main Window Tracks
Waveform Vertical Zoom x 1 (Normal) ⌃⌥⇧⌘⌦
Waveform Vertical Zoom x 2 ⌃⌥⇧⌘↘
Waveform Vertical Zoom x 4 ⌃⌥⇧⌘⇟
Waveform Vertical Zoom x 8 ⌃⌥⇧⌘⇞
Waveform Vertical Zoom Out ⌘-
Waveform Vertical Zoom In ⌘=
Toggle Waveform Vertical Zoom

Q. When should I use mono reverb as opposed to stereo reverb?

Q. When should I use mono reverb as opposed to stereo reverb?

Another nifty trick for chart-targeted pop and EDM productions is to widen a reverb effect until it gives that ‘outside the speakers’ illusion, and then use just a small amount of it to expand the apparent width of your mix as a whole. Although such a reverb will have such dreadful mono-compatibility that it may pretty much vanish in mono, that’s rarely a great loss in practice, because the reverb serves no musical function. Better to lose some reverb in mono, than an important musical line!

Mike Senior, “Sound on Sound”