Production Expert | Back To Basics. We Show You What To Have In A Remote Recording Engineer’s Gig Bag

Production Expert | Back To Basics. We Show You What To Have In A Remote Recording Engineer’s Gig Bag:

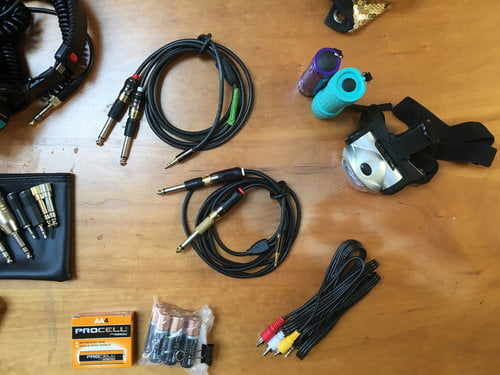
Seasoned engineers never leave home without their trusty gig bag, but if you’re new to remote recording, it can be hard to know what’s handy to have on the road. As a result, you either end up taking absolutely everything, just in case, or you end up on the job without a key cable of adaptor. In this article I am going to give you a sneak peek into my personal gig bag and explain why these items are so vital to having a successful gig.

I would add at least two dynamic mics and two attenuators. I carry an ART Dual-RDB and a pair of PylePro 58s.

Web MIDI API Example

Web MIDI API Example:

OK. Chrome can work with MIDI devices (and Electron apps as well — like Slack)

The example will work, sort of, by showing you the MIDI data from a device. I didn’t plug in a device, appeared not to work.

I tried this demo https://webaudiodemos.appspot.com/midi-synth/ to see if this worked. Noticed menu-like bit for MIDI-IN, chose a MIDI device, pressed notes, it worked.

Back to the original example. This now shows data.

Wow.

Vocal Chopping & Pitching — Attack Magazine

Vocal Chopping & Pitching — Attack Magazine:

Over the last couple of decades, samplers and digital editing techniques have blurred the lines between vocal tracks and instrumentals. Dance music producers have explored numerous ways to create vocal-led tracks without ever going near a microphone. They’ve even, in the case of producers like Todd Edwards and MK, developed ways to use vocal samples as instruments in their own right. In this walkthrough we’ll look at some of the best ways to cut and transpose vocals in your DAW in order to make them fit into your tracks. So grab some acapellas and let’s get started.

Screen Shots of Windows on the Mac

I’m added snapshots of windows to my blog posts about Logic Pro X. It used to be a lot harder.

  1. Press the screenshot keys — shift-command-4 (⇧⌘4) — enables screenshot
  2. Press the space key — switch to capture window mode
  3. Click in the window you want a shot of (the cursor is a little camera icon)

Now the really nice part…the image shows up in a little window at the bottom right of the screen. I can click on the image to mark it up, or I can just drag it to the place that I want it to be.

So much simpler.