Using bus sends and aux channels in Logic Pro X — MusicTech

Using bus sends and aux channels in Logic Pro X — MusicTech:

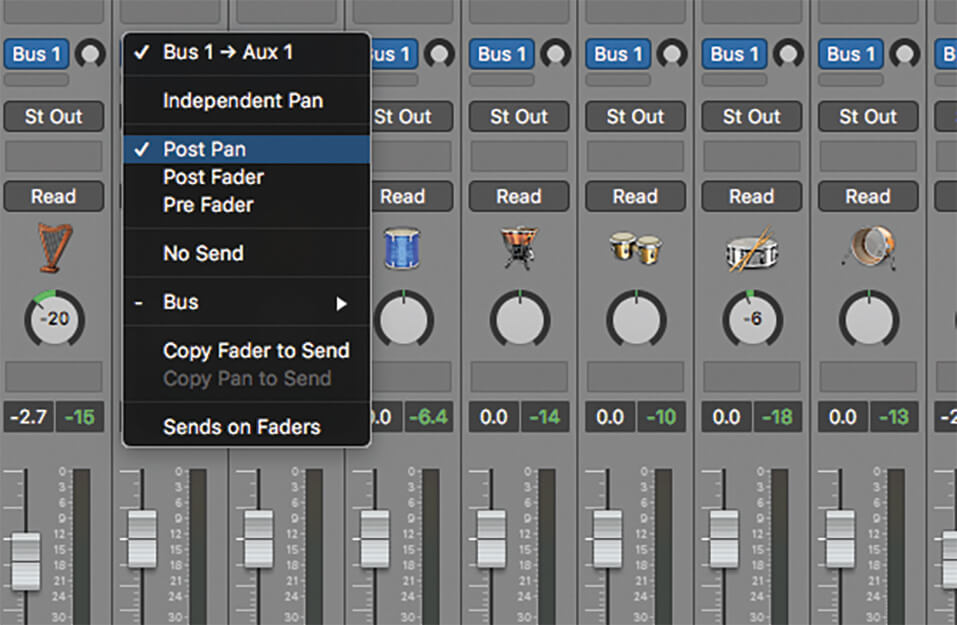
Bus (also spelt buss) sends and aux channels are an essential part of working with Logic’s mixer, covering everything from custom headphone mixes through to reverb and other forms of ‘parallel’ effects processing. Like many aspects of Logic, though, it’s easy to overlook the full functionality of what buses and aux channels have to offer, or indeed, the various new features that have been added to the use and application of bus sends and aux channels that can really aid your workflow.

In this workshop, therefore, we take a ‘back to basics’ look at what bus sends and aux channels can offer and why a more refined application can benefit your production.

How to Write a Bass Line When You’re Not Flea or Geddy Lee

How to Write a Bass Line When You’re Not Flea or Geddy Lee:

In the world of rock music, being ridiculous and flashy can get you a long way. For decades, rock has been propelled by bombastic lead singers, drummers, and guitar players. Despite the revelry often attached to the job description of “rock musician,” bass players hold the distinct challenge of having to blend in. While the bass in rock music has long served as a humble anchor underneath the cacophony, don’t be fooled—there are more possibilities for rock bass lines besides another unexciting eighth note cadence on the root note.

Add Selected Channel Strips to Selected Groups — Logic Pro X keyboard command of the day

Logic Pro X keyboard command of the day. #LogicProX @StudioIntern1

  Add Selected Channel Strips to Selected Groups

Select a Channel Strips by clicking on it. Add strips to the selection by holding down the shift key and clicking on a second one. This will select all the strips in between the first and second. Use command click to select non-contiguous strips.

Show the Groups window (⌥⇧G) is the easiest way. Expand the Groups window so you can see the list of groups. Select groups with click, shift-click, or command-click. Choose “Add selected channel strips” from the gear menu, or use the keyboard equivalent.

I think I like the possibility of “Track Zoom” and “Hide”, along with automating the group.

Groups overview — Logic Pro X:

Prior to mixing, you may find it useful to define some logical channel strip groups. You could, for example, group all drum channel strips under one drum group. This would allow you to control the group meters (volume, pan, mute, solo, sends, and so on) using a single control, while still maintaining the relative parameter values of each channel strip.

You can also automate a group. This lets you easily set the change for parameters of a group of channel strips over the course of a project. For example, you may wish to group all of your guitar channel strips together and have all of their relative volumes change at the same time throughout your project.

⇧ SHIFT – ⌃ CONTROL – ⌥ OPTION – ⌘ COMMAND
Nudge Region/Event Position Right by 1/2 SMPTE Frame — Logic Pro X keyboard command of the day

Logic Pro X keyboard command of the day. #LogicProX @StudioIntern1

  Nudge Region/Event Position Right by 1/2 SMPTE Frame

When that sound just has to line up with what is happening on the screen.

Editing audio to go along with a video. A skill that is probably far more useful now.

Move regions in the Tracks area — Logic Pro X:

You can also nudge regions (move them in small increments) left or right using key commands. To nudge regions, you first set the nudge value, then move selected regions by this value. Alternatively, you can nudge regions by a set value.

Logic Tutorial: Secrets of the Toolbar — MusicTech:

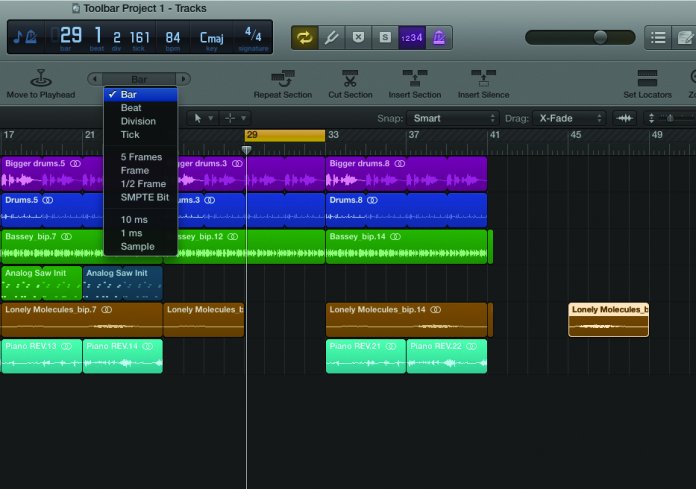
Cunningly hidden at the top of the interface, the Toolbar is Logic Pro X’s secret weapon for super-fast editing and arrangement, and a great way of extending a rough-and-ready demo into a developed composition.

Work with absolute time code — Logic Pro X:

The production process for video, film, or TV commercials is different from music production. Synchronization is always used, unlike in music production, where it is not always required. You need to work in absolute time: hours, minutes, seconds, and frames, rather than in bars and beats. Edits to the video, including changes to scene length, additional cuts, the use of slow or fast motion, and dialogue changes (or “redos”) are among the many situations that you will encounter when creating or editing a soundtrack.

⇧ SHIFT – ⌃ CONTROL – ⌥ OPTION – ⌘ COMMAND
Jazz Notation — The Default — deBreved — Tim Davies Website

Jazz Notation — The Default — deBreved — Tim Davies Website:

I get a lot of scores sent to me by composers and arrangers both young and old. I see a lot of things that do not need to be on the page, or are written in ways that are way more complicated than necessary. A lot of these extra indications are instructing players to perform in a way that is already covered by standard jazz performance practice, or what I call the Jazz Default. If you notate in a way that exploits this default, you will save yourself a lot of time and the players will know exactly what you mean, you do not need all the extra information.

On my blog, deBreved, I talk a lot about my concept of the Orchestral Default. In a nutshell, what does a player or section do when they see a naked note, with no articulation? If you can learn to think about this default reaction correctly, you will find many situations where you do not need to add any articulation. What happens if you add a staccato, a tenuto, an accent, or a cap

Finally — I can interpret my “Jazz Symbols” in Logic Pro X.